


98
Installation
6003417_a – 26.09.2017
3.4.4
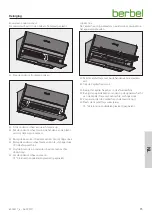
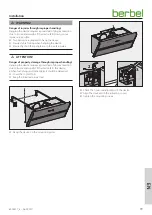
Hang the device in place
The device is designed to be hung on walls.
When mounting on a solid wall:
☞
Make sure that the wall has sufficient load bearing
capacity.
☞
Use the fastening materials provided.
With different installation situations:
☞
Enquire about alternative fastening systems (e.g. consult
with your architect).
☞
Only use fastening hardware suitable for the type of wall.
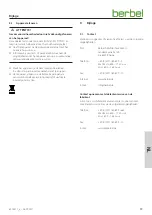
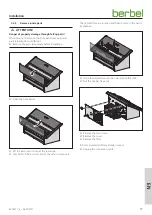
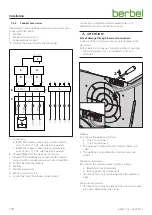
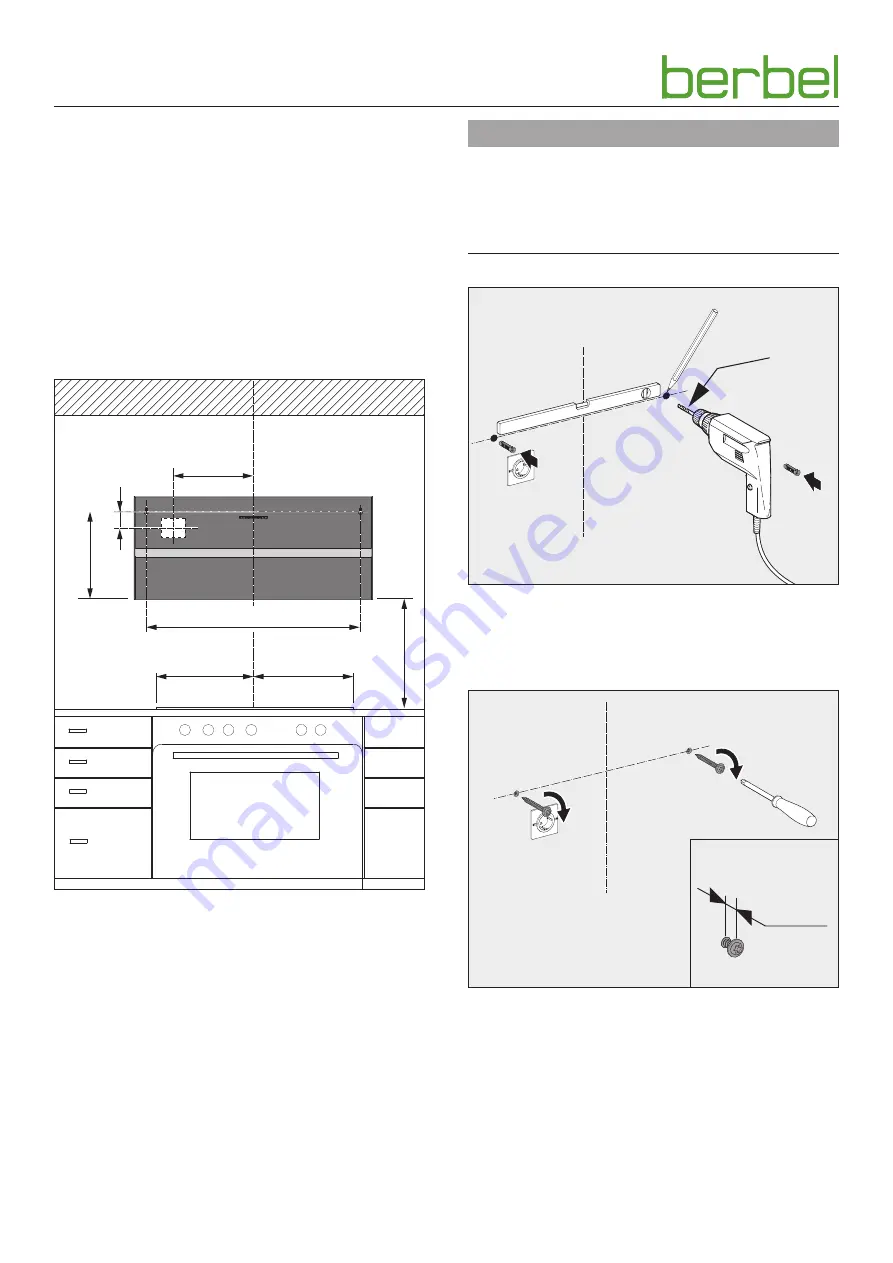
x
340
105
=
=
600
245
Safety distance (x):
y
Recommendation 450 mm.
y
With gas hobs, at least 650 mm.
Distances from the centre point of the socket opening on the
device rear:
y
Top 105 mm from the left fastening point.
y
Side 245 mm from the hood centre axis.
☞
Determine the hanging position.
☞
Make sure that the safety distance is complied with.
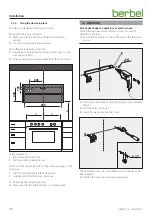
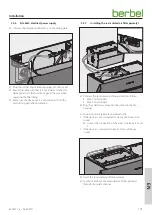
D
WARNING
Risk of death due to explosions or electric shock!
Drilling through gas, water or electrical lines can lead to
hazardous situations.
☞
Ensure that there are no lines in the wall at the fastening
points.
Ø 8
☞
Determine the locations of the fastening points and mark
them.
☞
Drill the holes in the wall.
☞
Insert the wall plugs into the holes.
a
a
a = 7
The fastening screws are only tightened once the device has
been aligned.
☞
Tighten the mounting screws appropriately.
Summary of Contents for Smartline BKH 80 ST
Page 112: ...6003417_a 26 09 2017 ...


