10
ASSEMBLY
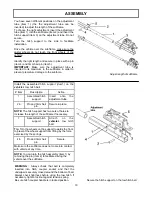
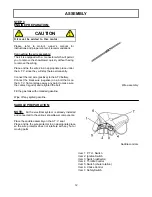
You have seven different positions on the adjustment
tube (item 1) (the the adjustment tube can be
inverted) to adjust the length of the subframe.
To choose the right adjustment, insert the adjustment
tube (item 1) into the subframe (item 2) and insert the
hitch support (item 3) on the adjustment tube. Do not
secure.
Turn the hitch support to the side to facilitate
installation.
Drive the vehicle over the subframe, make sure the
caster wheels do not touch the front wheels of the
vehicle.
Identify the right length and secure in place with a pin
(item 4) and 3mm hair pin (item 5).
IMPORTANT:
Make sure the adjustment tube is
inserted to its maximum in the subframe in order to
prevent premature damage to the subfame.
Adjust length of subframe
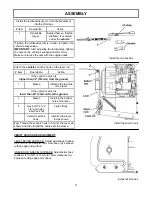
Secure the hitch support on the tow hitch ball
Install the assembled hitch support (item1) on the
vehicle
’s tow hitch ball.
# Item
Description
Action
1 Assembled
hitch
support
Insert onto the
adjustment tube.
2-3
Pin and 3mm hair
pin.
Secure in place.
NOTE:
The hitch support has two sets of holes to
increase the length of the subframe if necessary.
1 Assembled
hitch
support
A t t a c h o n t h e
vehicle
’s
tow hitch
ball.
Tip
: Turn the wheels on the support towards the front
to prevent the wheel support from lifting by the force
exercised by the springs.
4-5
Pin and 3mm hair
pin.
Secure.
Make sure the subframe does not come into contact
with vehicle at any time.
NOTE:
You can turn the hitch assembly (item 1) by
removing the pin (item 2) to facilitate driving the
vehicle over the subframe.
WARNING :
Always check that ball is completely
inserted into hitch coupler socket and that the
underjaw is securely closed around the bottom of ball.
Always check tightness before using the tow hitch. If
necessary, tighten locknut against tension spring.
Be sure hitch coupler handle is in locked position.


