18
REPLACEMENT OF ONE OR TWO SECTIONS OF THE AUGER
AND / OR GEAR BOX
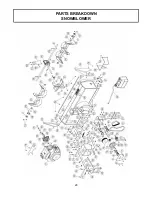
For belt part numbers, refer to snowblower parts
breakdown section for parts identification
Snowblower must be detached & disconnected
from the A.T.V. to replace the auger or the gear
box.
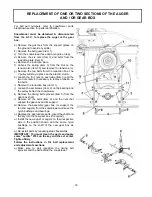
a) Remove the gas tank from the support (place on
the ground to avoid any spills)
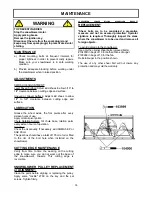
b) Remove the belt guard (item 1).
c) Turn the snowblower face down (engine on top).
d) Remove the six nuts (item 7) and bolts from the
reduction plate (item 8).
e) Remove the reduction plate.
f) Unhook the spring (item 9) from the slot on the
tension arm (item 10) and remove the tension arm.
g) Remove the two belts from the reduction box. The
V pulley will stay in place on the electric clutch.
h) Loosen the four nuts on each side (item 3) and the
two nuts (item 4) necessary to remove tension on
the belts.
i) Remove the reduction box (item 11).
j) Loosen the set screws (item 2) on the bearing and
the pulley behind the snowblower.
k) Remove the timing belt sprocket (item 5) from the
gear box shaft.
l) Remove all the bolts (item 6) and the nuts that
support the gear box and its support.
m) Remove the assembly (gear box, its support, the
fan and augers) from the snowblower and save the
nylon bushings and bearings.
n) Replace the appropriate parts. Insert the shaft and
the key into the new gear box (if required).
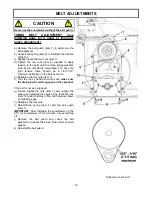
o) Install the new auger or augers on their respective
side in the position shown with the same nylon
bushings on the shaft of the new gear box as
shown.
p) Re-install parts by repeating steps backwards.
IMPORTANT: You must clean the parts and apply
some "Loctite" 2760 on the key and the set screw.
Tighten firmly.
Follow the instructions in the belt replacement
and adjustments sections
.
q) Make sure to well reposition the timing belt
sprocket and the belt behind the snowblower.

