14
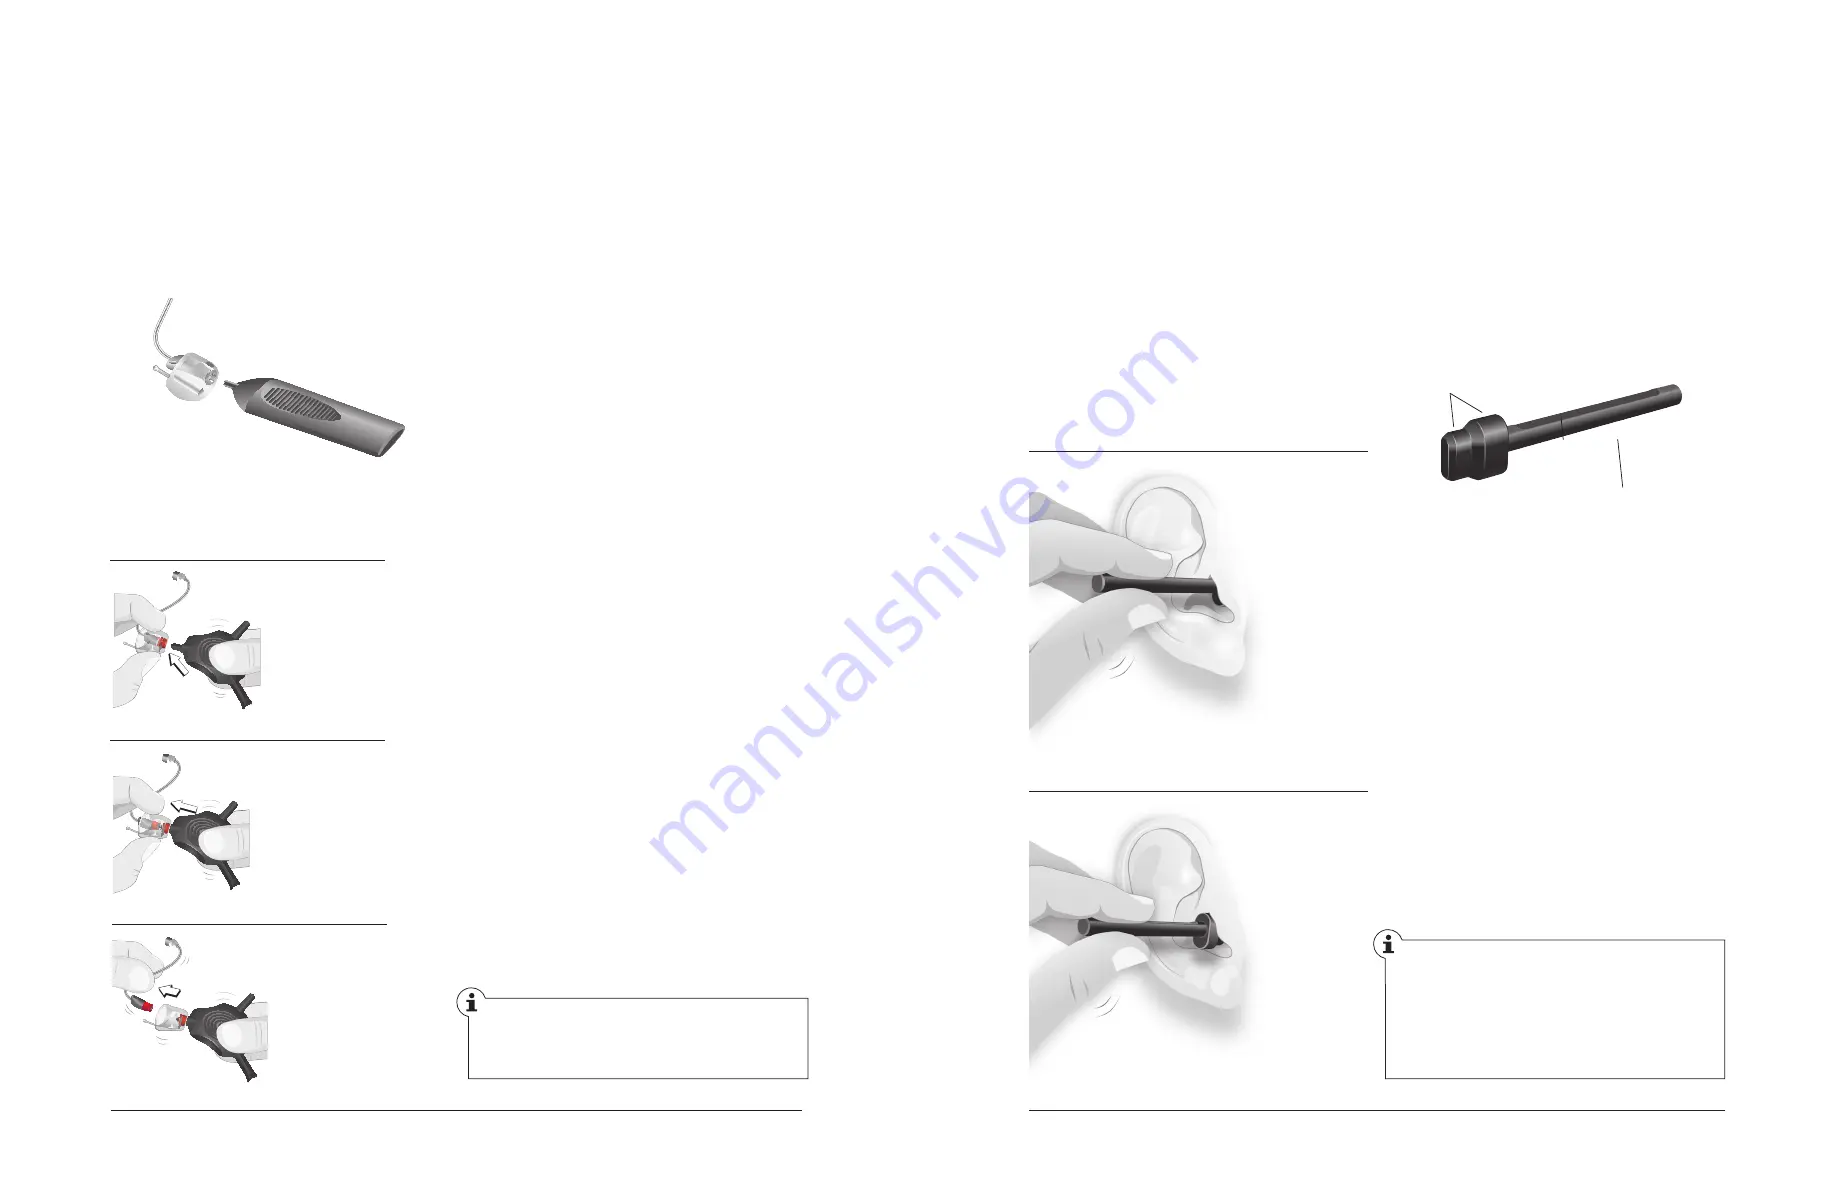
Detaching the Micro Mold from the M-Speaker
CN_ILLU_NRCostu
mMoldPspeakerDe
taching_BW_HI
It is not possible to detach the Micro Mold
or the Lite Tip without the appropriate
tool.
1 Carefully align the tool with the center of the
Lite Tip.
2 Press the tool into the Lite Tip to release
the M-Speaker unit while firmly holding the
Lite Tip.
3 The Lite Tip can now be removed from the
M-Speaker unit.
1 Remove the WaxStop from the Micro Mold
(see page 18).
2 Insert the disassembly tool into the Micro
Mold adapter, making sure to align with the
cross as illustrated.
3 Push the disassembly tool into the Micro Mold.
The Micro Mold will disengage with a click.
Detaching the Lite Tip from the M-Speaker
LT_ILLU_LiteTipFromMspeakerDeataching1_CMYK_HI
LT_ILLU_LiteTipFromMspeakerDeataching2_CMYK_HI
LT_ILLU_LiteTipFromMspeakerDeataching3_CMYK_HI
2
3
1
134056_NR_Fitting_Guide_generic_US_Private_Label.indd 14
14.03.13 13:37
NaNo RITE HEaRINg SySTEmS
15
1 – 2
3
P-Speaker unit for Power fittings
The P-Speaker unit contains a high performance receiver which requires ample room in the ear canal.
To determine if your client’s ear canal can accommodate this receiver, please use the measurement
gauge supplied. This step is necessary for both instant fittings with the Power Dome and custom
fittings with molds.
using the measurement gauge
1 Hold the handle of the measurement
gauge so that the flat side of the handle
is up.
2 Insert the gauge into the ear canal (with
the flat side up) until the size indicator is
fully surrounded by the ear canal. If the
size indicator fits easily within the ear
canal, the client is an excellent candidate
for the P-Speaker unit.
3 If the size indicator does not fit in the ear
canal but is hidden behind the tragus when
viewing from a 45° angle, the P-Speaker
with Canal Mold can still be produced.
4 If the size indicator is visible when viewed
from a 45° angle, the client is NOT a candidate
for the P-Speaker unit.
Size indicator
Flat side
Handle
The gauge must be cleaned and sterilized
properly before re-use. First clean any
visible cerumen from the gauge with a
clean dry or moist tissue. Next soak the
gauge in a cold sterilant for at least
6 hours.
134056_NR_Fitting_Guide_generic_US_Private_Label.indd 15
14.03.13 13:37


