

5
052815
Workbook 4—Embroidery Basics
Machine/Module Set-up
BERNINA 750, 770, 780, 790 & 880 Tips
The slide-on table must not be attached while
the embroidery module is being attached or
removed.
Make sure there is enough space around the
machine and embroidery module to allow the
unimpeded movement of the embroidery arm.
Always separate the machine and embroidery
module from one another before transporting
– do not transport as a single unit.
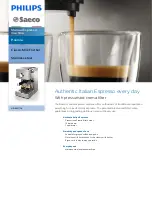
BERNINA 560 & 580
Embroidery Module
Module Connection Cable
- Stored on the bottom back edge of the module
- Make sure the FLAT side of the cable plug is to
the FRONT
Attaching the Module
- Place the machine on a flat surface (such as a
table or countertop)
- Place the module on the machine behind the free
arm
- Slide module on from left until lugs engage in
base plate
Removing Module
- Remove cable plug from sewing/embroidery
computer
- Lift module slightly (do NOT use the embroidery
arm to lift the module!); slide the module to the left
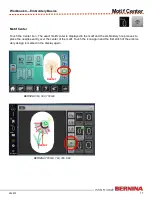
BERNINA 750 QE, 770 QE, 780, 790, 880
Embroidery Module
Attaching the Module
- Place the machine on a flat surface (such as a
table or countertop) sturdy enough to support the
weight of the machine without sagging
- S
lide the module at an angle from left to right to
attach
Removing Module
-
Detach by lifting left end and sliding to the left
BERNINA 560 and 580 Tips
When connecting the embroidery module,
make sure that the machine and module are
on a flat and even surface.
Make sure that there is enough space around
the sewing computer and embroidery module
to allow the unimpeded movement of the
embroidery arm.
Always separate the module and sewing
computer for transporting—never transport
them as a single unit.