background image

BERNINA 740

User Manual

Summary of Contents for 740 Favorite

Page 1: ...BERNINA 740 User Manual...

Page 2: ......

Page 3: ...ocused the highest demands on technique and the ease of use but also considered the design of the product After all we sell our products to creative people like you who do not only appreciate high qua...

Page 4: ...in 32 2 6 Feed dog 33 Adjusting the feed dog 33 2 7 Slide on table 33 Using the slide on table 33 2 8 Presser foot 34 Adjusting the presser foot position via the knee lifter of the Free Hand System 34...

Page 5: ...pattern combination 63 Deleting a stitch pattern combination 64 Editing a single stitch pattern 64 Deleting a single stitch pattern 64 Adding a single stitch pattern 65 Mirroring a stitch pattern com...

Page 6: ...hole open with the seam ripper 106 9 15 Cutting open buttonholes with the buttonhole cutter optional accessory 106 9 16 Sewing on buttons 106 9 17 Sewing eyelets 107 10 Quilting 108 10 1 Overview Quil...

Page 7: ...Table of Contents 5 Decorative stitches 131 Quilt stitches 133 Index 134...

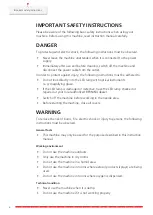
Page 8: ...magnifying glass If the LED lamp is damaged or defective have the LED lamp checked or repaired at your local authorized BERNINA dealer Switch off the machine before working in the needle area Before...

Page 9: ...ng of double insulated products To lubricate the machine only use oil recommended by BERNINA Safety instructions While operating the machine all protective inserts must be in place and all covers must...

Page 10: ...e area such as threading the needle changing the needle threading the looper or changing the presser foot switch off the machine To switch off set the power switch to 0 When protective covers are remo...

Page 11: ...notice Maintenance of double insulated products In a double insulated product two systems of insulation are provided instead of grounding No grounding means is provided on a double insulated product n...

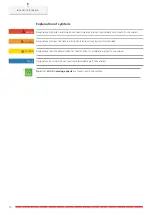
Page 12: ...th if not avoided WARNING Designates a medium risk hazard which can lead to serious injuries if not avoided CAUTION Designates a low risk hazard which can lead to minor or moderate injuries if not avo...

Page 13: ...d to an extensive functionality test The integrated stitch counter therefore indicates that the machine has already sewn stitches which were performed exclusively for test purposes and quality control...

Page 14: ...in the weekly blog of BERNINA Our experts give useful tips and explain step by step how you can achieve the desired result In the community you can upload your own projects and exchange experiences an...

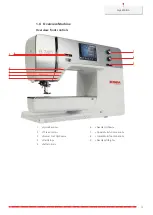
Page 15: ...Machine Overview front controls 1 2 3 4 5 6 7 8 9 1 Quick Reverse 6 Needle Up Down 2 Thread Cutter 7 Upper Multi function knob 3 Presser Foot Up Down 8 Lower Multi function knob 4 Start Stop 9 Needle...

Page 16: ...bin cover 7 Thread take up lever cover 2 Connection for accessory optional accessory 8 Thread take up lever 3 Presser foot 9 Fixing screw 4 Needle threader 10 Connection for the slide on table 5 Sewin...

Page 17: ...4 3 1 Connection for foot control 7 Power switch 2 PC connection 8 Connection for power cable 3 Spool pin 9 Magnet holder for touchscreen pen 4 Winding unit with thread cutter 10 Air vents 5 Swiveling...

Page 18: ...tion for Slide on Table 8 Carry Handle 2 Connection for Darning Hoop 9 Bobbin Winder Pretension 3 BSR connection 10 Thread Guide 4 Connection for accessory 11 BDF BERNINA Dual Feed 5 Air Vents 12 Thre...

Page 19: ...Free Hand System FHS To raise and lower the presser foot Slide on Table To increase the sewing surface Spool disc To support the regular unwinding of the thread from the spool Bobbin for B9 hook Set...

Page 20: ...o align regular seam distances Screwdriver Torx gray To change the needle Screwdriver red slot To loosen and tighten slotted screws Angular Torx wrench Torx To open the headframe Brush Needle Inserter...

Page 21: ...cal and decorative stitches To sew forward and in reverse 1D Reverse Pattern Foot To sew various practical and decorative stitches with Dual Feed To sew forward and in reverse 3A Buttonhole foot with...

Page 22: ...accessories can be neatly stored in compartments and matching holders 1 2 3 4 5 6 7 7 7 7 1 Big drawer 5 Spool Pin 2 Small drawer 6 Presser Feet 3 Buttonhole foot with slide 7 Presser Foot Holders fo...

Page 23: ...1 Upper Thread Tension 4 Stitch Plate Needle Selection 2 Presser foot indicator presser foot selection 5 Feed Dog Up Down 3 Presser Foot Pressure 6 Bobbin Thread Overview System settings 1 2 4 3 5 6 7...

Page 24: ...nger or stylus Tap Short tap of an element Swipe Tap an element and swipe quickly on the screen Draw Tap the screen and slowly move in one direction eg for scrolling up and down Navigation Illustratio...

Page 25: ...ider control Reset the value to the default value by tapping the small bullet Field Plus Minus Plus increase Minus reduce the value Yellow frame Indication that the set value differs from the default...

Page 26: ...neral it can be said the thinner the thread the finer the needle The illustrated needles are either standard or optional accessory depending on the machine Needle sizes 70 75 for thin fabrics Needle s...

Page 27: ...0 90 Small ball point For fine knitware and knitted materials For embroidery on fine delicate fabrics Metafil needle 130 705 H METAFIL 80 Long needle eye 2 mm in all needle sizes For sewing or embroid...

Page 28: ...read and fabric quality play an important role We recommend purchasing quality threads to achieve good sewing results Cotton threads have the advantage of being a natural fiber and therefore are espec...

Page 29: ...d skipped stitches can occur when there is too much clearance in the long groove and the needle eye The thread can break and get stuck when the thread scrapes against the edge of the long groove not f...

Page 30: ...ack of the box pull both extensions out until they click into place Storing accessory 2 3 4 6 7 5 1 1 1 1 1 Insert the holders 1 for bobbins presser feet and needles into the accessory box Store the p...

Page 31: ...power cable is designed for the voltage range applicable in the country of use If the machine is to be used in a country other than the country of origin the power cable suitable for that country must...

Page 32: ...ine Adjust the sitting height so that the knee lifter can be operated with the knee Fixing the touchscreen pen Store the touchscreen pen at the magnet holder Switching the machine on Set the Power Swi...

Page 33: ...ling the spool holder With metallic or other special threads it is recommend to use the swiveling spool pin The swiveling spool holder is necessary when several threads are sewn and it can also be use...

Page 34: ...only used with the horizontal spool pin Place the foam pad on the spool pin Place the thread spool on the spool pin Position the appropriate spool disc on the spool pin so that there is no space betw...

Page 35: ...on Freearm Extension Table attached to the freearm enables the available sewing area to be extended Raise the needle Raise the presser foot Switch off the machine and disconnect it from the power supp...

Page 36: ...sh the button Presser Foot Up Down To lower the presser foot push the button Presser Foot Up Down again Changing the presser foot Raise the needle Raise the presser foot Switch the machine off and dis...

Page 37: ...r foot is slightly lifted so that the fabric can be moved more easily When working with thin fabrics it is recommended to increase the presser foot pressure This provides the advantage that the fabric...

Page 38: ...e After changing the needle you can check whether this can be used with the selected stitch plate Tap Stitch Plate Needle Selection Select the fitted needle Selecting the needle type and the needle si...

Page 39: ...l of 11 needle positions The needle position is indicated by the needle position number in the display To position the needle position to the left push the button Needle left 1 To position the needle...

Page 40: ...ng on the rear of the stitch plate push the stitch plate downwards until it tips Remove the stitch plate Place the openings of the new stitch plate above the corresponding guide pins and press down un...

Page 41: ...e thread unwinds clockwise Add the appropriate spool disc Guide the thread in direction of the arrow through the rear thread guide 1 and hold the thread with the hands so that it is taut and can be in...

Page 42: ...htly down keep pressed and pull the thread to the left beneath the gray threader hook 10 9 10 Guide the thread around the gray threader hook from the left to the right 12 Press the threader lever down...

Page 43: ...ter 15 and cut 15 Threading the double needle Prerequisite The double needle is inserted Guide the first thread in direction of the arrow on the right side of the tension disc 1 Guide the second threa...

Page 44: ...read guide 1 Guide 2 threads past the thread tension discs 1 on the left and to the thread guide above the needle Guide 1 thread past the thread tension discs 1 on the right and to the thread guide ab...

Page 45: ...bobbin 6 The machine winds and the display to wind the bobbin appears Set winding speed To stop the winding process the engaging lever must be pushed to the right Push the engaging lever towards the...

Page 46: ...ase release at the bobbin case 1 1 Remove the bobbin case Remove the bobbin from the bobbin case Insert the new bobbin so that the silvery sensor surface is facing the back of the bobbin case Pull the...

Page 47: ...r the two thread guides 4 and pull upwards 3 4 When inserting into the machine hold the bobbin case so the thread guide 5 points upwards 5 Insert the bobbin case Press onto the center of the bobbin ca...

Page 48: ...use this function to reduce the maximum speed Tap Setup Program Tap Sewing settings RPM Tap Maximum Sewing Speed Set the maximum sewing speed Programming the securing stitches If the function is swit...

Page 49: ...e tap Securing Stitches To program subsequent securing stitches tap Securing stitches in close succession To program the number of subsequent securing stitches tap Plus or Minus To program 4 securing...

Page 50: ...ap Minus or Plus To program 4 securing stitches in place tap Securing stitches in place To deactivate the automatic securing tap Securing Stitches To activate the automatic securing tap Securing Stitc...

Page 51: ...e To set the stitch precise reverse sewing tap Backstepping To set the stitch precise reverse sewing tap Permanent Quick Reverse 3 2 Selecting personal settings Tap Setup Program Tap Personal Settings...

Page 52: ...tch to deactivate the upper thread indicator Tap the switch again to activate the upper thread indicator 3 4 Activating the audio signals 1 2 3 4 Tap Setup Program Tap Set Sound To switch all audio si...

Page 53: ...ap Machine Settings Tap Language Selection Select a language Adjusting the brightness of the display The brightness of the display can be set to meet your individual needs Tap Setup Program Tap Machin...

Page 54: ...creen Touch the crosses in sequence using the touchscreen pen Back to basic settings ATTENTION Using this function will delete all individually made settings Tap Setup Program Tap Machine Settings Tap...

Page 55: ...The Buttonhole foot with slide 3A is fitted The needle is not threaded Tap Setup Program Tap Machine Settings Tap Maintenance Updates Tap Calibrating the Buttonhole foot 3A To start the calibration pu...

Page 56: ...ERNINA dealer tap Phone Number To enter the website or e mail address of the specialized BERNINA dealer tap E mail Address Saving Service data The service data regarding the current status of the mach...

Page 57: ...alling up the Help Touch the window in the display where help is needed To start the Help Mode tap Help twice Tap the icon in the display where help is needed 4 4 Using eco mode During a longer interr...

Page 58: ...tch pattern Select a stitch pattern alphabet or buttonhole Wipe up in the area of the practical stitches alphabets or buttonholes to have more stitch patterns displayed To increase the view tap Increa...

Page 59: ...decorative stitches up to a stitch width of 9 mm Appliqu s sewing appliques ribbons and bias binding Difficult to work with fabrics are Velvet normally sewn with the grain Toweling Jersey especially...

Page 60: ...size 100 2 Company Mettler Switzerland is used for upper and bobbin thread When of using other types of sewing threads the optimal upper thread tension may vary Therefore it may be necessary to adjust...

Page 61: ...setting Touch the yellow framed icon on the left side to reset the alteration to default setting in the Setup Program 5 5 Editing stitch patterns Changing the stitch width Turn the Upper Multi functio...

Page 62: ...ctronic balance can correct these deviation and the stitch pattern can be adjusted optimally to the selected fabric Select a stitch pattern or alphabet Sewing stitch pattern Tap i Dialog Tap Balance A...

Page 63: ...Mirror Image Left Right To mirror the stitch pattern contrary to the sewing direction tap Mirror Image Up Down Editing stitch pattern length The stitch patterns can be lengthwise extended or shortened...

Page 64: ...ckstep the last 200 stitches tap Backstepping 5 6 Combining stitch patterns Overview Combi mode 1 2 3 4 1 Stitch Width 3 Combination Mode Single Mode 2 Stitch length 4 Individual stitch pattern within...

Page 65: ...on Tap Personal Memory Tap Save stitch pattern To save the stitch pattern combination tap Confirm Loading a stitch pattern combination Tap Combination Mode Single Mode Tap Personal Memory Tap Loading...

Page 66: ...n Tap Delete Tap Confirm Editing a single stitch pattern Create a stitch pattern combination To select a single stitch pattern tap the desired position 1 within the stitch pattern combination 1 To edi...

Page 67: ...pattern The new stitch pattern is always inserted after the selected stitch pattern Create a stitch pattern combination To select a single stitch pattern tap the desired position 1 within the stitch...

Page 68: ...tion where the stitch pattern combination is to be subdivided Tap i Dialog Tap Edit Combination at Cursor Position Tap Combination Subdivider 1 Stitch pattern combination Subdivider 2 A stitch pattern...

Page 69: ...nd hold Pattern Repeat or tap Clear Settings 5 7 Administering stitch patterns Saving settings of stitch patterns Select a stitch pattern alphabet or buttonhole Tap i Dialog Edit the stitch alphabet o...

Page 70: ...emory Tap Load embroidery motif Select the file where the stitch pattern has been saved Select a stitch pattern Deleting stitch patterns from the personal memory Prerequisite The stitch pattern is sav...

Page 71: ...the machine Select the stitch pattern which is to be deleted Tap Confirm 5 8 Securing Securing with the button Pattern end The Pattern End button can be programmed with various securing stitches Push...

Page 72: ...eedle to level the fabric layer The presser foot is leveled with the sewing project Place 1 3 compensating plates as required from the front of the presser foot close to the needle to level the fabric...

Page 73: ...Creative sewing 71 Lower the presser foot Resume sewing until the sewing project is on the feed dog again...

Page 74: ...fabrics 4 Running stitch For darning and reinforcing fabric edges or attaching lace or rubber tape 5 Securing program For automatic securing at the start of the seam with forward and reverse stitches...

Page 75: ...leather and for attaching rubber tape 16 Sewn out zigzag For finishing and reinforcing fabric edges for sewing on rubber tape and for decorative seams 17 Lycra stitch For flat joining seams visible he...

Page 76: ...straight stitch As a connecting stitch in a combination for one straight stitch 33 Three single straight stitches As connecting stitches in a combination for three individual straight stitches 6 2 Se...

Page 77: ...ng program No 5 Press the foot control The machine secures automatically Sew the required length of seam Push the button Quick Reverse The machine secures automatically and stops at the end of the sec...

Page 78: ...he presser foot and turn the sewing project Sew across the other side of the zipper and stop with needle position down Raise the presser foot and turn the sewing project Sew the second side from botto...

Page 79: ...ing Move the needle position to the left Sew the second side 2 in exactly the same way from bottom to top 2 1 6 6 Sewing Triple straight stitch The Triple straight stitch is especially suitable for du...

Page 80: ...thread is lying on top and a poor stitch formation results slow down the movement of the sewing project If there are knots on the wrong side of the fabric move the sewing project faster When the thre...

Page 81: ...ng the direction to avoid holes and thread breakage Work the edges in irregular lengths so that the thread is better spread over the fabric Sew the first rows not too close together and beyond the wor...

Page 82: ...longitudinal threads in all fabrics If the fabric becomes distorted correct with the Balance Fit the Reverse Pattern Foot 1C or Buttonhole foot with slide 3A Tap Practical Stitches Select Simple darni...

Page 83: ...work and the sew the Darning Program again The length is programmed and can be repeated as often as desired Fit the Buttonhole foot with slide 3A Tap Practical Stitches Select Reinforced darning progr...

Page 84: ...nor too long a stitch Guide the edge of the fabric into the center of the presser foot so that the needle goes into the fabric on one side and over the edge into the air on the other side 6 12 Sewing...

Page 85: ...long the marks on the stitch plate Select the needle position at the desired distance to the edge 5 8 5 8 5 8 25 15 15 15 75 75 6 15 Edgestitching using the seam guide When sewing parallel wider lines...

Page 86: ...ttern Foot 1C and the Edgestitch Foot 10 10C 10D all needle positions are possible Fit the Blindstitch Foot 5 or the Reverse Pattern Foot 1C or the Edgestitch Foot 10 10C 10D Tap Practical Stitches Se...

Page 87: ...guide of the presser foot to sew the stitches evenly deep Make sure that the needle only pierces the edge of the fold After sewing about 10 cm check both sides of the fabric and adjust the width agai...

Page 88: ...ric 6 20 Sewing basting stitches When sewing basting stitches it is recommended to use a fine darning thread This is easier to remove The basting stitch is suitable or sewing projects where a very lon...

Page 89: ...materials e g Decorative stitch No 107 Decorative stitches which are programmed with satin stitches are particularly appropriate for heavyweight materials e g Decorative stitch No 401 For a perfect s...

Page 90: ...ewing We recommend guiding your project evenly under the needle at a consistent speed following the lines of the design The stabilizer must be removed after sewing Sew a sample first to check what the...

Page 91: ...ght line Fit the Reverse Pattern Foot 1C 1D or Open Embroidery Foot 20C 20D Select a cross stitch of the Category 300 and combine it as desired Stitch the first row using the seam guide to sew a strai...

Page 92: ...mm double needle 31 optional accessory 5 grooves For heavy to medium weight fabrics In combination with the 3 mm double needle 32 optional accessory 7 grooves For light to medium weight fabrics In co...

Page 93: ...ntuck cord that fits well into the grooves of the selected pintuck foot The cord must be colorfast and shrinkproof Switch off the machine and disconnect it from the power supply Remove the needle Remo...

Page 94: ...d lies on the wrong side of the material and is hold sewn over by the bobbin thread Sewing Pintucks Insert the corresponding twin needle Threading the double needle Thread up command Sewing the first...

Page 95: ...mbroidery stabilizer on the wrong side Use an additional water soluble stabilizer on the right side of pile or napped fabrics e g terrycloth Stitch pattern Name ABCabc Block alphabet Double Block Scri...

Page 96: ...haracters standard setting To use lower case letters tap Lower Case Characters To use figures and mathematical symbols tap Numbers and Mathematical Characters To use special characters tap Special Cha...

Page 97: ...ble block Script and Comic alphabets as well as Cyrillic can also be downsized Tap Alphabets Select the font Select the letters Tap i Dialog To reduce the font size tap Alter Font Size To scale up the...

Page 98: ...ht to medium weight fabrics e g blouses dresses children s and baby clothes crafts 53 Stretch buttonhole For all elastic fabrics 54 Round buttonhole with normal bartack For medium weight to heavy fabr...

Page 99: ...cs 9 2 Making use of the height compensation tool When a buttonhole is to be sewn at right angles to the project edge it is recommend to use the height compensation plates optional accessory Place the...

Page 100: ...to be sewn automatically mark the complete length of 1 buttonhole on the fabric using chalk or a water soluble pen For any subsequent buttonholes mark the starting point For keyhole and round buttonho...

Page 101: ...g Prerequisite The Buttonhole foot with slide 3A is fitted and raised Insert the needle at the beginning of the buttonhole Guide the cord on the right side under the buttonhole foot with slide Hook th...

Page 102: ...The Buttonhole Foot 3C is fitted and raised Insert the needle at the beginning of the buttonhole Hook the cord over the pin at the back of the buttonhole foot Pull both cords ends under the buttonhol...

Page 103: ...und buttonhole with length measurement affect both beads in the same way With the manual keyhole or round buttonhole the alterations affect both sides differently If the stitch counter function is use...

Page 104: ...tonhole Foot 3C When the Buttonhole Foot 3C is used the buttonhole length must be determined via the function Stitch Counter The Stitch Counter function is suitable for all types of buttonholes The le...

Page 105: ...m depending on the buttonhole type The Buttonhole foot with slide 3A must lie perfectly flat on the fabric so that the length can be measured accurately Programmed buttonholes are all at the same leng...

Page 106: ...preprogrammed The individual steps can also be selected by scrolling via the arrow icons or by pushing the button Quick Reverse Prerequisite The Buttonhole Foot 3C is fitted Tap Buttonholes Select St...

Page 107: ...he arrow icons or by pushing the button Quick Reverse Prerequisite The Buttonhole Foot 3C is fitted Tap Buttonholes Select Round buttonhole with normal bartack No 54 Tap i Dialog man Tap Manual Length...

Page 108: ...y Place the fabric on an appropriate piece of wood Position the cutter in the center of the buttonhole Press down on the cutter with your hand 9 16 Sewing on buttons The Button Sew on Program can be u...

Page 109: ...left hole For buttons with 4 holes sew on the two front holes first then the two back holes Lower the presser foot Perform the first stitches in the left hole via the handwheel Keep turning the handw...

Page 110: ...stitch stippling quilt stitch For imitations of stippling stitch No 1328 Hand look quilt stitch For attaching an imitation of hand look stitch with monofilament No 1329 Blanket stitch For application...

Page 111: ...k No 1353 Dual double blanket stitch For sewing on the edge between two applications crazy patchwork No 1354 Satin stitch For appliqu 10 2 Quilting Securing Program Prerequisite The Reverse Pattern Fo...

Page 112: ...ingle lines of stitching are rounded and must not cross each other Quilting gloves with rubber nubs make it easier to guide the fabric For the best possible results use the High thread tension bobbin...

Page 113: ...Quilting 111 If there are knots on the wrong side of the fabric move the fabric more quickly...

Page 114: ...moving the fabric the machine accelerates If the fabric isn t moved securing in place is possible without pressing an additional button When working via the foot control or when using the button Star...

Page 115: ...nnect it from the power supply system Remove the BSR foot from the machine Press both push buttons at the BSR foot against each other Pull the presser foot sole out of the guide downwards Insert the n...

Page 116: ...he BSR Mode push the button Start Stop again or release the foot control The BSR Mode stops and the red light at the presser foot goes off BSR To deactivate the BSR Mode and to quilt without automatic...

Page 117: ...ine The BSR display opens and a BSR2 Mode is active Lower the presser foot Tap i Dialog Tap Securing Stitches Press the foot control or push the button Start Stop By moving the fabric some short secur...

Page 118: ...Tap Machine Data Updating firmware The latest firmware of the machine and a detailed step by step instruction for updating processes can be downloaded at www bernina com In general personal data and...

Page 119: ...ng the update The machine restarts When the update is complete a message appears Recovering saved data If personal data and settings after a software update are not available anymore they can be trans...

Page 120: ...ok Switch the machine off and disconnect it from the power supply system Remove the needle and presser foot Lower feed dog Remove the stitch plate NOTICE Dust and thread residues inside the machine Da...

Page 121: ...on the hook driver meeting the corresponding openings in the hook the colored mark on the hook driver should be visible through the hole in the hook Insert the hook The hook is magnetic and therefore...

Page 122: ...s the release lever to the left Fold down the fastening bracket along with the black hook race cover Remove the hook Clean the hook race with a brush and a soft cloth Do not use any sharp objects Add...

Page 123: ...r should be visible through the hole in the hook Insert the hook The hook is magnetic and therefore fastened to the correct position Close the hook race cover and the fastening bracket until the relea...

Page 124: ...elected in the Combi mode Combine other stitches The feed dog is not lowered To lower the Feed Dog push the button Feed Dog Up Down The selected needle and stitch plate cannot be used in combination R...

Page 125: ...on the BERNINA USB stick optional accessory No personal data for recovery available on the BERNINA USB stick optional accessory Make sure that the data and settings have been saved on the BERNINA USB...

Page 126: ...the display The counter for the cutting cycles is reset It is time for the regular maintenance Please contact your authorized BERNINA dealer to make an appointment The machine needs maintenance The me...

Page 127: ...r foot Clean the feed dog If the error still occurs contact your authorized BERNINA dealer 13 2 Troubleshooting Fault Cause Solution Uneven stitch formation Upper thread too tight or too loose Adjust...

Page 128: ...Upper thread breaks Incorrect needle thread combination Match the needle with the thread size Upper thread is too tight Reduce the upper thread tension Incorrectly threaded Rethread Poor quality threa...

Page 129: ...prevents the adjustment of the stitch width Select the fitted presser foot see page 34 Speed too low Unfavorable room temperature Place the machine in a warm room one hour before use Settings in the...

Page 130: ...ick Switch off the machine Switch the machine on Follow the instruction on the display Firmware update files are not found Unzip the update data Store data for the firmware update directly on the data...

Page 131: ...ed in a cold room place it in a warm room one hour before use Switch the machine off and disconnect it from the power supply system Don t store the machine outdoor Protect the machine against climatic...

Page 132: ...thickness 12 5 0 49 mm in Sewing light 30 LED Maximum speed 1000 Stitches per minute Measurements without the spool pin W H D 522 358 214 20 55 14 09 8 43 mm in Weight 14 30 86 kg lb Energy consumptio...

Page 133: ...16 17 18 19 20 22 23 24 25 26 29 30 32 33 Buttonholes 51 52 53 54 56 57 59 60 61 62 63 69 Decorative stitches Natural stitches 101 102 103 104 107 108 110 111 112 113 114 115 117 119 120 121 122 123 1...

Page 134: ...607 610 611 612 613 614 615 616 627 630 631 633 635 639 640 641 642 643 644 645 648 649 651 653 655 656 661 676 677 684 685 White embroidery 701 702 705 706 708 709 710 711 712 713 714 717 719 720 72...

Page 135: ...Overview stitch patterns 133 Quilt stitches 1324 1325 1327 1328 1329 1330 1331 1332 1333 1334 1336 1339 1346 6 Inch 2 4 cm 1347 1348 1352 1353 1354 1355 1356 1357 1358 1359 1396...

Page 136: ...ative stitches 87 Dispose of the machine 129 E Energy saving Mode 55 Entering dealer data 54 Environmental Protection 9 Error messages 122 Explanation of symbols 10 F Firmware Activate deactivate func...

Page 137: ...per thread indicator 50 Setting values 23 Sewing a test sample 101 Slide on Freearm Extension Table 33 Storing the machine 129 T Technical specifications 130 Threading the bobbin thread 43 Threading t...

Page 138: ...BERNINA recommends threads from BERNINA International AG CH 8266 Steckborn Switzerland www bernina com Copyright by BERNINA International AG 0360445 20A 04 2021 06 EN...

Reviews: