16
EN
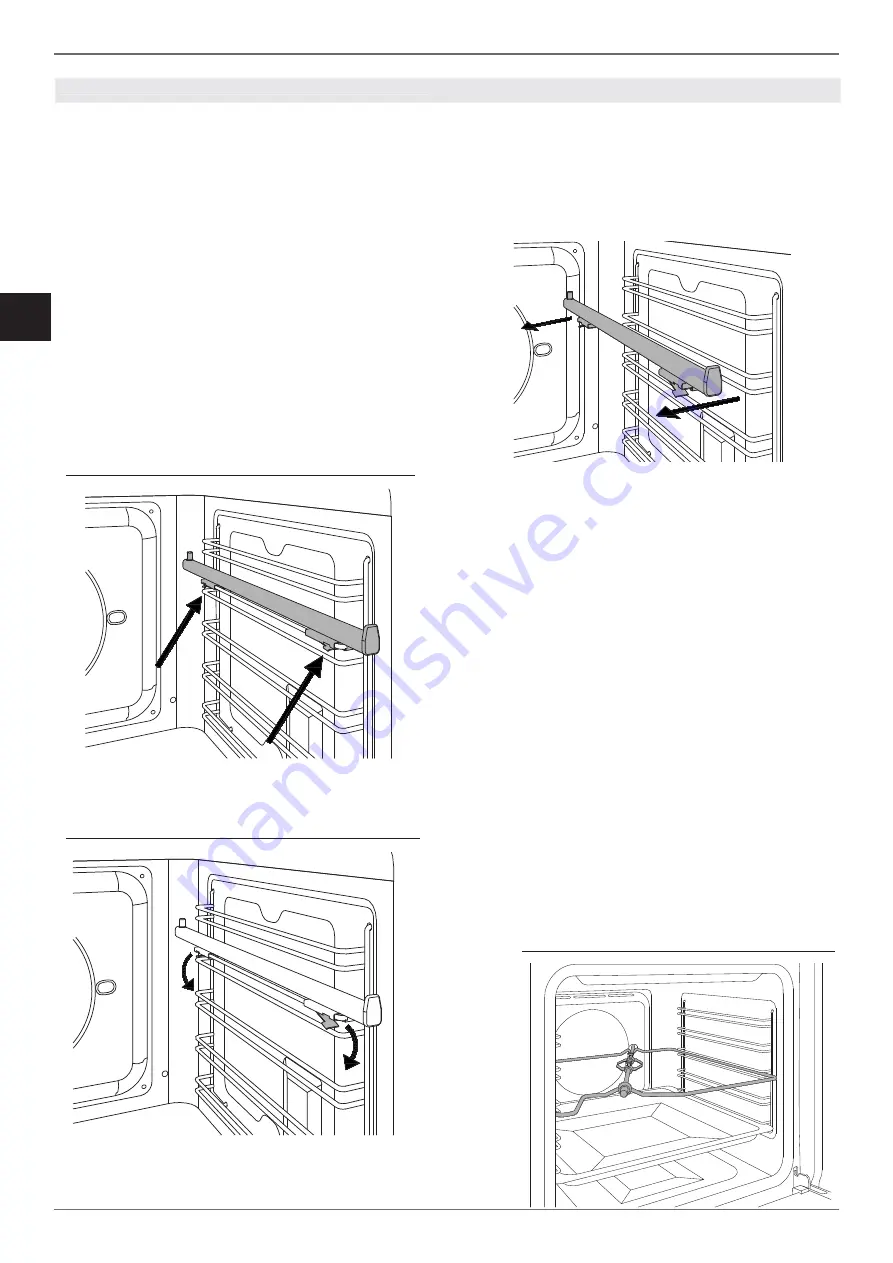
TELESCOPIC RAILS
The telescopic rails can be installed on any level
of the oven guides
• Locate the two spring clips (front and rear) on
the telescopic rail.
• Locate the pin indicating the rear part of the
rail.
• Position the telescopic rail fl ush with the upper
edge of the selected level.
• Insert the front clip, pushing it towards the side
guide.
• Insert the rear clip, pushing it towards the side
guide.
• Repeat the insertion operation for the other
side.
• Pull both rails out and position the oven rack
or tray between the rear pin and the front stop.
Removing the Telescopic Rails
• Locate the two spring clips (front and rear) on
the telescopic rail.
• Keeping the front clip pushed down, pull the
rail towards the interior of the oven.
• Repeat for the rear clip.
ROTISSERIE FUNCTION
Used to cook joints of meat, chickens and fi sh
evenly on all sides using the grill element.
When the grill function is selected, the rotisserie
motor will start up.
•
Position the skewer support in level 3 of the
side guides.
•
Place a tray on one of the lower levels of the
side guides to collect cooking grease.
•
Insert the meat or fi sh on the rotisserie skewer
using the fork.
•
Insert the skewer in the rotisserie motor
housing, located in the rear of the oven, and
rest it on the skewer support.
•
Remove the plastic handle from the skewer.
•
Select the grill function at maximum
temperature.
•
When cooking is complete, refi t the plastic
handle and remove the food from the oven.
Important: rotisserie cooking must always be
performed with the oven door closed.
/ Use
ACCESSORIES / OPTIONAL EXTRAS
ACCESSORIES / OPTIONAL EXTRAS

