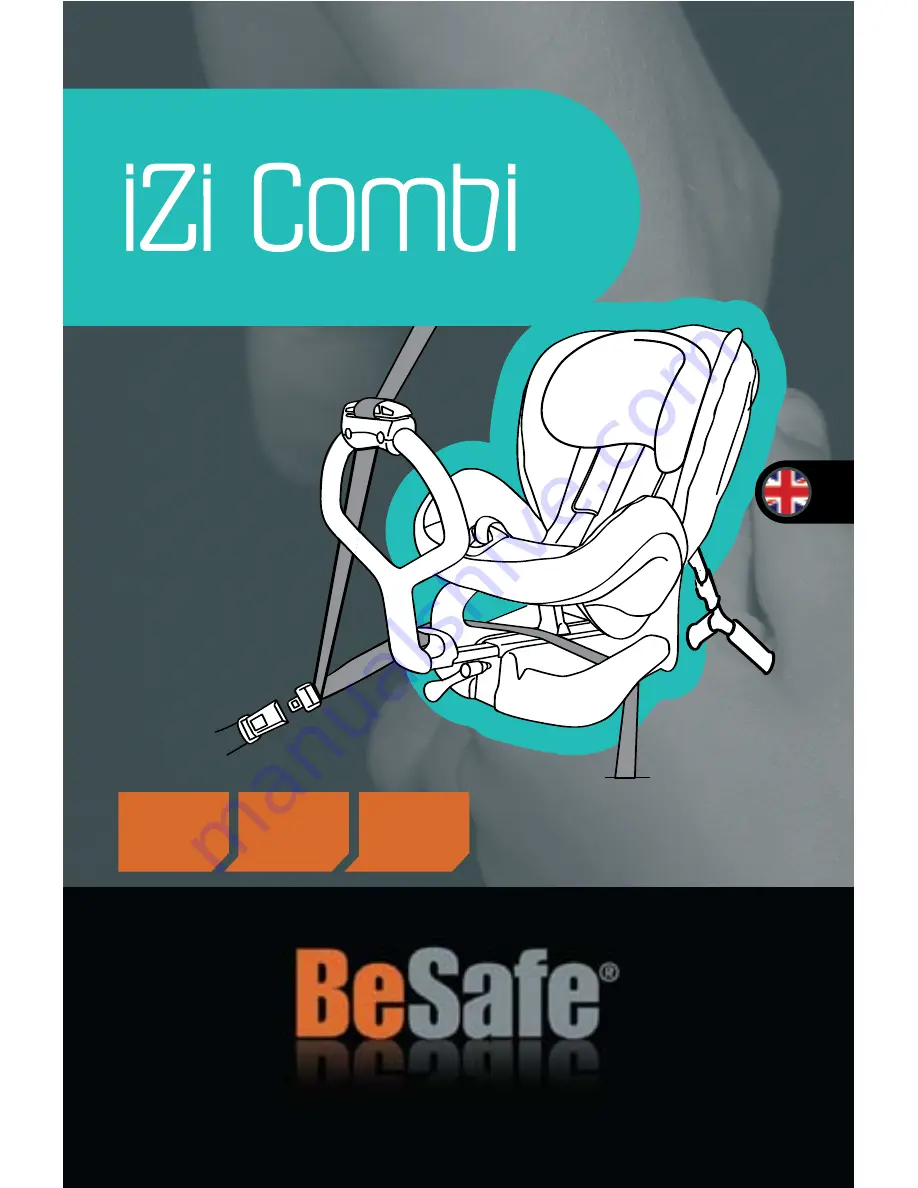
background image

1

0+/1

0-18 kg 6m-4y

ECE R44 04

USER MANUAL

REARWARD- & FORWARD-FACING

GROUP

WEIGHT

AGE

Summary of Contents for iZi Kid

Page 1: ...1 0 1 0 18 kg 6m 4y ECE R44 04 USER MANUAL REARWARD FORWARD FACING GROUP WEIGHT AGE ...

Page 2: ...ossible in the rearward facing installation We recommend that this seat is used only for children who can sit upright so not younger than 6 months For children under 1 year and or under 10 kg weight we recommend that the most reclined sitting position and the body hugger and seat cushion are used When the child weighs over 18 kg or the shoulder height grows above the highest position of the should...

Page 3: ... front brace inwards with the ratchet not further than the stop sign The ratchet is used to adjust the front brace in both directions Slide the knobs see red circle on the ratchet up or down to change direction 1 Floor support Release handle head rest Belt clamp 2x Adjustable head rest Harness shoulder straps Harness buckle Belt tension indicator if applicable Central adjuster Reclining lever Fron...

Page 4: ...bolts and tighten firmly 3 Thread the belt loop of the anchor belt through the opening of the attachment fitting Then bring the anchor belt locking device through the belt loop and pull hard 4 Secure an anchor belt round each of the rails of the front seat of the vehicle by bringing the locking device of the anchor belt through the belt loop Pull tight 5 Cross the anchor belts under the front seat...

Page 5: ... the floor of the vehicle To enlarge the space for the legs of the child you can move the front brace outwards with the ratchet Keep this space as small as possible 7 8 9 10 11 Rearward facing in the back seat installation Join the 2 anchor belts together to make a single belt Put the lock of belt 1 through the loop of the belt 2 and then through the loop of belt 1 Pull it firmly 7 Put the middle ...

Page 6: ... the back rest of the front seat of the vehicle forward so that the distance between child seat and back rest of the front seat of the vehicle is minimum 25 cm 15 16 17 18 19 20 21 23 10 a b c d 11 13 Adjustments of the front seat might bring slack in the anchor belts tighten the anchor belts again If the seat is standing too upright Push the front seat forward follow the described installation by...

Page 7: ...h the belt loop and the belt loop must be led into the hook on the floor support 15 Position the 3 point car belt Place the hip belt over the base of the seat behind the belt guiding horns on each side Fasten the car belt click 16 Tension the shoulder belt Pull out the shoulder belt and make it into a loop 17a Thread the loop through the metal part of the red belt block 17b Guide the loop into the...

Page 8: ... seat and click the car belt in the buckle 28 Position the hip belt over the belt guiding hook 28 17 18 19 1 2 3 4 5 6 7 22 28 20 21 20 Tighten the anchor belts to their maximum 20 Lock the floor support with the locking bolt 21 19 If the seat is installed in the back seat of the vehicle push the front seat of the vehicle forward as much as possible Remove the locking bolt from the floor support a...

Page 9: ...of the vehicle push the front seat of the vehicle forward as much as possible Loosen the tension in the car belt by moving the belt guiding hook inwards with the ratchet not further than the stop sign Unlock the belt clamps and unlock the car belt Remove the car belt and remove the seat from the vehicle Removing the seat 8 9 10 11 2 1 3 4 29 30 The height of the shoulder straps and the head rest c...

Page 10: ...s over the child s shoulders and close the buckle CLICK 35 Pull the harness strap through the central adjuster in the direction of the green arrow straight up forwards Continue pulling until the harness is a comfortable but firm fit The belt tension indicator will show green 36 5 6 7 34 35 36 37 Removing the cover Pay attention when you remove the cover as fitting the cover is done in the opposite...

Page 11: ...ectly installed 39 Mount the top part and then the shoulder parts Mount the seat part and bring the seat cover under the rear parts of the sidewalls Pull the head rest in the highest position Mount the head rest cover and connect the hooks at the back side Pull the harness straps through the holes Connect the loose bottom part of the head rest fabric with the plastic part under the head rest 39 2 ...

Page 12: ...e DO NOT use at home It has not been designed for home use and can only be used in a vehicle When the child seat is mounted in the car check all the areas where the child seat might touch the interior We recommend using a BeSafe protection cover in these places to avoid cuts marks or discolouration on the interior of the vehicle especially in vehicles with leather or wooden interior Point of sale ...

Page 13: ...ng fault except covers and harness straps please return it to the original place of purchase The guarantee is only valid when you use your seat appropriately and with care Please contact your dealer he will decide if the seat will be returned to the manufacturer for repair Replacement or return cannot be claimed The guarantee does not get extended through repair The guarantee expires when there is...

Reviews: