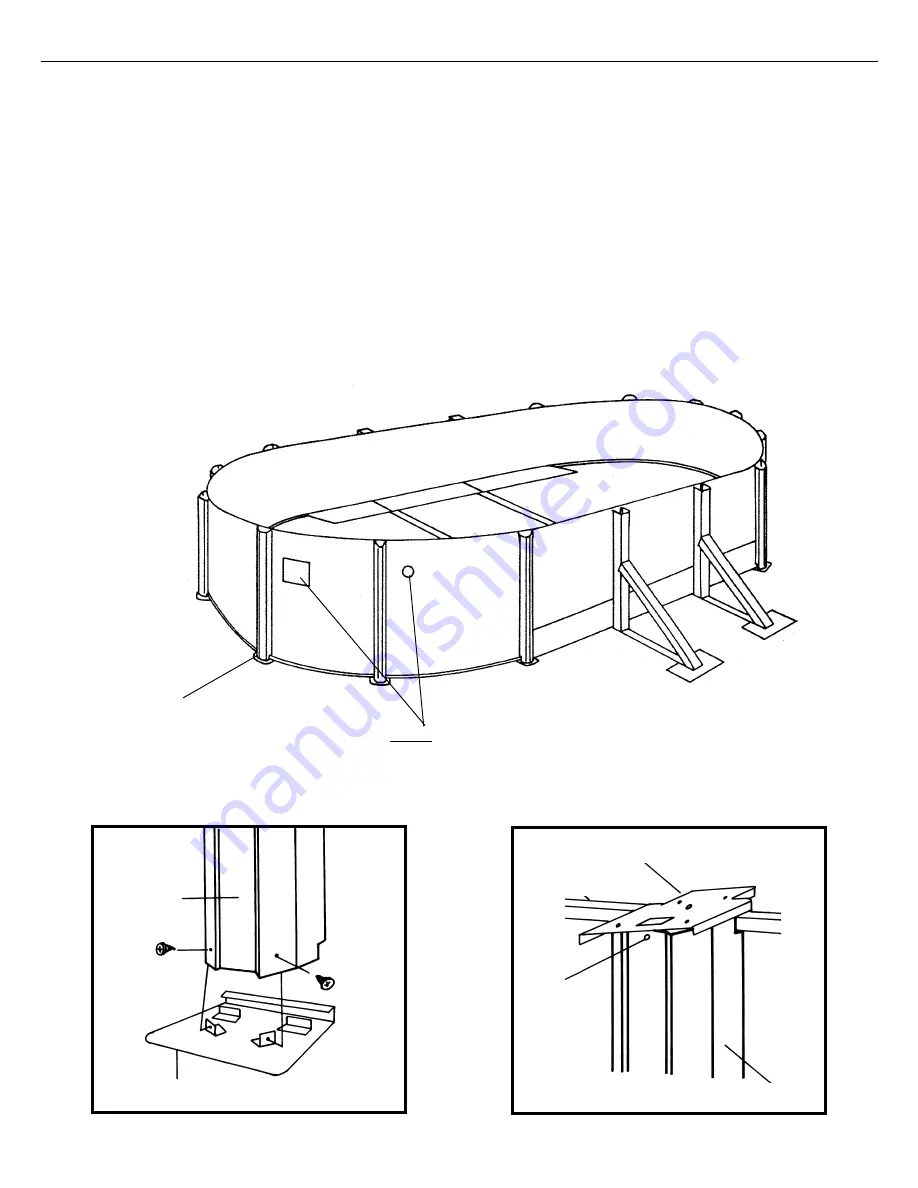
It is easiest to line all of the uprights up next to each other in a line. It helps to lean them against a fence or some other stur-
dy object. On most models, the top of the upright can be identified by either an extra hole in the middle, or one on each side
(depending on which model pool you have) for the decorator caps. If your model pool has deco-strips they need to go on first.
This is done by using the double-sided tape provided. Stick it to the upright first then matching the holes on the deco-strip up to
those on the upright. Now you place the top cap on the upright making sure that the holes line up and the hooked part is facing
the open side of the upright. Now screw only the center hole using a #10 screw. Do not do the two side holes until later. This will
make things easier and more efficient down the line.
Now would be the time to install the fence brackets onto the uprights if you have a fence for the pool.
If you have not done so already, install uprights on curved ends, referring to diagrams. The top plates can remain unsecured
for now, but should be temporarily be clipped over the wall to prevent them from falling forward. Check the pool ends again for
roundness, making sure the stakes have not been moved, so that the pool remains a true oval. Place the uprights over the tabs
on the bottom plates and secure with #10 screws. Make sure the holes line up perfectly, as hole locations for the top and bottom
plates vary on most pools.
If your pool has a resin “boot” for the upright, secure it to the uprights now using 2 #10 screws for each.
UPRIGHTS
(WALL JOINT HIDDEN
BEHIND UPRIGHT)
NOTE: SKIMMER AND SKIMMER
RETURN LOCATIONS.
Upright
#10
Screw
Bottom Plate
#10
Screw
Top Plate
Upright
Put front
screw of
top plate in
STEP 11: UPRIGHT ASSEMBLY


