background image

4

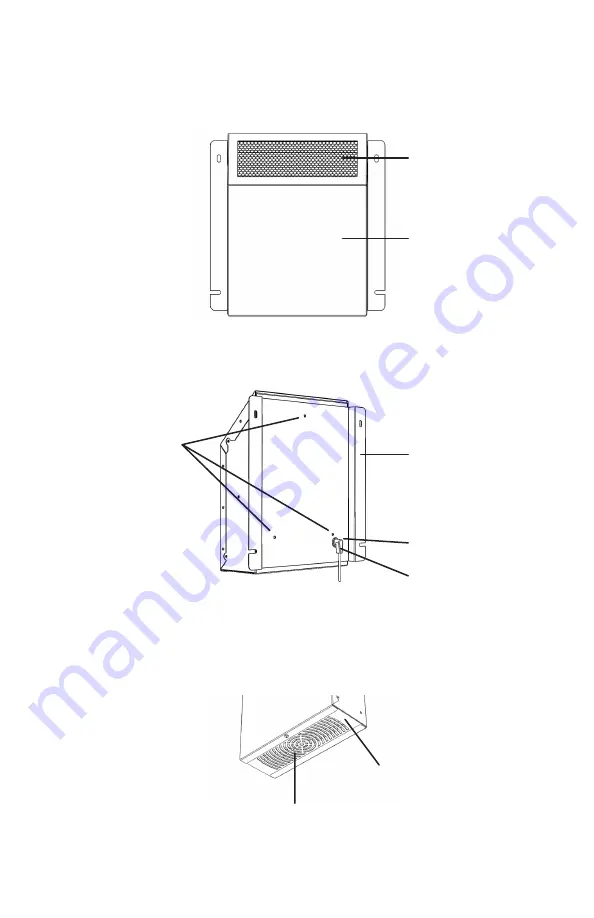
Unit Diagrams

Unit Front

Unit Rear

Mounting Bracket

(Stationary Only)

Unit Cover

Air Outlet

Air Intake

Filter Cover Plate

Security Mounting Holes

Power Outlet

DC Power Plug


Unit Bott

om

Summary of Contents for MCI ProtectAIR

Page 1: ...Owner s Manual Mountable Air Purification Owner s Manual MCI ProtectAIR...

Page 2: ...proactive way The MCI ProtectAIR produces aggressive ionized oxidizers and trademarked MCI multi cluster ions that are then distributed throughout the home or office This trademarked MCI Multi cluste...

Page 3: ...y may occur NOTE A slight odor may be noticeable when the unit is first installed and operated This is due to the newness of the UV bulb being used and the initial cleaning of the contaminated space T...

Page 4: ...4 Unit Diagrams Unit Front Unit Rear Mounting Bracket Stationary Only Unit Cover Air Outlet Air Intake Filter Cover Plate Security Mounting Holes Power Outlet DC Power Plug Unit Bottom...

Page 5: ...5 Unit Pictures Wall Mount Unit Stand Alone Unit Interior...

Page 6: ...elbow style DC connector to the back of the MCI ProtectAIR unit 3 Attach the MCI ProtectAIR unit to the wall location with included screws utilizing the mounting bracket flanges Make sure there is ad...

Page 7: ...wer source WARNING Make sure to disconnect the unit from its power source before any maintenance or cleaning is done WARNING Make sure to disconnect the unit from its power source before any maintenan...

Page 8: ...t Part Numbers Your DBI Cell should be replaced every 3 years STEP 2 8 4 Locate the DBI Cell rotate a quarter turn and gently remove from the socket 5 Repeat step 4 with the second DBI cell if include...

Page 9: ...tAIR Replacement DBI Cell SKU281 MCI ProtectAIR Replacement Filter SKU385 Warranty Information Your MCI ProtectAIR unit comes with a one year manufacturer s warranty To view warranty information warra...

Reviews: