4
To Assemble:
Identify and Separate all the Parts and Hardware.
R
EAD
T
HROUGH
I
NSTRUCTIONS
FROM
BEGINNING
TO
END
BEFORE
STARTING
TO
ASSEMBLE
UNIT
.
1.
2.
This is a 2 person step
.
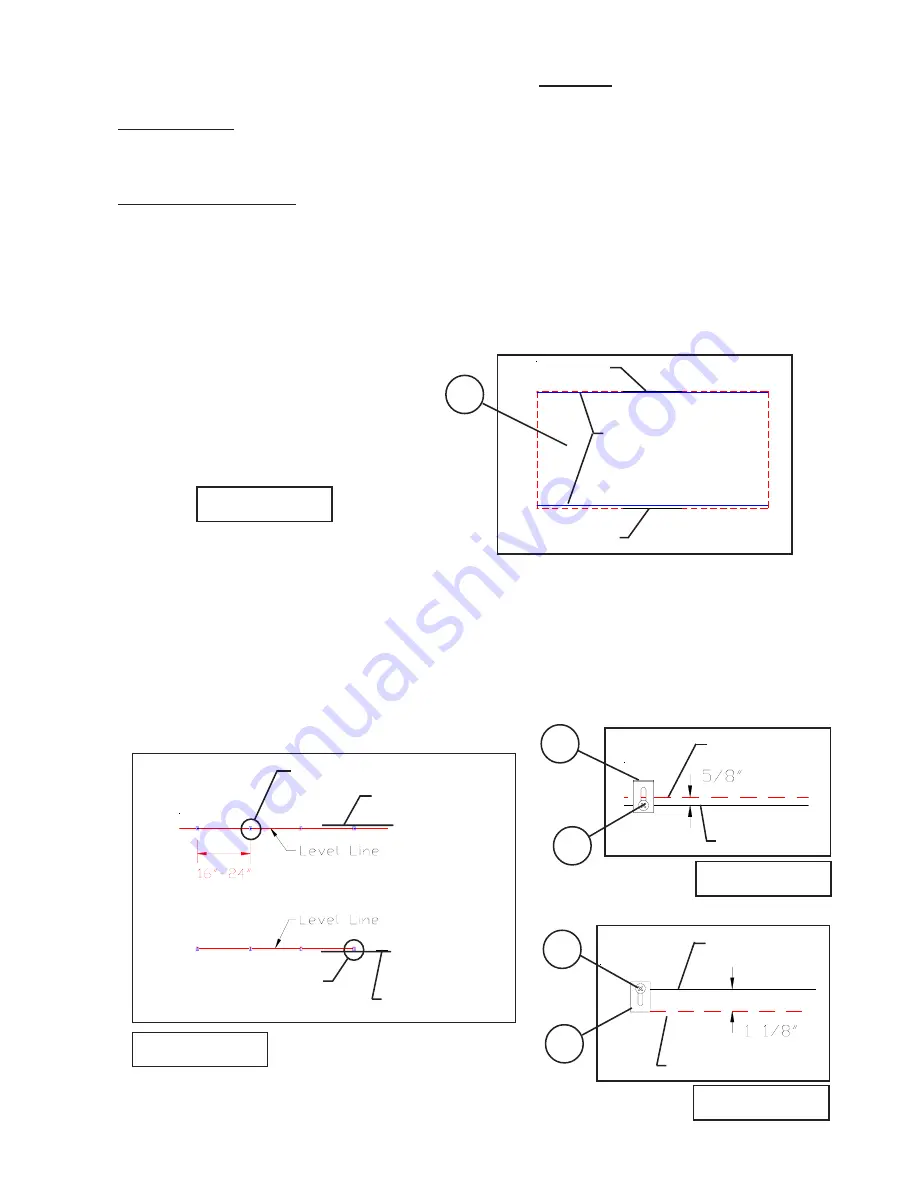
Find the desired location for board on wall. Hold the board on the desired spot while
someone marks the top and bottom of the board on the wall. Make sure marks are able to
be cleaned from wall surface. Remove the board from the wall. Draw leveled line 1/2”
below the top mark line on entire length of your board. Draw another leveled line 1” above
your bottom mark on the wall entire length of the board. These two leveled lines are very
important because you will be using them to fasten L-Brackets (B) to install your board.
See Illustration # 1.
3. Use the leveled lines to fasten L-Brackets (B) with 1 1/4” Screw (A) for top L-Brackets
(B) see illustration #2a, and bottom L-Brackets (B) see illustration #2b. These brackets
would be 16” or 24” apart, based on where wall studs are located. Please make sure your
L-Brackets (B) are secure on the wall by going through wall studs. You should be able to
push the bracets up and down if you have to. If you can not locate wall studs you must use
proper screw anchors per type of wall you have. See Illustration # 2, #2a and #2b.
Illustration # 1
Illustration # 2
Illustration # 2a
Illustration # 2b
B
See illustration #2a
A
See illustration #2b
Top mark
Leveled line
A
B
Leveled line
Top mark
Leveled line
Bottom mark
P-1
Top mark
Bottom mark
Bottom mark


