- 14 -
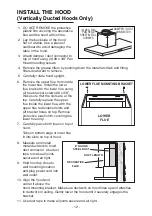
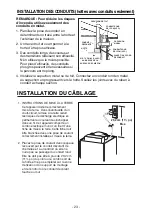
INSTALL THE HOOD (Non-Ducted Hoods Only)
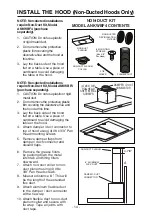
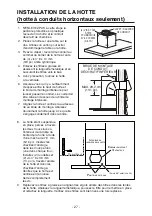
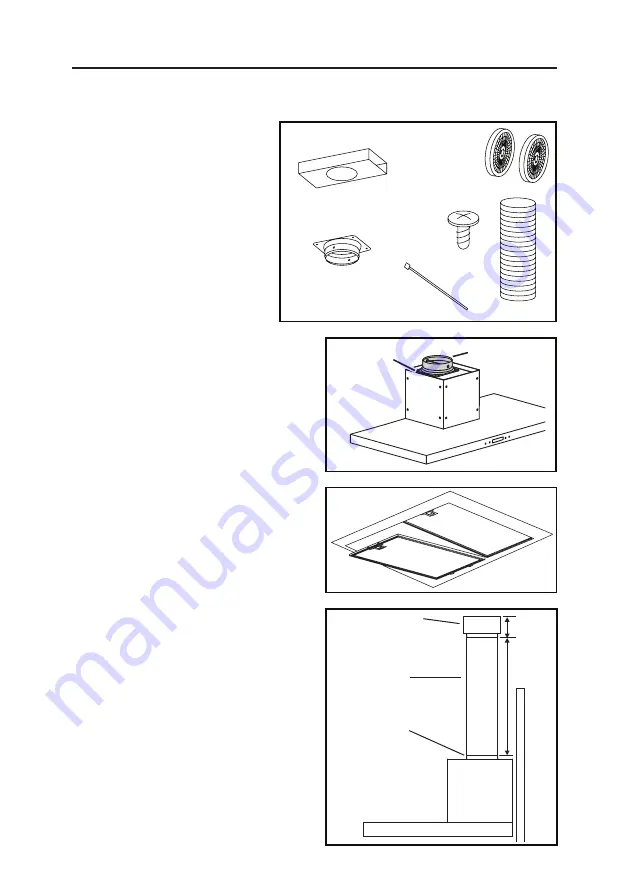
NON-DUCT KIT
MODEL ANKWBF4 CONTENTS
NON-DUCT
PLENUM
2 TIE
WRAPS
FLEXIBLE DUCT
NON-DUCTED
RECIRCULATION
FILTERS
NON-DUCT PLENUM
COLLAR
8 MOUNTING
SCREWS
(#8 x 3/8”
PanHead)
(4) #8 X 3/8”
PAN HEAD
SHEET METAL
SCREWS
DAMPER / DUCT
CONNECTOR
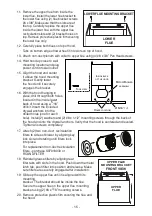
6. Remove the grease filters
by pushing down the metal
latch tab and tilting filters
downward.
A
NON-DUCT PLENUM
6” ALUMINUM
FLEX DUCT
DAMPER / DUCT
CONNECTOR
4-7/8”
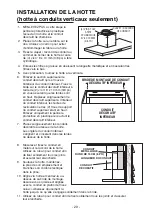
NOTE: Non-ducted installations
require Non-Duct Kit, Model ANKWBF4
(purchase separately).
1. CAUTION: Do not use plastic or rigid
metal duct.
2. Do not remove the protective plastic
film covering the decorative flue and
the hood at this time.
3. Lay the back side of the hood
flat on a table. Use a piece of
cardboard to avoid damaging the
table or the hood.
4. Attach damper / duct connector to
top of hood using (4) #8 x 3/8” Pan
Head mounting screws.
5. Remove damper flaps from
damper / duct connector and
discard flaps.
7. Attach non-duct collar to non-
duct plenum using (4) #8 x
3/8” Pan Head screws.
8. Measure distance “A”. This will
be the length of the extended
flex duct.
9. Attach aluminum flexible duct
to the damper / duct connector
with a tie wrap.
10. Attach flexible duct to non-duct
plenum collar and secure with
tie wrap. Tape all joints with
duct tape.
NOTE: Non-ducted installations
require Non-Duct Kit, Model
ANKWBF4 (purchase
separately).
1. CAUTION: Do not use plastic
or rigid metal duct.
2. Do not remove the protective
plastic film covering the
decorative flue and the hood at
this time.
3. Lay the back side of the hood
flat on a table. Use a piece of
cardboard to avoid damaging
the table or the hood.
Summary of Contents for WBF4I
Page 52: ... 52 99528392B ...


