background image

10

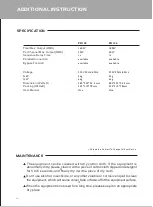
16KW
2KW
1s

220V 50Hz/60Hz

 5kg

6kg
484*222*44.5 mm
555*310*78mm
One

:  
:  
:  
:  

:  

:  
:  
:  
:  
:  
:  

18KW
3KW
1s

220V 50Hz/60Hz

 5kg

6kg
484*222*44.5 mm
555*310*78mm
One

PX128

PX136

SPECIFICATION

Total Max. Output (RMS)
Per Channel Max. Output (RMS)
Sequence Delay Time

Parallel Connection

Bypass Function

Voltage

N.W.
G.W.
Dimension (WxHxD)
Packing (

)

WxHxD

User Manual

Parameters Subject To Change Without Notice

MAINTENANCE

 The equipment can be cleaned with dry cotton cloth. If the equipment is 

abnormally dirty, please clean it with a piece of cotton cloth dipped in detergent 
for 5 to 6 seconds, and finally dry it with a piece of dry cloth.

 Don't use alcohol, insecticide, or any other volatile or corrosive liquid to clean 

the equipment, which will cause colour fade or flake-off of the equipment surface.

 When the equipment is not used for a long time, please keep it in an appropriate 

dry place.

ADDITIONAL INSTRUCTION     

available
available

available

available

文件

(图)名

产品名称

客户/品牌/型号

版本

第10页  共11页

文件

(图)

ELDER/β3/PX128+、PX136+

英文说明书

电子周边
Summary of Contents for PX128

Page 1: ...ED B3 MA 080317 001 PX128 PX136 R PROFESSIONAL SEQUENCE POWER DISTRIBUTOR User Manual...

Page 2: ...r humidity This equipment must work in places with good air flow Please check whether local voltage supply can meet the requirement of this equipment Please pull out the plug when this equipment is no...

Page 3: ...TENTS Introduction Installation Additional Instruction Features Front panel function instructions Back panel function instructions Network connection FAQ Safety Regulations Specifications Maintenance...

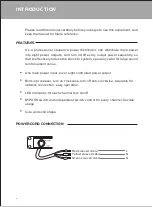
Page 4: ...ecially cater for large sound reinforcement venue One main power input six or eight controlled power output Built in processor turn on clockwise turn off anti clockwise available for network connectio...

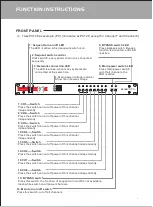
Page 5: ...s the LED is active 7 CH1 Switch Press the switch can cut off power of this channel independently 8 CH2 Switch Press the switch can cut off power of this channel independently 9 CH3 Switch Press the s...

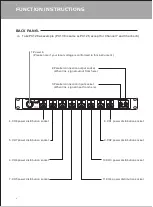
Page 6: ...socket When link signal output from here 3 Parallel connection input socket When link signal input from here 4 CH8 power distribution socket 5 CH7 power distribution socket 6 CH6 power distribution s...

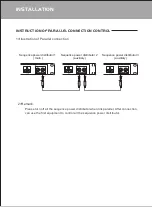
Page 7: ...ON CONTROL 1 Illustration of Parallel connection 2 Remark Please turn off all the s when link parallel After connection can use the first equipment to control all the s equence power distributor equen...

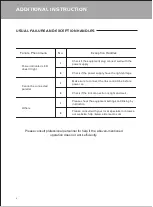
Page 8: ...f the power supply have the right voltage Make sure to connect the link control line before power on Check if the link connection is right and well Please check the settings and linking by instruction...

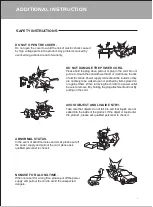
Page 9: ...with wet hand or it will cause the risk of electric shock Power supply cords should be routed so they are not likely to be walked upon or pinched by items placed on or again st them When removing the...

Page 10: ...ithout Notice MAINTENANCE The equipment can be cleaned with dry cotton cloth If the equipment is abnormally dirty please clean it with a piece of cotton cloth dipped in detergent for 5 to 6 seconds an...

Page 11: ...PX128 PX136 R www beta3pro com...

Reviews: