


CAUTION
RISK OF ELECTRIC SHOCK
DO NOT OPEN
220-240V
50-60Hz
E
N
L
E
N
L
E
N
L
E
N
L
E
N
L
E
N
L
E
N
L
E
N
L
CH 8
CH 7
CH 6
CH 5
CH 4
CH 3
CH 2
CH 1
INPUT
OUTPUT
LINK CONTROL
6
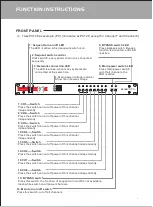
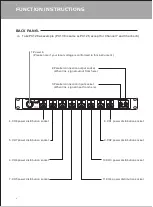
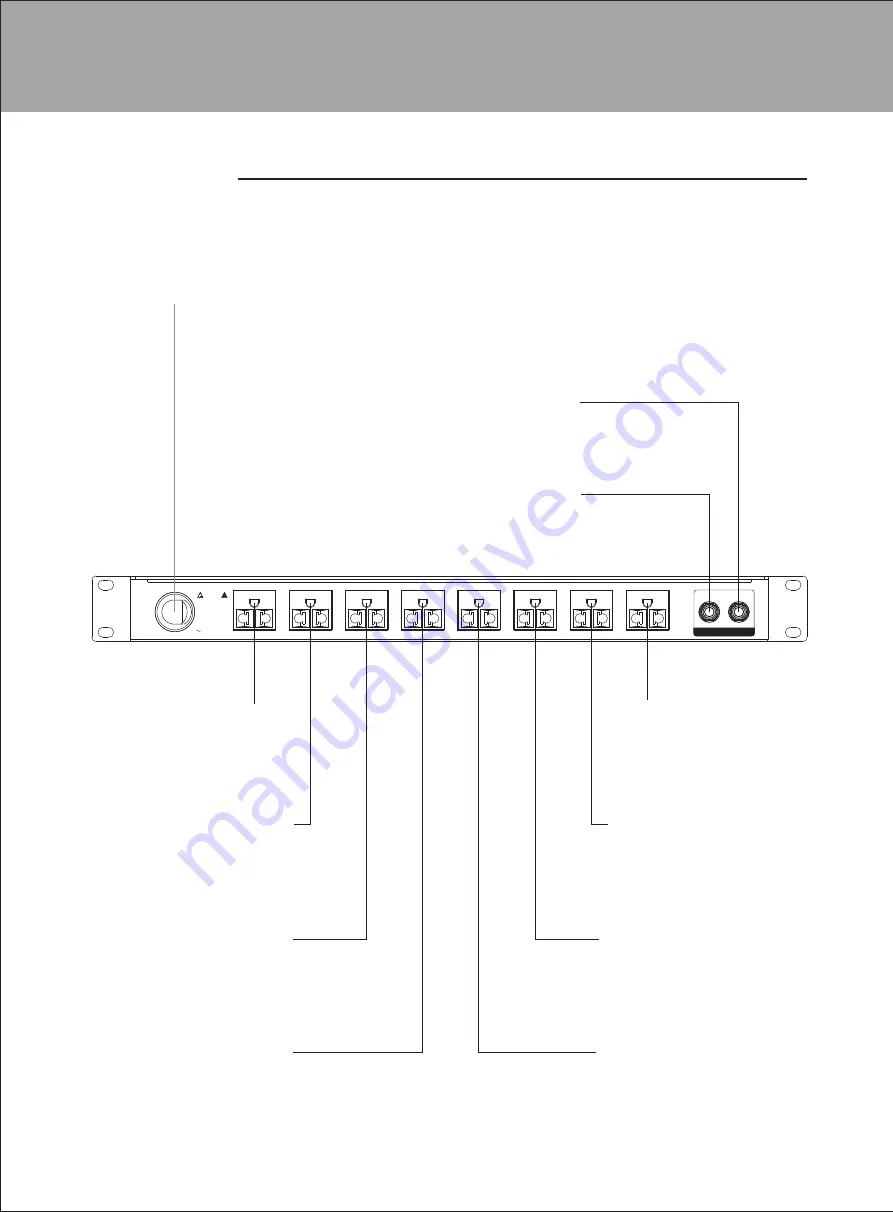
1.Power in
(Please note if your local voltage is conformed to this instrument )
2.Parallel connection output socket
(When link, signal output from here)
3.Parallel connection input socket
(When link, signal input from here)
4.CH8 power distribution socket
5.CH7 power distribution socket
6.CH6 power distribution socket
7.CH5 power distribution socket
8.CH1 power distribution socket
9.CH2 power distribution socket
10.CH3 power distribution socket
11.CH4 power distribution socket
※
Take PX128 as example ( PX136 is same as PX128, except for Channel 7 and Channel 8)
BACK PANEL
FUNCTION INSTRUCTIONS
文件
(图)名
产品名称
客户/品牌/型号
版本
第6页 共11页
文件
(图)
号
ELDER/β3/PX128+、PX136+
英文说明书
电子周边