5 - 4
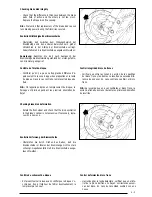
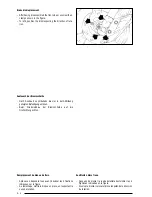
Right and left body side disassembly
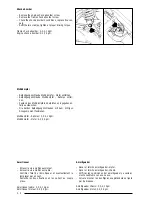
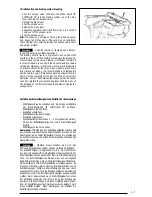
- Remove the 10 clamps on the right side, as shown in the
figure, and the 9 clamps on the left.
N.B.:
Mind not to remove the paint on the plastic surfaces.
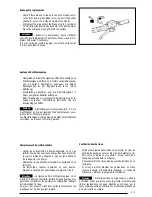
Helmet compartment disassembly
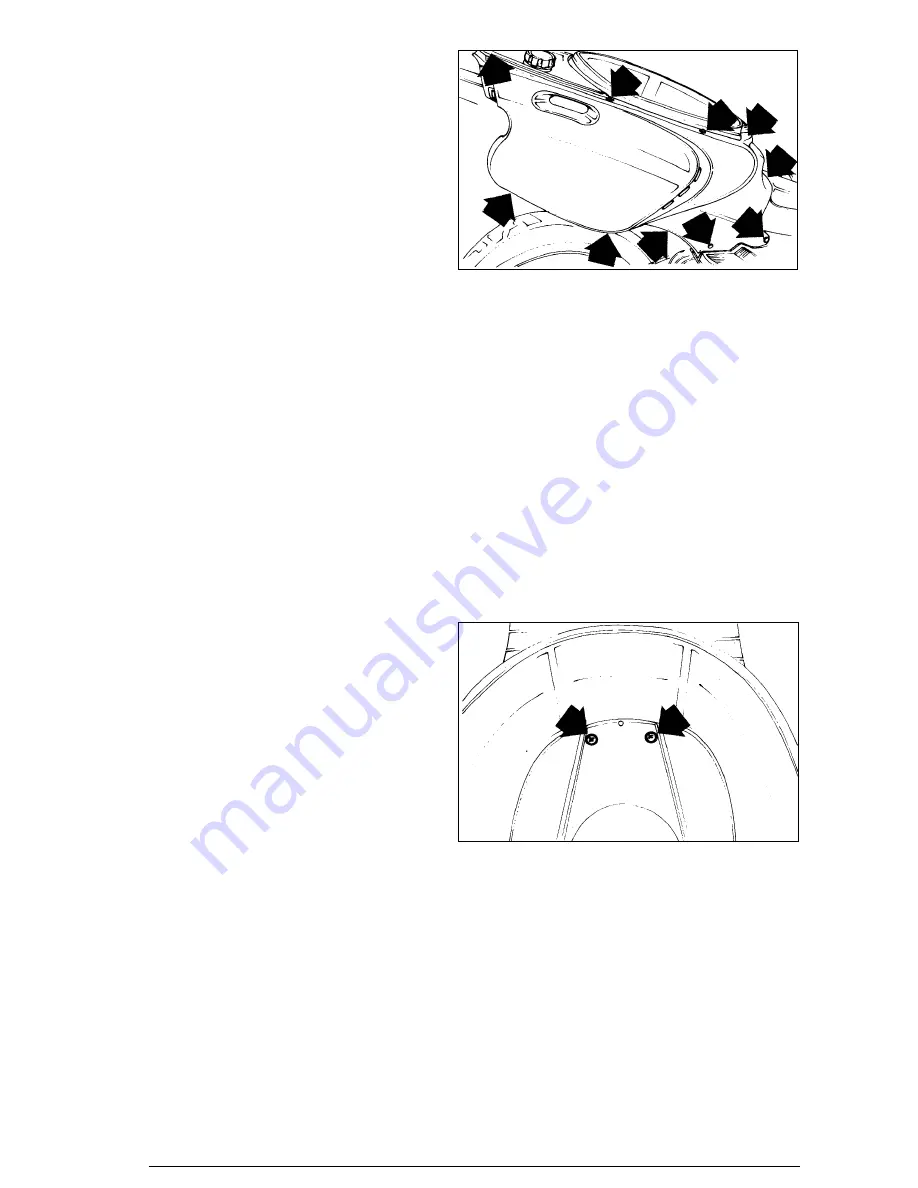
- Remove the 2 clamps inside the helmet’s compartment,
as shown in the figure, remove the fuel tank tap.
Ausbau linke und rechte Seitenverkleidung
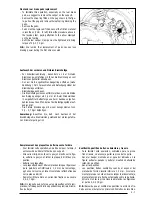
- Die 10 Befestigungen an der linken Seitenverkleidung und
die 9 Befestigungen an der rechten Seitenverkleidung wie
in der Abbildung gezeigt entfernen.
Anmerkung:
Achten Sie bei den Aus- und Einbauarbeiten
darauf, daß Sie die Farbe an den Plastikteilen nicht beschä-
digen.
Dépose des capots de droite et de gauche
- Retirer les 10 fixations indiquées sur la figure pour le
capot D. et les 9 fixations pour celui de G.
N.B.:
Pendant les opérations de dépose et repose, faire atten-
tion à ne pas abîmer la peinture des plastiques.
Desmontaje protección lateral carenado derecha e
izquierda
- Extraer las 10 fijaciones indicadas en la figura en la parte
derecha y las 9 fijaciones de la parte izquierda.
N.B.:
Durante las operaciones de desmontaje y montaje, pre-
star atención a no quitar la pintura de las superficies de plá-
stico.
Ausbau Helmstauraum
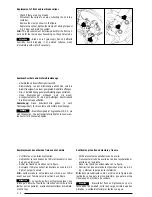
- Die beiden Befestigungen wie in der Abbildung gezeigt
entfernen und den Benzintankdeckel abschrauben.
Dépose du logement de casque
- Retirer les 2 fixations à l’intérieur du logement pour le
casque, comme l’indique la figure et enlever le bouchon
du réservoir d’essence.
Desmontaje alojamiento portacasco
- Sacar las 2 fijaciones interiores del alojamiento portaca-
sco como se indica en la figura y desmontar el tapón del
depósito gasolina.
Summary of Contents for Ark AC
Page 46: ...2 LIGHTING SET ELEKTRISCHE ANLAGE ÉQUIPMENT ÉLECTRIQUE INSTALACIÓN ELÉCTRICA ...
Page 61: ...3 SUSPENSIONS FEDERUNG SUSPENSIONS SUSPENSIONES ...
Page 70: ...4 BRAKING SYSTEM BREMSANLAGE CIRCUIT DE FREINAGE INSTALACIÓN DE FRENADO ...
Page 79: ...5 BODYWORK KAROSSERIE CARROSSERIE CARROCERIA ...

