background image


Indoor Use Only 

Made in China                                                                                                                                                                     H205412INST022015 

 
Note:

 Because our trees use high grade materials to ensure a long lifetime of beauty, wearing long sleeves and gloves 

is recommended to protect your arms and hands from foliage while shaping the branches. 


Specifications: 

Input:  110VAC  5A 600 Watts Max 

Bulbs:  2.2V Miniature 200ma w/Shunt 

Fuse:  Power Cord -  5 Amp, 125 Volt  

Fuse Bulb:  Light Strings – 2.2V Miniature 

                                              200ma Shuntless 

Included Parts: 

Pre-light Tree Top (section D)( 7lbs) 

Upper Middle Section of Pre-light Tree (section C)(15 lbs) 

Lower Middle Section of Pre-light Tree (section B)(19 lbs.) 

Bottom Section of Pre-light Tree (section A)(23lbs) 

Collapsible Tree Stand with 3 screws 

Replacement bulbs and fuses 

Corded Remote attached to section A (10’ cord) 


Setup Instructions: 

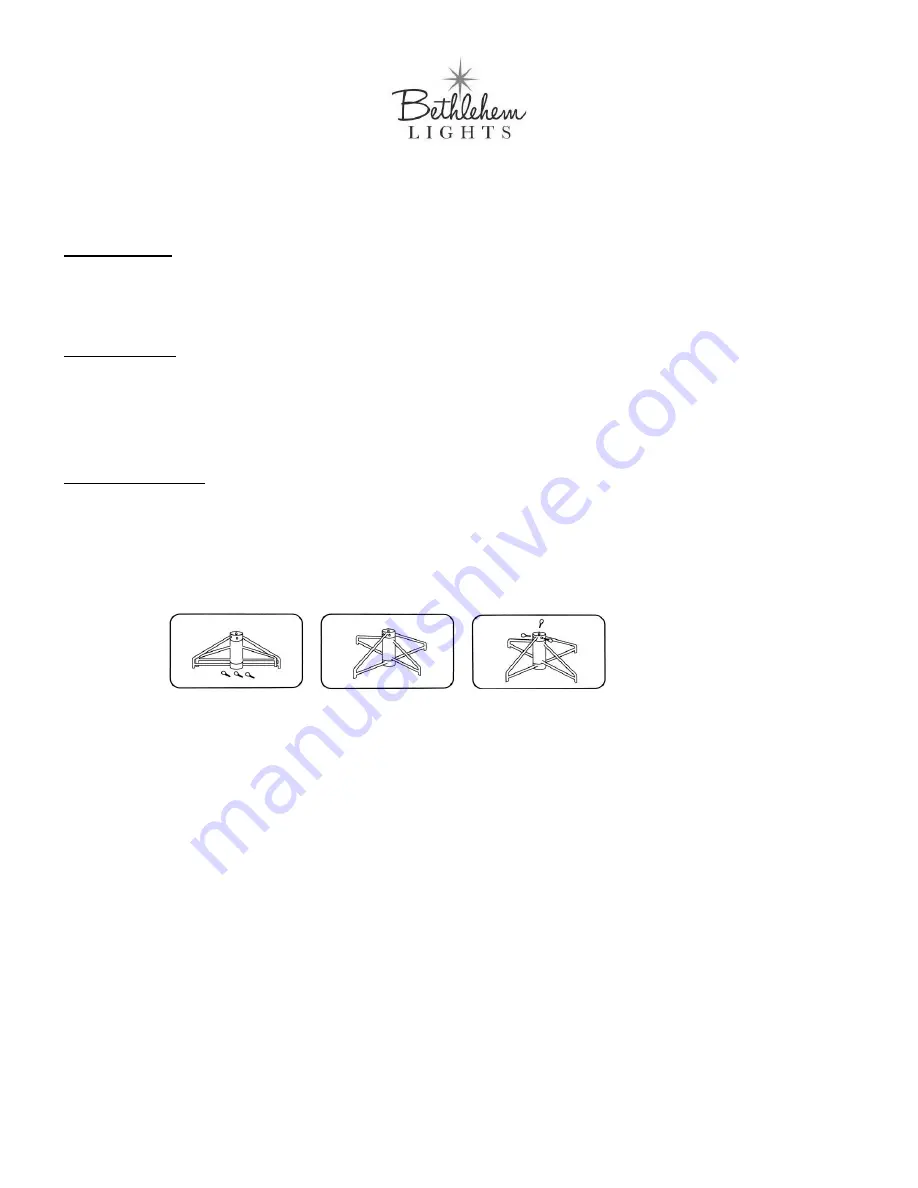
Step 1: Position and Set-Up Tree Stand 

Note: For easier assembly, the white straps around each section should NOT be removed until each section is 

assembled. Cut the strap after each section is assembled.   

A.


Place tree stand in desired location. 

B.


Unfold tree stand until the legs are perpendicular and the screw holes are aligned. 


C.


Insert the tree screws into the screw holes and turn 3 – 4 rotations only (if the screws are inserted too far you 

will not be able to fully insert the tree pole). 


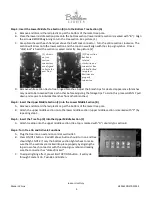
Step 2: Insert the Bottom Section (A) into the Tree Stand 

A.


Remove and discard the red plastic cap at the bottom of the metal tree pole. 

B.


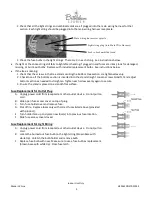
Release the power cord and corded remote from the lower tree branch by releasing the red twist ties. (NOTE: 

DO NOT REMOVE THE RECTANGULAR BOX THAT IS ZIP TIED TO THE BOTTOM TREE BRANCH.) 

C.


Insert the bottom tree section into the stand (bottom section is marked with “A”) ensuring it is standing 

straight. 

D.


Secure the bottom tree section in the stand by tightening the screws evenly. TIP: partially tighten each screw 

then check to make sure the bottom tree section is still straight in the stand. Adjust as needed before fully 

tightening each screw. If bottom section is not tightened into stand properly it could result in remaining 

sections not locking into place properly causing a portion of lights to be out. 

E.


Remove white section ties to free hinged branches. Adjust the branch tips for desired appearance (branches 

may need to be loosened from each other before adjusting the foliage tips. To aid in this process GENTLY pull 

down and separate individual branches from other branches). 

Summary of Contents for Swift Lock Ready Shape Tree

Page 1: ... lamps Do not twist lamps Read and follow all instructions that are on the product or provided with the product Do not attempt to connect other lighting strings or decorative products to this tree NO OTHER PRODUCTS SHOULD BE WIRED OR PLUGGED INTO THE TREE This product employs overload protection fuse A blown fuse indicates an overload or short circuit situation If the fuse blows unplug the product...

Page 2: ...ligned C Insert the tree screws into the screw holes and turn 3 4 rotations only if the screws are inserted too far you will not be able to fully insert the tree pole Step 2 Insert the Bottom Section A into the Tree Stand A Remove and discard the red plastic cap at the bottom of the metal tree pole B Release the power cord and corded remote from the lower tree branch by releasing the red twist tie...

Page 3: ... Step 4 Insert the Upper Middle Section C into the Lower Middle Section B A Remove and discard the red plastic cap at the bottom of the metal tree pole B Attach the upper middle section onto the lower middle section upper middle section is marked with C by repeating step 3 Step 5 Insert the Tree Top D into the Upper Middle Section C A Attach treetop onto the upper middle section tree top is marked...

Page 4: ...k into stand to prevent losing the screws Step 8 Store in cool dry area protected from sunlight If storing in the original box or a box of similar size it is recommended that the bottom section is placed in the box first followed by the middle and top sections for the best fit Package tree carefully as to not bend or break off branches DO NOT FORCE TREE INTO STORAGE BOX Trouble Shooting If the ent...

Page 5: ... bottom section as needed to straighten Tighten each screw evenly again to secure 3 Ensure the stand is placed on a smooth flat surface Fuse Replacement for Outlet Plug A Unplug power cord from receptacle or other outlet device Do not pull on cord B Slide open fuse access cover on top of plug C Turn fuse holder over and remove fuse D Risk of fire Replace fuses only with correct fuses listed above ...

Page 6: ...nce that may cause undesired operation NOTE This equipment has been tested and found to comply with the limits for a Class B digital device pursuant to Part 15 of the FCC Rules These limits are designed to provide reasonable protection against harmful interference in a residential installation This equipment generates uses and can radiate radio frequency energy and if not installed and used in acc...

Reviews: