Indoor Use Only
Made in China H205412INST022015
3
Step 3: Insert the Lower Middle Tree Section (B) into the Bottom Tree Section (A)
A.
Remove and discard the red plastic cap at the bottom of the metal tree pole.
B.
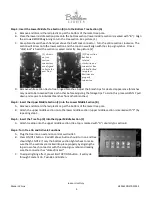
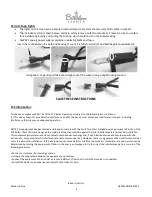
Place the lower middle section pole onto the bottom section (lower middle section is marked with “B”). Align
the arrows BEFORE beginning to turn the tree section. See picture (1).
C.
Grasp branches with each hand just above the Swift Lock connector. Turn the entire section clockwise. The
section will screw onto the lower section and the top arrow will align with the stop sign symbol. Once a
“click/lock” is heard the section is seated correctly. See picture (2).
D.
Remove white section ties to free hinged branches. Adjust the branch tips for desired appearance (branches
may need to be loosened from each other before adjusting the foliage tips. To aid in this process GENTLY pull
down and separate individual branches from other branches).
Step 4: Insert the Upper Middle Section (C) into the Lower Middle Section (B)
A.
Remove and discard the red plastic cap at the bottom of the metal tree pole.
B.
Attach the upper middle section onto the lower middle section (upper middle section is marked with “C”) by
repeating step 3.
Step 5: Insert the Tree Top (D) into the Upper Middle Section (C)
A.
Attach treetop onto the upper middle section (tree top is marked with “D”) similarly to section B.
Step 6: Turn Tree On and Activate Functions
A.
Plug the tree into an extension cord or wall outlet.
B.
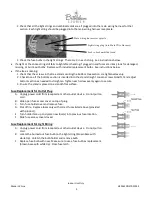
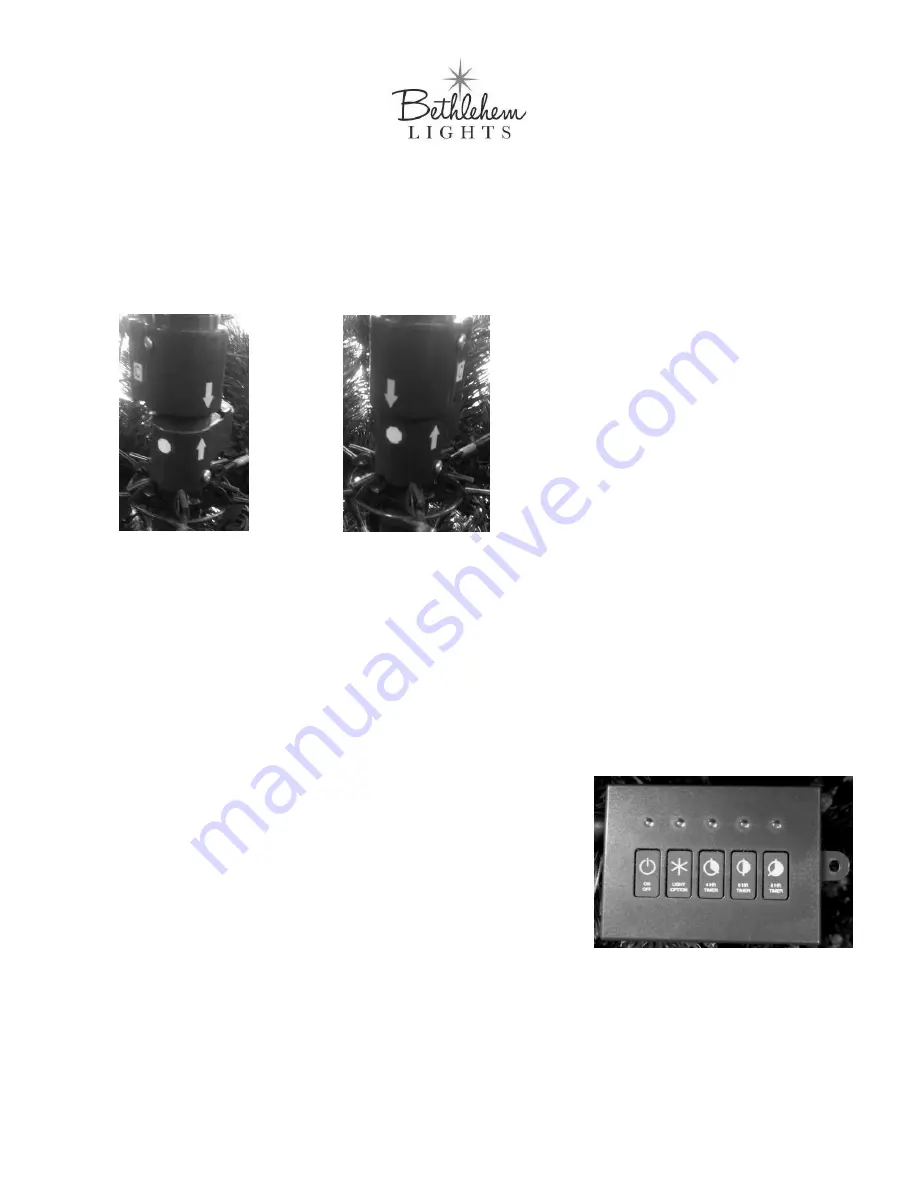
Press ON/OFF button. Red LED above button should turn on and tree
should light. NOTE: If only the bottom section lights check to make
sure that the sections are locked into place properly by aligning the
top arrow of each connector with the stop sign symbol and making
sure the connecter has “clicked/locked”.
C.
To adjust lighting effect, press LIGHT OPTION button. It will cycle
through Constant On, Twinkle and Glisten.
(2) Top section
has been
rotated
clockwise and
connector has
clicked/locked
into place.
Sections are
properly
connected.
(1) Arrows
on tree
section
connectors
are aligned
to begin the
next step.


