Indoor Use Only
Made in China H205412INST022015
4
D.
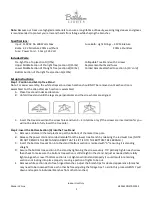
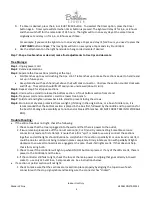
If a timer is desired, press the 4, 6 or 8 HR TIMER button. To deselect the timer option, press the timer
button again. Timer cycle will start when timer button is pressed. The lights will stay lit for 4, 6, or 8 hours
and then switch off for the remainder of 24 hours. The lights will turn on every day at the same time as
originally set and stay on for 4, 6, or 8 hours each time.
For example: If you want the lights to turn on every day at 5pm and stay lit for 4 hours, you need to press the
4 HR TIMER
button at
5pm
. The tree lights will turn on every day at 5pm and stay lit until 9pm.
E.
Use the attachment on the right hand side to hang corded remote if desired.
Step 7: Shape tree branches as desired, make final adjustments to tree tips and decorate
Tree Storage:
Step 1
: Unplug power cord.
Step 2
: Remove decorations.
Step 3
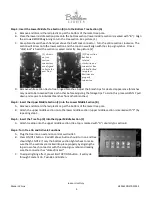
: Separate the tree sections (starting at the top).
•
Fold branches up to avoid crushing the tips. Hint: Tie branches up to make the sections easier to handle and
set up in future years.
•
Grasp branches with each hand just above the Swift Lock connector. Unscrew the section counter clockwise
and lift up. The section should lift off easily once unscrewed (about ½ turn).
Step 4
: Repeat step 3 for all upper sections.
Step 5
: Unscrew tree stand to release the bottom section. Lift out bottom section from stand.
Step 6
: Tie power cord and cont cord to a lower tree branch.
Step 7
: Fold stand and tighten screws back into stand to prevent losing the screws.
Step 8
: Store in cool dry area protected from sunlight. (If storing in the original box, or a box of similar size, it is
recommended that the bottom section is placed in the box first, followed by the middle and top sections for
the best fit. Package tree carefully as to not bend or break off branches. DO NOT FORCE TREE INTO STORAGE
BOX).
Trouble Shooting:
•
If the entire tree does not light, check the following:
1.
Check to see that the tree is plugged into the wall and that there is power to the outlet.
2.
If issue remains please take off the non-lit section (B, C or D) and try reconnecting. Sometimes a loose
connection is made on first attempt. Ensure that a firm “spin” is made to securely connect the sections
together and all the lights should illuminate. Helpful hint: If a section is partially lit or one strand is not lit, it
could be due to section not being rotated in place completely. Firmly rotate section with partially lit lights
clockwise to ensure all connectors are engaged at the pole. Check if all lights are lit. If that does not help,
check for missing bulb.
3.
Check to see if the controller will light up when ON/OFF button is pressed. If any of the LEDs are lit, there is
power to the Controller and the tree.
4.
If the controller still fails to light, check the fuse at the main power cord (plug that goes directly into wall
socket) – use only 125 volt fuse, 5 amp maximum. See instructions below.
•
If a section or partial section will not light:
1.
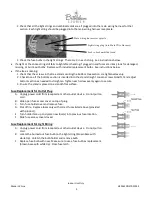
Check to make sure that the sections are locked into place properly by aligning the top arrow of each
connector with the stop sign symbol and making sure the connecter has “clicked”.


