


Aftercare
Aftercare
In the event that your product has a problem some maintenance may be
required.
Temperature control issue
If the temperature control does not regulate the temperature once the
product is installed this could be due to incorrect pressures.
Or
This could be due to debris in the thermostat, as the system was not
flushed prior to connection of the water supply.
Or
This could be due to limescale build up on the thermostat
If the pressures are not balanced, this must be fixed by either
increasing the lower pressure or reducing the higher pressure
(but the minimum pressure requirement must still be achieved)
Alternatively check the thermostat and clean away any debris
or limescale.
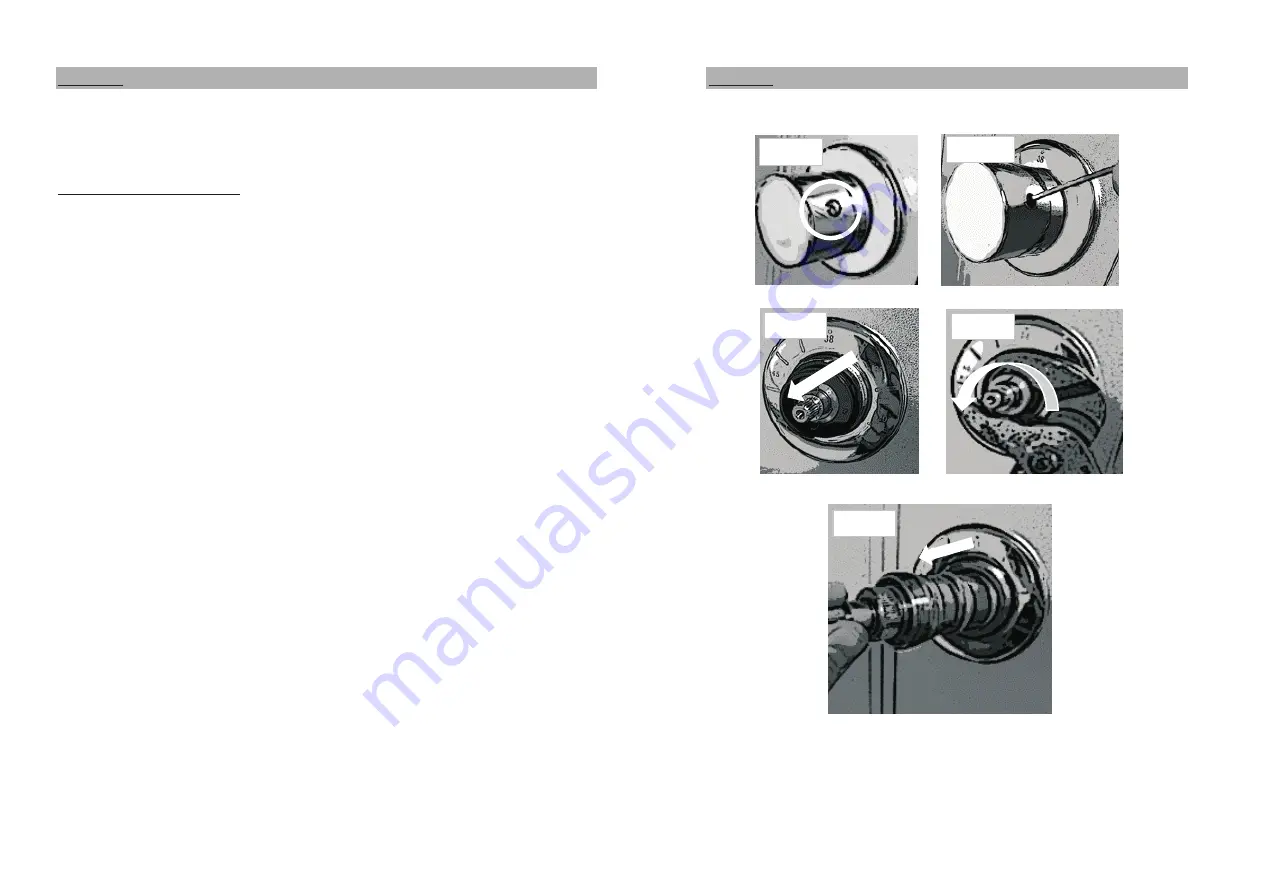
TURN OFF WATER SUPPLY
Turn the diverter handle to an open position to allow water to drain.
Turn temp handle to the 38c stop position and remove the handle cap (Fig 1).
Using a hex key, loosen the grub screw inside the handle (Fig 2).
Pull the handle and take note of the stop ring position for replacing (Fig 3).
Using grips, turn the brass thermostat anti-clockwise to remove (Fig 4).
Once removed clear any debris inside the mixer.
Run the thermostat under warm water and scrub using a soft
bristle brush to remove debris/limescale.
Re-fit thermostat and re-fit black stop ring in noted position.
Replace handle with button in the 38c position.
Tighten screw and re-fit cap.
If you should have any issues with your product, please contact us via
Turn on water supply and test.
our Help Centre on line at WWW.betterbathrooms.com
Fig 1
Fig 2
Fig 3
Fig 4
Fig 5
SEPT 18 - V6BB


