background image


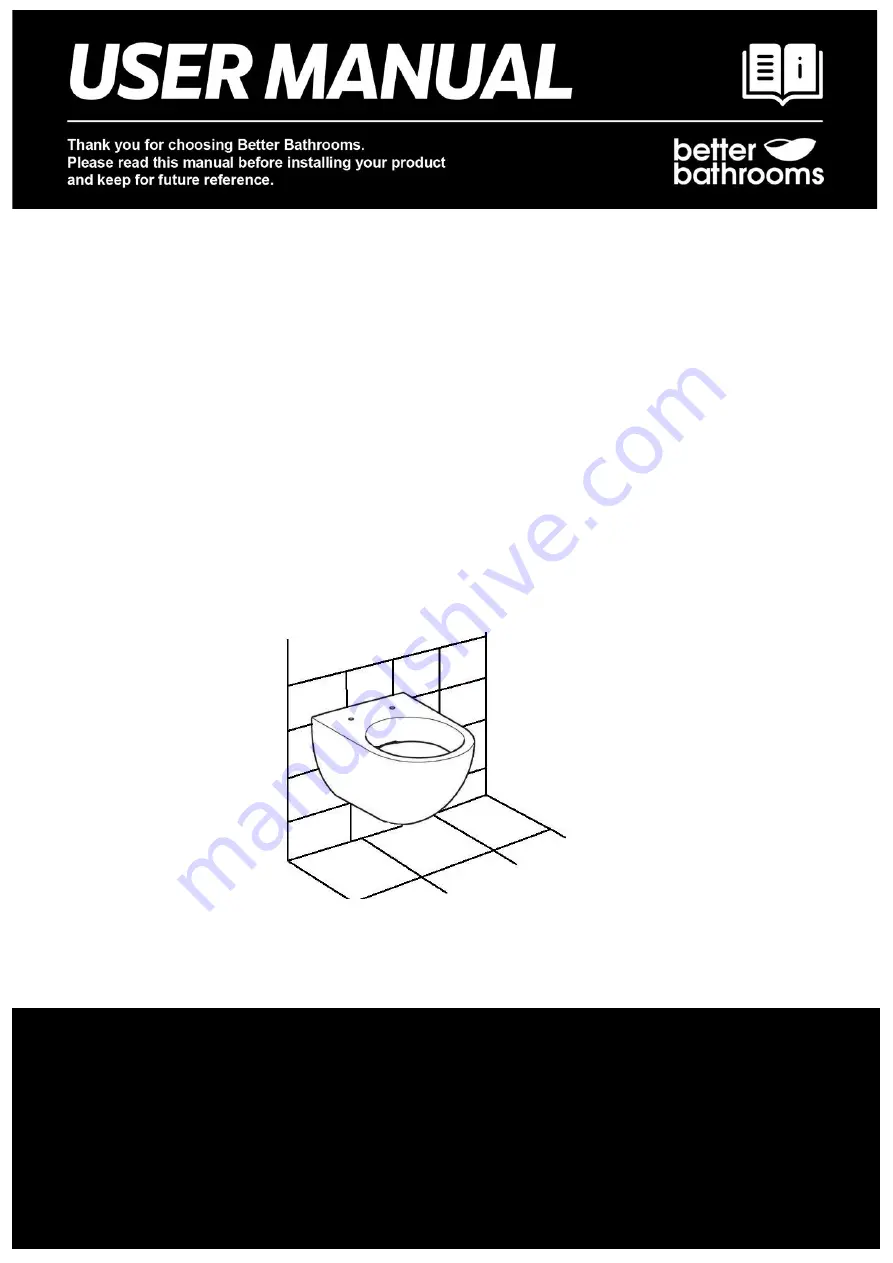
Wall Hung Toilet 

BeBa_27556 Boston Wall Hung Pan 

BeBa_25895 Ashford Rimless Wall Hung Toilet  

BeBa_25901 Santiago Rimless Wall Hung Toilet  

BeBa_25899 Valencia Rimless Wall Hung Toilet  

BeBa_28418 Newport Rimless Wall Hung Toilet 

Toilet seat and Wall Frame/cistern sold separately 


Waste pipe sold separately if a new installation


Please note: Image is for illustrative purposes only and may differ slightly to the 
actual product. 


Single-person assembly 


Tools required 


We always recommend using professional 
tradespeople to install your product 

V4 11.1.22 


Summary of Contents for BeBa 25895

Page 1: ...g Toilet BeBa_28418 Newport Rimless Wall Hung Toilet Toilet seat and Wall Frame cistern sold separately Waste pipe sold separately if a new installation Please note Image is for illustrative purposes only and may differ slightly to the actual product Single person assembly Tools required We always recommend using professional tradespeople to install your product V4 11 1 22 ...

Page 2: ...st Track 100 We hope your new product goes beyond and above your expectations However should any problems occur please Log in to your account and contact our customer services team via your self serve portal betterbathrooms com CustomerAccount Login Contact us via betterbathrooms com content contact us Important information Please read these instructions thoroughly and retain for future reference ...

Page 3: ...3 Contents Parts 4 Tools required 4 Installation o Preparing for a Wall Hung Toilet Pan Fitting 5 o Wall Hung Toilet Pan Fitting 6 7 Troubleshooting 8 Maintenance 8 Cleaning 8 ...

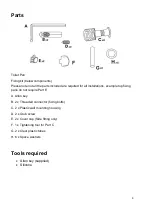
Page 4: ...llations example top fixing pans do not require Part E A Allen key B 2 x Threaded connector fixing bolts C 2 x Plastic wall mounting housing D 2 x Grub screw E 2 x Cover cap Side fitting only F 1 x Tightening tool for Part C G 2 x Clear plastic tubes H 6 x Space washers Tools required Allen key supplied Silicone ...

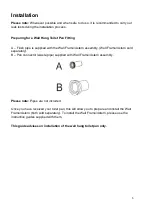
Page 5: ...istern assembly Wall Frame cistern sold separately B Pan connector waste pipe supplied with Wall Frame cistern assembly Please note Pipes are not included Once you have received your toilet pan this will allow you to prepare and install the Wall Frame cistern both sold separately To install the Wall Frame cistern please use the instruction guides supplied with them This guide advises on installati...

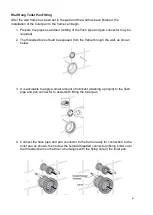
Page 6: ...aded bars should be exposed from the frame through the wall as shown below 3 It is advisable to apply a small amount of lubricant washing up liquid to the flush pipe and pan connector to assist with fitting the toilet pan 4 Connect the flush pipe and pan connector to the frame ready for connection to the toilet pan as shown then screw the female threaded connectors fixing bolts onto the threaded b...

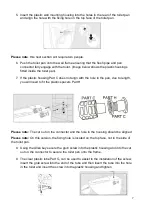
Page 7: ...hole in the pan due to length you will need to fit the plastic spacers Part H Please note The cut out on the connector and the hole in the housing should be aligned Please note On this version the fixing hole is located on the top face not in the side of the toilet pan 8 Using the Allen key secure the grub screw into the plastic housing and into the cut out on the connector to secure the toilet pa...

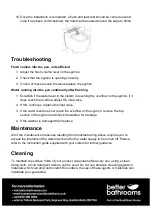
Page 8: ...s continues replace the inlet valve 3 If the water level does not reach the overflow on the syphon remove the top section of the syphon and check the washer for damage 4 If the washer is damaged then replace Maintenance All of the maintenance measures resulting from troubleshooting above requires you to access the internals of the cistern tank and for the water supply to be turned off Please refer...

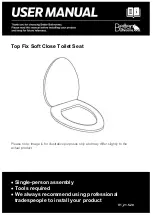
Page 9: ...Seat Please note Image is for illustrative purposes only and may differ slightly to the actual product Single person assembly Tools required We always recommend using professional tradespeople to install your product V1_21 5 20 ...

Page 10: ...ceived countless awards including the National Business Awards UK the Digital Entrepreneur Awards and being placed on The Sunday Times Fast Track 100 We hope your new product exceeds your highest expectations However if you experience any problems please call our friendly UK call centre on 0871 244 0935 9am 7pm Monday to Friday or 10am 4pm Saturday and Sunday or send us a message via customerservi...

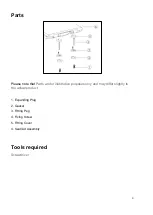
Page 11: ... note that Parts are for illustrative purposes only and may differ slightly to the actual product 1 Expanding Plug 2 Gasket 3 Fitting Peg 4 Fixing Screw 5 Fitting Cover 4 Seat Lid Assembly Tools required Screwdriver ...

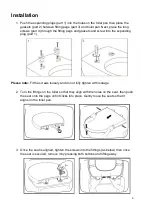
Page 12: ...expanding plug part 1 Please note Fit the screws loosely and do not fully tighten at this stage 2 Turn the fittings on the toilet so that they align with the holes on the seat then push the seat onto the pegs until it clicks into place Gently move the seat so that it aligns on the toilet pan 3 Once the seat is aligned tighten the screws into the fittings as below then once the seat is secured remo...

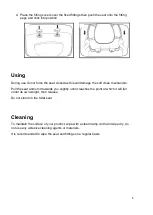
Page 13: ...oft close mechanism Pull the seat and or lid towards you slightly until it reaches the point at which it will fall under its own weight then release Do not stand on the toilet seat Cleaning To maintain the surface of your product wipe with a clean damp cloth and wipe dry do not use any abrasive cleaning agents or materials It is recommended to wipe the seat and fittings on a regular basis ...

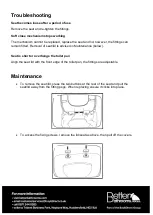
Page 14: ...d Removal of seat lid is advised in Maintenance below Seat is short or overhangs the toilet pan Align the seat lid with the front edge of the toilet pan the fittings are adjustable Maintenance To remove the seat lid press the two buttons at the rear of the seat and pull the seat lid away from the fitting pegs When replacing ensure it clicks into place To access the fixing screws remove the lid sea...

Page 15: ...Covers Before building the wall and tiling around the frame the protective covers need to be fitted to the flush plate housing flush pipe and pan connector and the fixing bars fixed into place 1 Fit the flush plate fixing bracket as below then fit the flush plate fitting box Please note The Flush Plate is sold separately 2 Push on the flush pipe and pan connector covers 3 Screw the threaded bars i...

Reviews: