background image

In presenza di strappi sulla rete, anche di piccole dimensioni, è necessario provvedere alla sua sostituzione.

Usare parti di ricambio originali, pena la decadenza della garanzia.
9. GARANZIA

La garanzia si applica in relazione ai contenuti del D.Lgs. n.24 del 02.02.2002. La durata della Garanzia è di 24 mesi (o maggiore quando esplicita-
mente indicato) per le Persone fisiche che acquistano il prodotto per scopi che possono considerarsi estranei alla loro attività professionale (Cliente 
privato finale). E’ di 12 mesi se il prodotto è fatturato ad un’Impresa o Professione soggetto di IVA.
La garanzia si riconosce sul funzionamento del prodotto e sui materiali che lo compongono, esclusi i danni indiretti. Non vengono coinvolti nel 
concetto di garanzia eventuali costi sostenuti per raggiungere il luogo dove si trova il prodotto oggetto di garanzia ed eventuali costi di installazione 
o rimozione.
Poiché è prassi utilizzare il documento fiscale di vendita per dare validità e data certa alla garanzia, lo stesso documento ne determinerà la durata.

9.1 Norme per la validità della Garanzia

Rispettare l’uso consentito del prodotto. Rispettare le norme d’uso e manutenzione. 
La garanzia sarà valida solo se accompagnata dal documento di vendita, comprovante la data d’acquisto.
L’installazione, così come la manutenzione obbligatoria, dovrà essere effettuata solo ed esclusivamente da un installatore specializzato; entrambe 
dovranno essere comprovate con il documento fiscale relativo a questa garanzia.

9.2 Decadimento della Garanzia.

- Uso improprio del prodotto in occasione di vento, pioggia, grandine, neve e/o altri eventi combinati.
- Cedimento della parte dove il prodotto è stato ancorato.
- Manomissione del prodotto; installazione, smontaggio, manutenzione non effettuati da installatore specializzato o non effettuati secondo le norme 

e le istruzioni di montaggio.

- Mancata manutenzione obbligatoria entro i termini stabiliti.
- Uso di parti di ricambio non originali Bettio Group sas.
- Rimozione od occultamento dell’etichetta identificativa Bettio Group sas, per cui la rintracciabilità del prodotto non risulta possibile.
Per altre specifiche esclusioni dalla Garanzia, si fa riferimento alle eventuali note specificate dall’Azienda. 
Per qualsiasi controversia, si elegge quale unico foro competente quello di Venezia.

10. IMBALLO MOVIMENTAZIONE E TRASPORTO

Date le dimensioni e la forma del prodotto, è necessario, oltre la misura in lunghezza di 240 cm, effettuare la movimentazione manuale in due 
persone.

59

Sicurezza - Normative    

Safety - CE rules

Sicurezza - Normative    

Safety - CE rules

®

Summary of Contents for SCENIKIT SCENICA

Page 1: ...Montage Benutzungs und Wartungshandbuch Manuale di installazione uso e manutenzione Manuel de montage utilisation et maintenance Installation user and maintenance manual ...

Page 2: ...f and most of all the total absence of bottom rail and adjusting profile your KIT ta KIT Merci pour avoir choisi SCENIKIT et BETTIO Encouragé par l enthousiasme de la clientèle pour le modèle Scenica Bettio a mis au point Scenikit une version confectionnée pour l assemblage de série Scenikit est dis ponible dans les mesures standard 1500x2500 mm et 2000x2500 mm en 4 couleurs toujours au magasin et...

Page 3: ...Maintenance pg 52 54 Sécurité et normes pg 55 64 Installation à discrétion pg 36 41 Scenikit 1 Flügel pg 4 28 Scenikit 2 Flügel pg 29 35 Probleme und Lösungen pg 42 51 Wartung pg 52 54 Sicherheit und Vorschriften pg 55 64 Wahlfreie Installation pg 36 41 INDICE CONTENTS INDEX INDEX Scenikit ad 1 battente pg 4 28 Scenikit a 2 battenti pg 29 35 Problemi e soluzioni pg 42 51 Manutenzione pg 52 54 Sicu...

Page 4: ...Allen wrench KIT635 31 STEI M 12x12 screws KIT1748 32 Side profile 33 Sliding profile 42 Flyscreen 44 Torx T15 key 10 Ausgleichsprofil 14 Befestigungsplatte KIT1806 77 15 Ausgleicher KIT1801 77 16 Haube KIT1812 77 17 Untere Sperre KIT1815 77 19 Bohrungsabdeckstöpsel für Seitlichprofil 21 Ausgleichsstöpsel KIT1814 77 26 Gewindestift 5x6 KIT636 27 HILO Schraube 4x16 und 4x19 3 KIT1842 30 Sechskantsc...

Page 5: ...15 31 15 10 Towards box side Verso il lato cassonetto Richtung Kastenseite Vers le caisson 5 Installazione 1 battente 1 leaf installation Installation 1 battant 1 Flügel Installation ...

Page 6: ...box side Appoggiare sul lato di montaggio del cassonetto Lehnen an die Kastenmontageseite Appuyer à la côte de montage du caisson 6 Installazione 1 battente 1 leaf installation Installation 1 battant 1 Flügel Installation ...

Page 7: ...n assenza di appoggio alla parete utilizzare il tappo compensatore Falls kein Stützpunkt an der Wand ist benutzen Sie den Abdeckstöpsel Sans appui au mur utiliser le bouchon adaptateur 10 7 Installazione 1 battente 1 leaf installation Installation 1 battant 1 Flügel Installation ...

Page 8: ...21 10 30 26 26 21 10 8 Installazione 1 battente 1 leaf installation Installation 1 battant 1 Flügel Installation ...

Page 9: ...15 15 15 10 9 Installazione 1 battente 1 leaf installation Installation 1 battant 1 Flügel Installation ...

Page 10: ...10 Installazione 1 battente 1 leaf installation Installation 1 battant 1 Flügel Installation ...

Page 11: ...14 11 Installazione 1 battente 1 leaf installation Installation 1 battant 1 Flügel Installation ...

Page 12: ...14 12 Installazione 1 battente 1 leaf installation Installation 1 battant 1 Flügel Installation ...

Page 13: ...aso il prodotto debba essere imballato nuovamente Behalten die Stücke nr 22 und nr 23 wenn der Produkt ein anderes Mal verpacken werden wird Conserver les pièces nr 22 et nr 23 si le produit doit être emballer une autre fois 13 Installazione 1 battente 1 leaf installation Installation 1 battant 1 Flügel Installation ...

Page 14: ...aking the black wheel pass inside its own housing Einfügen die Führungss chiene durch den Eintritt des Rads in ihrer Stelle Insérer le guide en faisant passer la roue noire dans la siège correspondante 14 Installazione 1 battente 1 leaf installation Installation 1 battant 1 Flügel Installation ...

Page 15: ...ersi Make sure that the upper cord is free to move Versichern sich daß die obere Kordel frei zu bewe gen ist S assurer que la corde supérieure est libre de glisser 15 Installazione 1 battente 1 leaf installation Installation 1 battant 1 Flügel Installation ...

Page 16: ...at the thick cord is in the groove of the pulley Versichern sich daß die große Kordel richtig in der Scheibennut einge fügt ist S assurer que la corde grosse est insérée cor rectement dans le col de la poulie 16 Installazione 1 battente 1 leaf installation Installation 1 battant 1 Flügel Installation ...

Page 17: ...44 17 Installazione 1 battente 1 leaf installation Installation 1 battant 1 Flügel Installation ...

Page 18: ...least 5cm of exceeding wire for eventual further regulations Falls eventuelle Regulierungen lassen wenigstens 5cm der Kordel im Überschuss Laisser au moins 5 cm de corde en plus pour réglages éventuels 18 Installazione 1 battente 1 leaf installation Installation 1 battant 1 Flügel Installation ...

Page 19: ...allazione Caution hold the rail during the installation Führen immer die Füh rungsschiene während der Installation Accompagner la guide pendant l installation 19 Installazione 1 battente 1 leaf installation Installation 1 battant 1 Flügel Installation ...

Page 20: ...14 10 42 2 1 20 Installazione 1 battente 1 leaf installation Installation 1 battant 1 Flügel Installation ...

Page 21: ...42 14 21 Installazione 1 battente 1 leaf installation Installation 1 battant 1 Flügel Installation ...

Page 22: ...27 4mm 4x16 4mm 4x19 3 max 6mm Viti per compensazioni Screws for adjustment Ausgleichsschrauben Vis de compensation 44 22 Installazione 1 battente 1 leaf installation Installation 1 battant 1 Flügel Installation ...

Page 23: ...e leaf version Caution Do not tear it off in 2 leaves version 16 Lösen das darstellende Stück nur im 1 Flügel Modell Achtung Nicht lösen im 2 Flügel Modell Détacher le pièce de l image seulement dans la version à 1 battant Attention Ne pas détacher dans la ver sion à 2 battants 23 Installazione 1 battente 1 leaf installation Installation 1 battant 1 Flügel Installation ...

Page 24: ...16 16 24 Installazione 1 battente 1 leaf installation Installation 1 battant 1 Flügel Installation ...

Page 25: ...le Lubrificante per prodotti Scenica Bettio Schmieren die Seiten der beweglichen Schiene mit dem für Bettio Scenica Produkte speziellen Schmierspray Lubrifier les côtés de la coulisse mobile avec le spécial lubrifiant pour produits Scenica de Bettio 25 Installazione 1 battente 1 leaf installation Installation 1 battant 1 Flügel Installation ...

Page 26: ...26 Installazione 1 battente 1 leaf installation Installation 1 battant 1 Flügel Installation ...

Page 27: ... regolare la corda come illustrato a pagina 45 prima di svolgere totalmente la rete Während des ersten Aufrollen kon trollieren daß das Netz keine Falten hat anders regeln die Kordel wie Seite 45 vor dem kompletten Netzaufrollen Pendant le premier déroulement vérifier que la toile n a pas des plis autrement régler la corde comme pag 45 avant le déroulement total de la toile 27 Installazione 1 batt...

Page 28: ...ok 28 Installazione 1 battente 1 leaf installation Installation 1 battant 1 Flügel Installation ...

Page 29: ... leaf version is composed of two single leaf screen please refer to page 4 in the index 2 Flügel Modell besteht aus zwei 1 Flügel Modell Insektenschutz Sehen Index Seite 4 La version à 2 battants est composée de deux moustiquaires à 1 battant voir l index à page 4 29 Installazione 2 battenti 2 leaves installation Installazione 2 battenti 2 leaves installation ...

Page 30: ...ggiare su entrambi i lati Lean against both sides Lehnen an die zwei Kastenmontageseiten Appuyer sur les deux côtes 30 Installazione 2 battenti 2 leaves installation Installazione 2 battenti 2 leaves installation ...

Page 31: ...af follow the instructions from page 4 to page 28 Für die Flügelinstallation folgen die Montageanleitung von Seite 4 bis Seite 28 Observer les instructions de pag 4 à pag 28 pour l installation de chaque battant 31 Installazione 2 battenti 2 leaves installation Installazione 2 battenti 2 leaves installation ...

Page 32: ...clack 16 16 32 Installazione 2 battenti 2 leaves installation Installazione 2 battenti 2 leaves installation ...

Page 33: ...33 Installazione 2 battenti 2 leaves installation Installazione 2 battenti 2 leaves installation ...

Page 34: ...34 Installazione 2 battenti 2 leaves installation Installazione 2 battenti 2 leaves installation ...

Page 35: ...ok 35 Installazione 2 battenti 2 leaves installation Installazione 2 battenti 2 leaves installation ...

Page 36: ...ne a discrezione Additional component Optional installation Ergänzende Zubehörteil Unverbindlich Accessoire complémentaire Installation à discrétion 36 Installazioni opzionali Optional installation Wahlfreie Installation Installation à discrétion ...

Page 37: ...17 37 Installazioni opzionali Optional installation Wahlfreie Installation Installation à discrétion ...

Page 38: ...azione assieme al blocco inferiore accorciare il profilo di 25mm Ergänzendes Seitlichprofil Wegen der Installation mit dem unteren Sperre schneiden das Profil 25 mm Le profil latéral est complémentaire En cas d installation avec le blocage inféri eur couper le profil de 25 mm 25mm 32 38 Installazioni opzionali Optional installation Wahlfreie Installation Installation à discrétion ...

Page 39: ...19 32 32 16 39 Installazioni opzionali Optional installation Wahlfreie Installation Installation à discrétion ...

Page 40: ...e a discrezione Additional component Optional installation Ergänzende Zubehörteil Unverbindlich Accessoire complémentaire Installation à discrétion 40 Installazioni opzionali Optional installation Wahlfreie Installation Installation à discrétion ...

Page 41: ...41 Installazioni opzionali Optional installation Wahlfreie Installation Installation à discrétion ...

Page 42: ...Problema 1 Problem 1 Problem 1 Problème 1 42 Problemi e soluzioni Problems and solutions Probleme und Lösungen Problèmes et solutions ...

Page 43: ...1 44 44 44 2 3 Soluzione 1 Solution 1 Lösung 1 Solution 1 43 Problemi e soluzioni Problems and solutions Probleme und Lösungen Problèmes et solutions ...

Page 44: ...Problema 2 Problem 2 Problem 2 Problème 2 44 Problemi e soluzioni Problems and solutions Probleme und Lösungen Problèmes et solutions ...

Page 45: ...Soluzione 2 Solution 2 Lösung 2 Solution 2 2 1 3 44 44 44 45 Problemi e soluzioni Problems and solutions Probleme und Lösungen Problèmes et solutions ...

Page 46: ...cm of exceeding wire for eventual further regulations Falls eventuelle Regulierungen lassen wenigstens 5cm der Kordel im Überschuss Laisser au moins 5 cm de corde en plus pour réglages éventuels min 5cm 46 Problemi e soluzioni Problems and solutions Probleme und Lösungen Problèmes et solutions ...

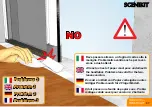
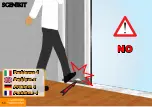
Page 47: ...n foglio di carta sotto la maniglia Problematica valida anche per la ver sione a due battenti Es muß ein Blatt von Papier vorbeigehen unter Gültiger Problem auch für 2 Flügel Modell Il doit passer une feuille de papier sous Problé matique valide aussi pour version à 2 battants NO 47 Problemi e soluzioni Problems and solutions Probleme und Lösungen Problèmes et solutions ...

Page 48: ...2 Soluzione 3 Solution 3 Lösung 3 Solution 3 1 44 3 44 48 Problemi e soluzioni Problems and solutions Probleme und Lösungen Problèmes et solutions ...

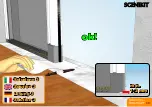
Page 49: ...Soluzione 3 Solution 3 Lösung 3 Solution 3 ok min 1 2 mm 49 Problemi e soluzioni Problems and solutions Probleme und Lösungen Problèmes et solutions ...

Page 50: ...Problema 4 Problem 4 Problem 4 Problème 4 NO 50 Problemi e soluzioni Problems and solutions Probleme und Lösungen Problèmes et solutions ...

Page 51: ...catamente con l aiuto delle mani prima di riavvolgerla nel cassonetto Wenn das Netz zufällig seinen Sitz ver lässt wiedereinfügt es zart mit der Hilfe der Hände bevor im Kasten zu umspu len Si la toile sorte de son siège accidentel lement la réinsérer délicatement avec l aide des mains avant la rembobiner dans le caisson ok 51 Problemi e soluzioni Problems and solutions Probleme und Lösungen Probl...

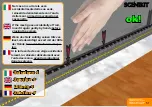
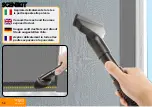
Page 52: ...esposte alla polvere Vacuum the mesh and the areas exposed to dust Saugen sanft das Netz und die auf Staub ausgestellten Teile Aspirer délicatement la toile et les parties exposées à la poussière 52 Manutenzione Maintenance Wartung Maintenance ...

Page 53: ...th and neutral solution Reinigung benutzen Sie ein nasses Tuch mit neutraler Lösung Nettoyer avec une linge humide à solution neutre Pulire con un panno umido di soluzione neutra 53 Manutenzione Maintenance Wartung Maintenance ...

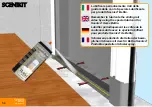
Page 54: ...ail sides by using the special lubricant for Scenica items Bettio Schmieren periodisch die Seiten der bewe glichen Schiene mit dem für Bettio Scenica Produkte speziellen Schmierspray Lubrifier périodiquement les côtés de la coulisse mobile avec le spécial lubrifiant pour produits Scenica de Bettio 54 Manutenzione Maintenance Wartung Maintenance ...

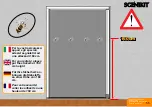
Page 55: ...oller les adhésifs à une hauteur de 160 cm Per la vostra sicurezza apporre gli speciali adesivi segnaletici ad una altezza di 160 cm Für Ihre Sicherheit an bringen die Klebstoffe an einer Höhe von 160 cm 55 Sicurezza Normative Safety rules Sicherheit und Vorschriften Sécurité et normes ...

Page 56: ...04 tende da sole requisiti di funzionamento e sicurezza Resistenza al vento NPD EN 14201 2004 Resistenza alle operazioni ripetute EN 13120 2004 Tende tecniche requisiti di funzionamento e sicurezza UNI EN 349 94 Spazi minimi per evitare lo schiacciamento di parti del corpo UNI EN ISO 12100 1 2005 UNI EN ISO 12100 2 2005 Sicurezza del macchinario Principi generali di progettazione UNI EN 1050 98 Pr...

Page 57: ... deve essere considerato improprio e pertanto vietato in quanto le relative condizioni di esercizio non sono state considerate nell analisi dei rischi condotta dal fabbricante e per i quali potrebbero non essere presenti protezioni specifiche E vietato appoggiarsi alla rete L uso improprio assolve da ogni responsabilità il costruttore stesso per eventuali danni causati a persone o cose Il mancato ...

Page 58: ...critte nel foglio contenuto nell imballo L eventuale attività di sigillatura sarà eseguita con resina siliconica neutra Quando la velocità del vento raggiunge i 20 km h è necessario chiudere la zanzariera 8 MANUTENZIONE 8 1 Manutenzione ordinaria Data l alta qualità dei materiali impiegati nella costruzione della zanzariera non è prevista alcuna manutenzione ordinaria tranne l eventuale pulizia de...

Page 59: ...sarà valida solo se accompagnata dal documento di vendita comprovante la data d acquisto L installazione così come la manutenzione obbligatoria dovrà essere effettuata solo ed esclusivamente da un installatore specializzato entrambe dovranno essere comprovate con il documento fiscale relativo a questa garanzia 9 2 Decadimento della Garanzia Uso improprio del prodotto in occasione di vento pioggia ...

Page 60: ...della rete evitare di sporgersi o farlo solo utilizzando attrezzature adeguate 11 3 Rischi inerenti la manutenzione riparazione a Pericolo di urto durante le operazioni di carico scarico della molla b Pericolo di non corretto ripristino della zanzariera durante il cambio della rete c Pericolo derivante dal mancato utilizzo di attrezzature e DPI non marchiati CE 11 4 Pericolo di inciampo sugli elem...

Page 61: ...3561 2004 External blinds performance requirements including safety Wind resistance NPD EN 14201 2004 Resistance to repeated operations EN 13120 2004 Internal blinds performance requirements including safety UNI EN 349 94 Minimum gaps to avoid crushing parts of the human body UNI EN ISO 12100 1 2005 UNI EN ISO 12100 2 2005 Safety of machinery General principles for design UNI EN 1050 98 Principles...

Page 62: ...o of the handle rail until the mesh is fully rewound Misuse relieves the manufacturer from all liability for any injury to persons or damage to property Failure to comply with the conditions of use automatically invalidates any type of warranty given by the manufacturer 5 OPERATOR REQUIREMENTS Normal use of the flyscreen is allowed for non professional users provided they are aged 12 and over Inst...

Page 63: ...ing it up Do NOT use solvents ammonia or hydrocarbons for cleaning CAUTION cleaning carried out using steps platforms or such must only be done by specialised personnel working in conformity with safety regulations and who must use suitable personal protective equipment such as body harnesses with separate safety line see Italian Legislative Decree 81 2008 8 2 Extraordinary maintenance CAUTION onl...

Page 64: ...is Venice Italy 10 PACKAGING HANDLING AND TRANSPORTATION Given the size and shape of the product when it is longer than 240 cm it must be handled by two persons The packaging contains the instructions for installation use and maintenance as well as the warranty the installer must ensure that they are read over explained and then given to the end user Keep the packaging materials out of reach of ch...

Page 65: ...inale rispetto alla classica zanzariera comunemente proposta Bettio un azienda proiettata nel futuro Company profile BETTIO leading producer of insect screen systems seated in Marcon Venice born at the beginning of 1990 s with a clear and simple goal manufacture and sell top quality insect screens The excellence of our products is a well balanced mix of attention and handicraft technical ability a...

Page 66: ...i ambienti Per ulteriori informazioni può rivolgersi presso il Suo rivenditore di fiducia Dear Customer We remind you that the world of BETTIO insect screens is pretty big and well assorted and includes also many more models for every use and need of Your home We invite you to deepen your knowledge of our products that offer several solutions also for the installation of flyscreens in window rooms...

Page 67: ... on line Un sistema in continua evoluzione che ha già conquistato centinaia di aziende www bettio it internet Visita il sito Bettio Potrai scaricare i cataloghi più recenti i moduli d ordine e le istruzioni Visionare i modelli di ultimissima generazione ed essere aggiornato sulle news dell Azienda come fiere eventi e curiosità Scopri l incredibile comodità degli ordini via on line Un sistema in co...

Page 68: ...www bettio it Maggio 2010 I disegni del presente manuale sono puramente indicativi L Azienda si riserva di apportare modifiche in qualsiasi momento e senza preavviso Download viewer at www i nigma com ...

Reviews: