38
Beurer GL44
11
The device automatically switches on and shows the start display.
As soon as the hand and the droplet symbol start to flash, the device is ready for meas-
urement.
12
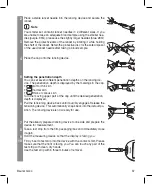
You may now use the lancing device to take a blood sample. Make
sure that the blood remains as a droplet and is not spread. Immedi-
ately use the blood droplet to take a measurement.
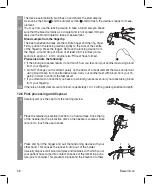
Blood sample from the fingertip
The best penetration areas are the middle finger and the ring finger.
Firmly position the lancing device slightly to the side of the centre
of the fingertip. Press the trigger. Remove the lancing device from
the finger. A round drop of blood of at least 0.6 microlitres (corre-
sponds to approx. 1.4 mm, original size: ) must have formed.
Please also note the following:
• If the blood glucose test results do not match how you feel, carry out another test using blood
from your fingertip.
• Do NOT change your treatment purely on the basis of a measurement that was carried out
using blood taken from an alternative area. Carry out another test with blood from your fin-
gertip in order to confirm the test result.
• If you often fail to notice that you have a low blood glucose level, carry out a test using blood
from your fingertip.
13
If there is an insufficient amount of blood, repeat steps 1 to 12 with a greater penetration depth.
12.6 Post-processing and disposal
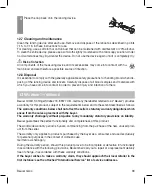
1
Carefully remove the cap from the lancing device.
2
Place the retained protective disc flat on a hard surface. Stick the tip
of the needle into the protective disc so the needle is covered. Take
care not to touch the used lancet.
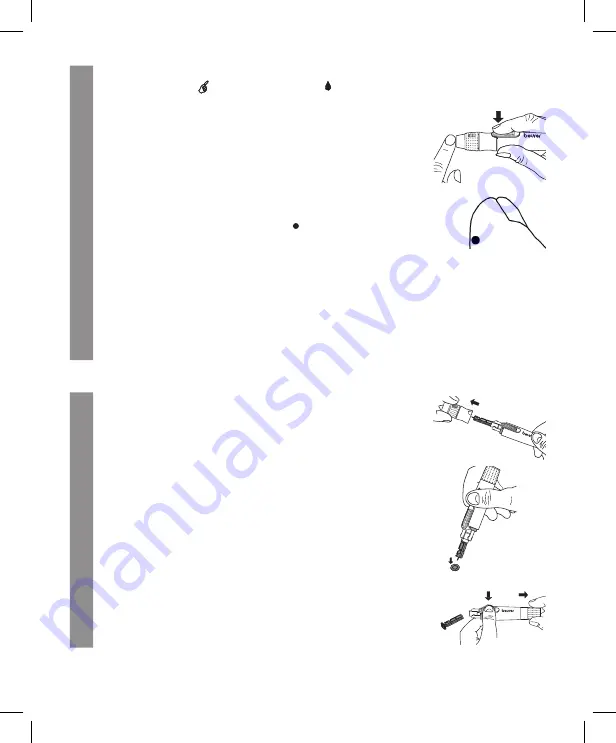
3
Press and hold the trigger and pull the tensioning device with your
other hand. This causes the lancet to drop out of the holder.
Carefully dispose of all blood samples and materials with which you or
your patient have come into contact. Dispose of the lancet in a punc-
ture-proof container. This prevents injuries and the infection of others.
1
2

