11
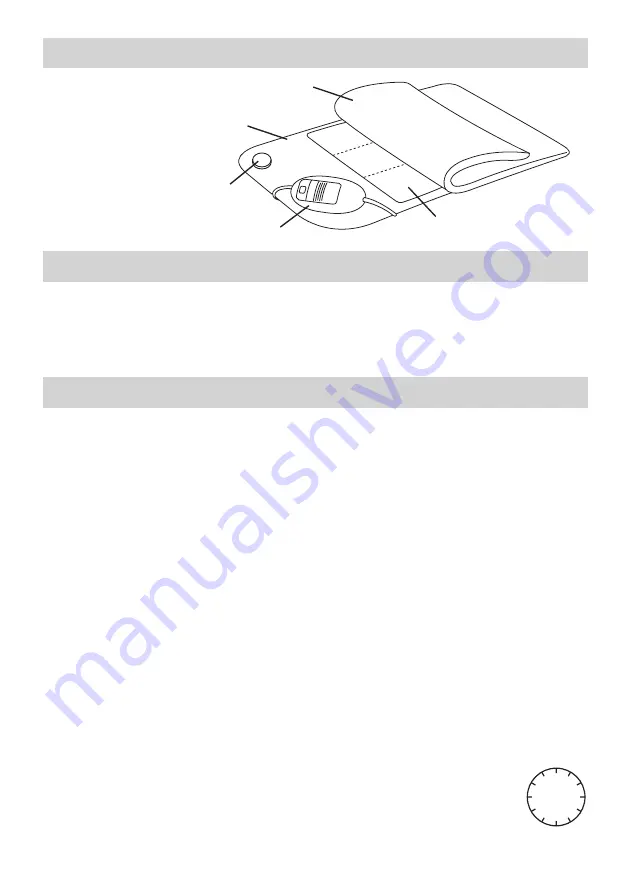
5. Appliance description
1 Heating pad
2 Plug-in coupling
3 Cover
4 Switch
5 Herb insert
6. Initial use
Remove the packaging from the desired herb insert and smooth it out onto the heating pad
through the opened heating pad cover. Then close the zip fastening. Then check if the switch
is connected to the heating pad via the plug-in coupling. Insert the mains plug into the socket.
Place the heating pad on the upper body to enable the essential vapours to be inhaled.
7. Operation
7.1 Safety
This heating pad has a SAFETY SYSTEM. This electronic sensor technology prevents the enti-
re surface of the heating pad from overheating by automatically switching off in the event of a
fault. If the safety system switches off the heating pad automatically as a result of a fault, the
indicator lamp is no longer illuminated even when the heating pad is switched on. Please note
that, after a fault has occurred, the heating pad can no longer be used for safety reasons and
must be sent to the service address indicated.
7.2 Selecting temperature
After switching on, the switch position will remain continuously illuminated. The fastest way to
heat up the heating pad is to first set the switch to the highest setting. A lower setting can be
selected later if required.
We recommend the lowest temperature setting for extended use of the heating pad.
7.3 temperature settings
Setting:
0 Off
1 Minimum heat
2 Medium heat
3 Maximum heat
7.4 Automatic switch-off function
This heating pad is equipped with an automatic switch-off function. This turns off
the heat supply approx. 90 minutes after the initial use. The switch position will
then begin to flash. In order to reactivate the heating pad, the position switch must
initially be set to the "0" position. After about 5 seconds it is possible to switch it
on again.
4
3
1
5
2
90
min
STOP


