First Steps
This user’s manual contains general working instructions for your freezer.
Before starting the freezer, follow these important first steps:
Installation
Verify that your energy source is 1ph/120V~
Choose a place that is near a grounded electrical outlet.
The freezer should be located where surrounding temperatures will not
exceed 110°F (43°C). Temperatures of 32°F (0°C) and below will NOT
affect freezer operation. Additional compressor heaters are not
recommended.
Allow space around the unit for good air circulation.
Leave a 4” (100 mm)
space on all sides of the freezer for adequate circulation. Do not block the
side and backside grids.
Cleaning
Wash any removable parts, the freezer interior, and exterior with mild
detergent and warm water. Wipe dry.
DO NOT USE HARSH CLEANERS
ON THESE SURFACES.
Do not use razor blades or other sharp instruments, which can scratch the
appliance surface.
SCRAPPING OF FROST
It is recommended to remove the frost accumulated before reloading the
freezer or anytime when one quarter inch of frost has accumulated.
Keeping the freezer plugged-in, with product, place a clean dry soft cloth
over the product to catch the frost that will be removed in the following
step.
Remove the frost using a plastic scrapper trying to go through the basket
handles to eliminate as much frost as possible.
The soft cloth, already wet with the frost removed, could be used for light
cleaning the inner cabinet prior to reloading.
Total inside cleaning
To perform a deep cleaning, remove the product and relocate it in another
freezer. Unplug the freezer and allow the equipment to defrost.
Do the cleaning with a wet cloth. Do not pour water or any other liquid.
Dry up completely and plug the freezer in again allowing 4 hours to run
empty before reloading it again.
Warning
T
HE LOWER SIDE OF THE GLASS LIDS IS PROVIDED WITH A SPECIAL
FILM
. D
O NOT USE RACER BLADES OR OTHER SHARP INSTRUMENTS WHICH CAN
SCRATCH THIS SURFACE AND DAMAGE THE FILM
. For cleaning use only a damp soft
cloth.
Freezer Lids Removal
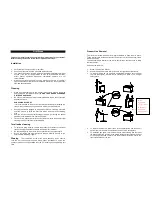
The lids are provided with aluminum angle retainers to keep them in place.
These retainers are installed at the front and at the rear of the aluminum frame
where the lids run
The aluminum angle retainer at the rear is shorter than the front ones to allow
the lids removal.
If lids must be removed:
1.
Stand- in front of the freezer.
2.
Assure that the lower lid is totally closed to the right side of the freezer.
3.
To remove the top lid, run it open to its maximum and then pull it up from
the rear (see figure). Handle the lid carefully and place it in a straight
safety place.
4.
To remove the lower lid, slide it open to the opposite side and then pull it
up from the rear. Handle the lid carefully and put it in a safety place.
5.
To install the lids again, reverse the previous steps starting with the lower
lid, assuring that the grooves in the plastic profiles at the rear and the front
of the lids get inserted correctly into the aluminum retainers, first to the
front side and then at the rear.
Dice:
Aluminum
angle retainer
Debe decir:
Aluminum
angle retainer


