background image

BGS technic KG

Bandwirkerstr. 3

D-42929 Wermelskirchen

Tel.: 02196 720480

Fax.: 02196 7204820

mail@bgs-technic.de

www.bgstechnic.com

© BGS technic KG, Copying and further use not allowed

USE 

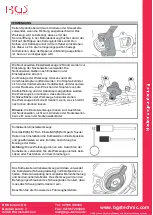
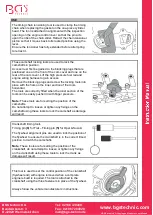
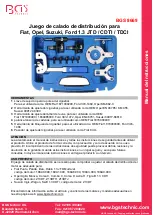
The timing chain tensioning tool is used to clamp the timing 
chain when replacing the gasket on the one-piece cylinder 
head. The tool is attached in alignment with the inspection 
opening on the engine control cover so that the pin acts 
upon the ribs of the chain slider. Retract the chain tensioner 
piston so that it moves back to its locked position using the 
lever. 
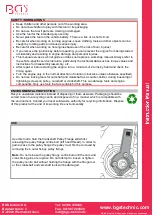
Ensure the tensioner has fully extended before attempting 
to retract it. 


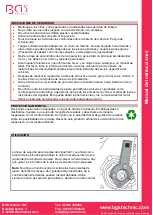
These camshaft locking tools are used to lock the 
camshafts in position. 
Access must first be gained to the blanking plugs that are 
positioned one on the front of the cam cover and one on the 
rear of the cam cover. Lift the high pressure fuel rail and 
engine wiring harness to gain access. 
Remove the blanking plugs and screw the locking tools into 
place with the flats on the inner section of the tools 
horizontal. 
The tools are correctly fitted when the inner section of the 
tools can be easily pushed in with finger pressure. 

 
Note:

 These tools are for setting the position of the 

camshafts. 
Do not attempt to loosen or tighten any fixings on the 
camshaft using these tools to lock the camshaft as damage 
will result. 


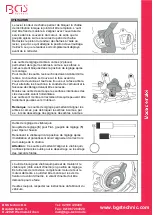
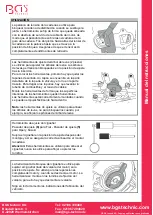
Crankshaft timing tools


Timing pin 

(6)

 for Fiat – Timing pin

 (5)

 for Opel & Suzuki 

The flywheel alignment pins are used to lock the position of 
the flywheel to ensure the crankshaft is in the correct timed 
position to match the camshafts. 

 
Note

: These tools are for setting the position of the 

crankshaft, do not attempt to loosen or tighten any fixings 
on the crankshaft using these tools to lock the crank as 
damage will result. 


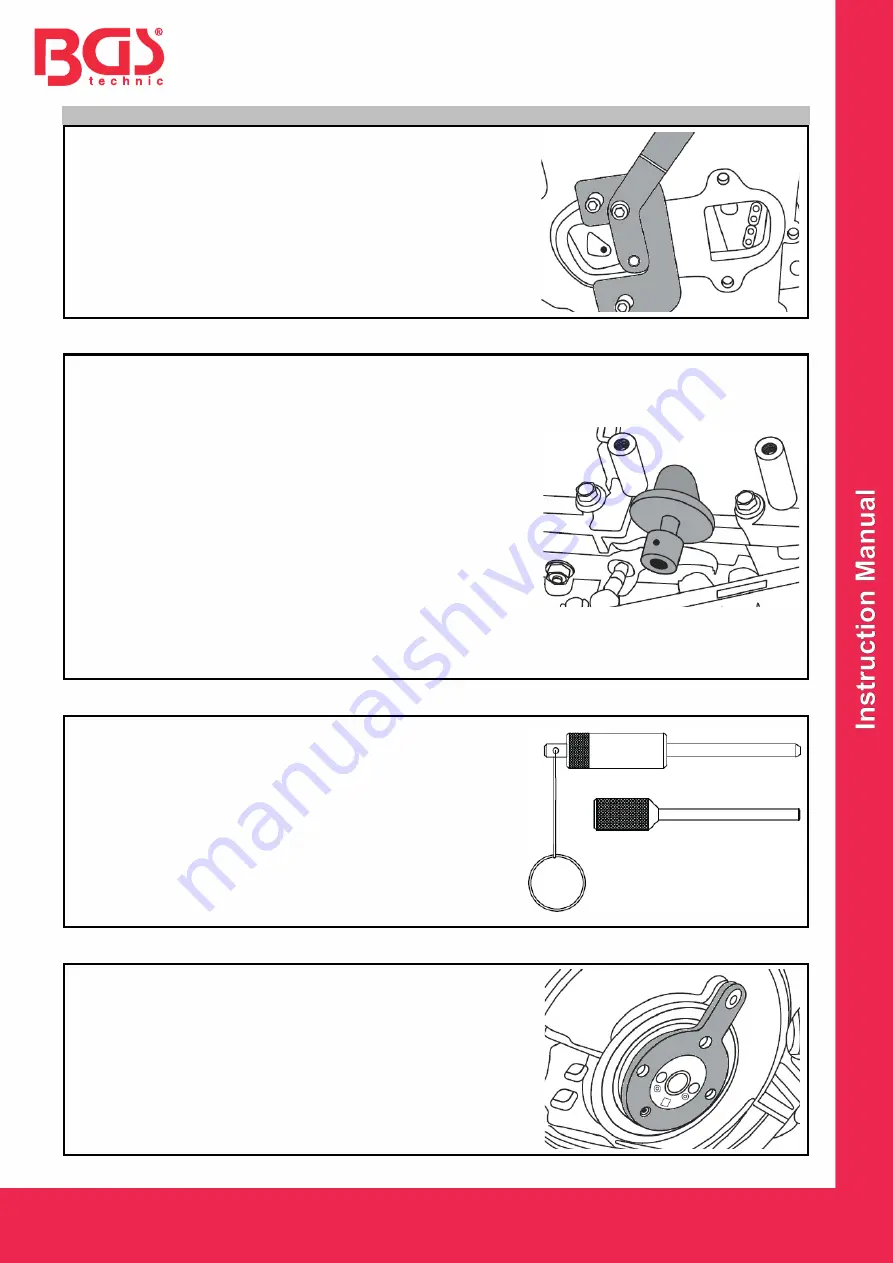
This tool is used to set the control position of the crankshaft 
(flywheel end) with engine removed when a complete 
engine rebuild is required. The tool is attached to the 
crankshaft using the three fasteners in place of the flywheel. 
 

Always follow the vehicle manufacturers’ instructions. 


Summary of Contents for 8669

Page 1: ... 8 mm ACHTUNG Lesen Sie die Bedienungsanleitung und die enthaltenen Sicherheitshinweise aufmerksam durch bevor Sie das Produkt verwenden Benutzen Sie das Produkt korrekt mit Vorsicht und nur dem Verwendungszweck entsprechend Nichtbeachtung der Sicherheitshinweise kann zu Schäden Verletzungen und Erlöschen der Gewährleistung führen Bewahren Sie diese Anleitungen für späteres Nachlesen an einem sich...

Page 2: ...teratur Nach erfolgter Reparatur bzw vor dem Starten den Motor min 2 Umdrehungen von Hand drehen und die Steuerzeiten erneut überprüfen Drehen Sie den Motor nur in normale Drehrichtung im Uhrzeigersinn soweit nicht anders angegeben Einstellwerkzeuge für Nocken und Kurbelwellen niemals als Gegenhalter beim Lösen oder Festziehen von Verschraubung an Riemenscheiben Nocken oder Kurbelwellenrädern verw...

Page 3: ...nd der andere an der Rückseite Zum Erreichen der Stopfen muss die Kraftstoffleitung und der Kabelbaum angehoben werden Die Werkzeuge so montieren dass die inneren Schlüsselflächen der Werkzeuge horizontal stehen Die Werkzeuge sind korrekt montiert wenn sie sich leicht nach innen drücken lassen Hinweis die Einstellwerkzeuge dienen zum Ausrichten der Nockenwellen nicht zum Arretieren der Nockenwelle...

Page 4: ...8 mm ATTENTION Read the operating instructions and all safety instructions contained therein carefully before using the product Use the product correctly with care and only according to the intended purpose Non compliance of the safety instructions may lead to damage personal injury and to termination of the warranty Keep these instructions in a safe and dry location for future reference Enclose t...

Page 5: ... After repair or before starting the engine turn a minimum of 2 turns by hand and check the timing again Turn the engine only in the normal direction of rotation clockwise unless otherwise specified Do not use locking tools for camshaft and crankshaft as a counter holder during loosening or tightening screws on pulley camshaft or crankshaft This can damage tools and engine components Only use tool...

Page 6: ...he blanking plugs and screw the locking tools into place with the flats on the inner section of the tools horizontal The tools are correctly fitted when the inner section of the tools can be easily pushed in with finger pressure Note These tools are for setting the position of the camshafts Do not attempt to loosen or tighten any fixings on the camshaft using these tools to lock the camshaft as da...

Page 7: ... utilisation et les consignes de sécurité avant d utiliser le produit Utilisez correctement le produit avec prudence et uniquement en conformité avec l utilisation prévue Ne pas respecter les instructions et consignes de sécurité peut entraîner des blessures des dommages matériels et l annulation de la garantie Conservez ce manuel en lieu sûr et sec afin de pouvoir le consulter ultérieurement Veui...

Page 8: ...ès une réparation ou avant le démarrage du moteur faites 2 rotations à la main minimum et revérifiez ensuite les temps de distribution Faites tourner le moteur uniquement dans le sens de rotation normal sauf indication contraire le sens des aiguilles d une montre N utilisez jamais les outils de réglage pour arbres à cames et vilebrequins comme dispositif de retenue lorsque vous desserrez ou serrez...

Page 9: ... de carburant et le faisceau de câblage doivent être soulevés Montez les outils de sorte que les surfaces intérieures des clés des outils soient horizontales Les outils sont montés correctement lorsqu ils peuvent être facilement poussés vers l intérieur Remarque les outils de réglage permettent d aligner les arbres à cames pas de bloquer les arbres à cames par ex lors du desserrage des pignons des...

Page 10: ...del cigüeñal para ser utilizada como OEM Fiat 1870900300 Ford 303 1468 6 Pasador de ajuste del cigüeñal para ser utilizado como Fiat 8 mm ATENCIÓN Lea atentamente el manual de instrucciones y todas las instrucciones de seguridad antes de utilizar el producto Utilice el producto de forma correcta con precaución y solo de acuerdo con su uso previsto El incumplimiento de las instrucciones de segurida...

Page 11: ...de la literatura de servicio específica del vehículo Después de realizar la reparación o antes de arrancar el motor gire el motor como mínimo 2 vueltas a mano y compruebe de nuevo la sincronización Gire el motor solo en el sentido de giro normal en el sentido horario salvo indicación de lo contrario No utilice nunca las herramientas de ajuste para árboles de levas y cigüeñales como contrasoporte c...

Page 12: ...ue quitar los tapones de sellado Un tapón se encuentra en la parte delantera de la tapa de la válvula y el otro en la parte trasera Para llegar a los tapones hay que levantar la tubería de combustible y el mazo de cables Monte las herramientas de forma que las superficies interiores de las herramientas queden horizontales Las herramientas están correctamente montadas cuando se pueden empujar fácil...

Reviews: