- 17 -
PUMP
7 pump
7 .1 function
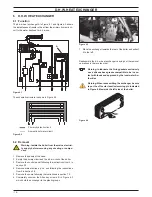
The pump A in Figure 7.1 and Figure 7.2 has the function of mak-
ing the water in the main circuit circulate through the main con-
densing heat exchanger and therefore through the c.h. system
(during the c.h. function) or through the secondary heat exchang-
er (during the d.h.w. function).
figure 7 .1
a
warning: isolate the boiler from the mains electrici-
ty supply before removing any covering or compo-
nent .
Check that the pump is not seized and that the movement of
the rotor is not subject to mechanical impediments.
The pump doesn't need.
Switch the boiler on.
The electronic control circuit provides automatically to unlock the
pump to avoid seizing.
There is no inspection plug and it's not necessary to operate
manually with screwdriver.
Check that the impeller is integral with the rotor.
With the boiler off remove the front and right hand side case pan-
els, lower the control panel and empty the primary circuit.
Remove the pump head by undoing the screws which hold it to
the pump body and check that the impeller is firmly joined to the
rotor.
7 .2 removal pump
warning: isolate the boiler from the mains electrici-
ty supply before removing any covering or compo-
nent .
1 Remove the front and right hand side case panels.
2 Empty the primary circuit of the boiler.
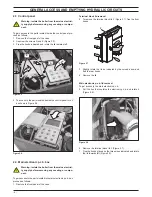
3 Disconnect the connector E (Figure 7.2).
figure 7 .2
b
c
d
e
a
f
G
h
i
4 Loosen the connection C,and pull up and turn to the left the
pipe D.
5 Remove the fork H, loosen the connection B and remove the
pipe G.
6 Remove the locking plate I.
7 Unscrew the two screws F that hold the pump on the frame
and remove the pump.
Reassemble the pump carrying out the removal operations in the
reverse order. When reassembling the pump, check the correct
location of the O-ring gasket in the inlet port of the pump that
seals the connection between the pump and the plastic group.
Summary of Contents for Inovia 25C ERP
Page 2: ......


