background image

Instruction for use 


От

 5 

До

 15

градусоь

Between    -5°C and
+5°C

Lower than -
5°C

Менее


-5°C

градусоь

From 5°C to
15°C

Между

-5°C


и

+5°C 

градусами


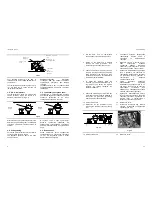
Fig. 2.7 


Your qualified installer will be able to 
recommend the most suitable adjustment for 
your system. 


Квалифицированный


монтажник


посоветует


Вам

как


выбрать


наиболее


подходящую


настройку


для


Вашей


системы

The temperature and pressure gauge (4, Fig. 
1.3) will allow you to check that the set 
temperature is obtained. 


Термоманометр

 (4, 

рис

. 1.3) 

поможет


Вам


проконтролировать


получение


заданных


температур

2.5.  D.h.w. temperature  


2.5 

Температура


горячей


воды

The temperature of  the D.h.w. storage tank  
can be varied by turning the knob 8 to a 
maximum of about 60 °C (Fig. 2.8) 


Температура


в


накопительном


бойлере


для


горячей


воды


может


изменяться


путем


поворота


регулятора

 8 

до


макс

температуры


около

 60

û

С

.(

рис

.2.8) 


8

Minimum

vbybvev


8

Maximum

vfrcbvev


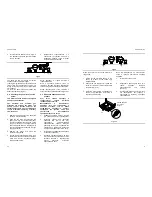
Fig. 2.8 


Where the amount of limescale present in the 
water may be particularly great, it is advisable 
to install a small water treatment device or 
softener. 


В


случаях

когда


в


воде


присутствует


большое


количество


примесей

мы


рекомендуем


устанавливать


небольшие


системы


водоподготовки


или


умягчители


воды

.  

2.6. Extinguishing 


2.6 

Выключение


To turn the boiler off set the function selector 
7 to the position shown in Fig. 2.9. 
The appliance operation light 9 will flash 
every 4 seconds. 


Чтобы


выключить


котел

переместите


переключатель

 7 

в


положение

указанное


на


рис

. 2.9. 

Индикатор


котла

 9 

будет


моргать


каждые

 4 

секунды


Commissioning 


33 

5  Set the d.h.w. and c.h. temperature 

control knobs to their maximum position. 


Установите


рукоятки


регулировки


температуры


горячей


воды


и


отопления


на


максимальные


значения

6  Switch on the boiler and if external 

controls are fitted (Timeclock, room 
thermostat ) ensure they "call for heat". 


Включите


котел


и


в


случае

если


к


нему


подключены


внешние


устройства


(

таймер

комнатный


термостат

), 

удостоверьтесь

что


они


находятся


в


режиме

 "

запрос


тепла

". 

7  Check the maximum gas pressure and 

compare the value on the gauge with the 
value indicated in the section 4.4 (gas 
pressures at the burner), accordingly with 
the model of boiler installed. 


Проверьте


максимальное


давление


газа


и


сравните


его


значение


со


значениями

указанными


в


разделах


4.5 (

давление


газа


на


горелке

), 

в


соответствии


с


моделью


установленного


котла

8 To adjust the pressure rotate the 

maximum gas pressure adjustment (A in 
Fig. 6.5)until you obtain the required 
pressure (by rotating clockwise the 
pressure increases). 


Чтобы


увеличить


давление

поворачивайте


регулятор


максимальное


давления


газа

  (

С


на


рис

.6.5) 

до


тех


пор

пока


не


получите


необходмые


показатели


(

при


вращении


по


направлению


часовой


стрелки

давление


возрастает

). 

9  Check the maximum gas flow at the gas 

meter and compare the value indicated in 
the section 4.4 (gas rate), accordingly 
with the model of boiler installed. 


Проверьте


максимальный


расход


газа


на


газовом


счетчике


и


сравните


значения

указанные


в


разделах

 4.5  

(

расход


газа

), 

в


соответствии


с


моделью


установленного


котла

10  Switch off the boiler. 


10 

Выключите


котел

11 Disconnect the gas modulator coil by 

removing the electrical connector B Fig. 
6.5). 


11 

Отключите


модулирующую


газовую


катушку

отсоединив


электрический


контакт


В

 (

рис

. 6.5). 


9

7

6

5


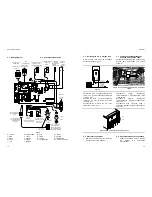
Fig. 6.4


Fig. 6.5


12  Switch on the boiler. 


12 

Включите


котел

Summary of Contents for PARVA CONTROL M90.24AV

Page 1: ...1796211072 17962 1107 2 4606 52A5 PARVA CONTROL MODEL M90 24AV USER MANUAL AND INSTALLATION INSTRUCTIONS...

Page 2: ...erous to obstruct even partially the air intakes used to aerate the room where the boiler is installed to use extractor fans fire places and the like in the same room at the same time as the boiler to...

Page 3: ...the gas cocks get the assistance of a qualified person Do not touch the appliance with parts of the body that are wet or damp and or bare feet In case of structural work or maintenance near the exhaus...

Page 4: ...ng the addition of an external control you can eliminate the boiler from your fault analysis Do not forget to range rate the boiler to suit the system requirements This procedure is covered in the com...

Page 5: ...e boiler to follow the timed settings Some products incorporate an anti cycling time delay It is normal when first switching the boiler on for the boiler to operate on heating for a few seconds then s...

Page 6: ...1 Warnings 39 7 2 Procedures 39 8 Maintenance 8 1 Warnings 41 8 2 Dismanting the external panels 41 8 3 Emptying the ch system 42 8 4 Cleaning the primary heat exchanger 42 8 5 Checking the pressurisa...

Page 7: ...e left hand side panel adjacent to the data badge the self adhesive label included with the conversion kit indicating the type of gas and the gas pressures to which the appliance has been set 11 12 Re...

Page 8: ...tructions relating to the procedures for adapting the boiler to the type of gas available and subsequent calibration described below are presented in sections 6 5 and 6 6 6 5 6 6 7 2 Procedures 7 2 1...

Page 9: ...ur Fill in the details required on the Boiler Guarantee Certificate and hand to the User advising them to return the correct section for boiler Guarantee registration Finally advise the User that for...

Page 10: ...s normally provided by the installer for this purpose 2 2 If you are in any doubt regarding this procedure you are advised to contact your Installer or an Approved Engineer This appliance is provided...

Page 11: ...ment potentiometer marked RISC Fig 6 8 Rotating the potentiometer anti clockwise reduces the maximum supply current to the gas modulator device and thus reduces the gas pressure to the burner RISC 6 8...

Page 12: ...e operation light 9 will flash every 2 seconds operating boiler 4 7 2 5 9 2 Commissioning 35 6 6 Adjusting the burner ignition 6 6 1 Turn off the boiler by means of the fused spur isolation switch pro...

Page 13: ...ment will be necessary A full explanation of the gas pressure adjustment procedure is given in the Gas Valve section of the service manual If maximum and or minimum gas pressures are adjusted then the...

Page 14: ...iance operation light 9 will flash every 4 seconds 7 2 9 9 4 Commissioning 33 5 Set the d h w and c h temperature control knobs to their maximum position 5 6 Switch on the boiler and if external contr...

Page 15: ...panel of the case see section 8 2 in this manual 1 8 2 2 Open the gas valve inlet pressure test point 36 in Fig 6 5 at the valve input connect a suitable pressure gauge check the gas pressure of the s...

Page 16: ...ll turn and leave open permanently 3 21 6 2 1 4 Open the C h circuit filling valve 12 in Fig 6 1 and fill the C h circuit see section 2 2 4 12 6 1 2 2 5 Open each radiator air release tap starting wit...

Page 17: ...be inspected and cleaned This service can be part of a maintenance contract In particular you are advised to have the following checks carried out primary heat exchanger domestic hot water storage tan...

Page 18: ...ter comes out of the pressure relief valve Check that the C h circuit filling valve is closed as described in the section 2 2 of this manual 2 2 Check on the temperature and pressure gauge 4 on sectio...

Page 19: ...ting it upwards 5 14 Connect the two temperature probe wires between D h w storage tank temp probe terminals Fig 5 15 5 15 Insert D h w storage tank temp probe in the longest probe sheath Fig 5 16 5 1...

Page 20: ...on switch Fig 5 11 T 1 2 L N 3 Room thermostat Power supply terminal block External controls terminal block Fig 5 12 5 Connect the electrical supply flexible cord coming from the fused spur isolation...

Page 21: ...to facilitate the operations on the internal parts 3 5 9 45 4 Loosen the screws J and remove the service panel Fig 5 10 4 J 5 10 For the electrical connection to the boiler use electric wires which co...

Page 22: ...C h temp probe NTC Primary circuit flow switch Three way diverter valve D h w storage tank temp probe NTC NTC Pump Gas valve Installation 25 5 7 Installing the D h w storage tank 5 7 D h w storage tan...

Page 23: ...l information 17 4 4 Technical Data mod M90 24AV 4 4 Nominal heat input kW 26 6 Minimum heat input kW 11 0 Maximum useful output kW 24 0 Minimum useful output kW 9 3 Central heating Temp regulation ra...

Page 24: ...ney working at the nominal heat input 1 Installation 23 5 3 Installing the bracket 5 3 Precautions Utilise the paper template supplied with the boiler to determine the fixing position for the bracket...

Page 25: ...by promoting formation of a protective skin on metal surfaces and neutralising gases present in the water Technical information 19 4 5 Hydraulic specifications 4 5 0 00 0 10 0 20 0 30 0 40 0 50 0 2 0...

Page 26: ...d only in an adequately ventilated room in conformity with the standards A minimum air flow rate of 2 m3 h per kW of max heat input must be ensured 2m3 For LPG the appliance must also conform with the...

Reviews: