background image

Commissioning 

40 

5  Re-assemble the burner and the front 

panel of the combustion 


Установите


на


место


горелку

переднюю


панель


камеры


сгорания


и


съемную


переднюю


часть


герметичной


камеры

6  Extract the control panel as explained in 

the section 5.8 of this manual. 


Извлеките


панель


управления

как


описано


в


разделе

 5.8 

настоящего


руководства

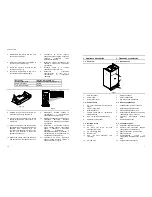
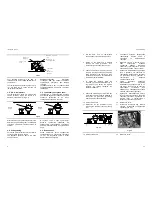
7  Loosen the screws A and remove the 

service panel (Fig. 7.2). 


Ослабьте


винты


А


и


снимите


сервисную


панель

 (

рис

. 7.2) 

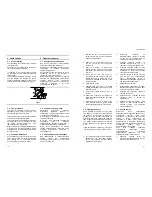
8  set correctly the dip-switch “2” (Fig. 7.3) in 

accordance with the following table. 


Правильно


установите


переключатель

 "2" (

рис

. 7.3) 

в


соответствии


со


следующей


таблицей


Gas supply 

Position of dip-switch n.2 

Используемый


газ


Положение


переключателя

 n. 2 

Natural gas/

Метан

 On/

Вкл


L.P.G./

Сжиженый


газ

 Off/

Выкл


A


Fig. 7.2 

ON

OFF

1 2

3 4

ON

OFF

1

2

3 4

Natural gas

L.P.G.


Fig. 7.3 


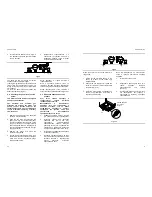
9  Calibrate the gas valve according to the 

instructions given in the section 6.5. 


Калибруйте


газовый


клапан


в


соответствии


с


инструкциями

приведенными


в


разделе

 6.5. 

10 Set the correct gas pressure for central 

heating output required, see section 6.7 in 
this manual. 


10 

Выберите


правильное


давление


для


требуемой


выходной


тепловой


мощности

см

раздел

 6.7 

настоящего


руководства

11 Stick on the inside of the left hand side 

panel adjacent to the data badge the self-
adhesive label (included with the 
conversion kit) indicating the type of gas, 
and the gas pressures to which the 
appliance has been set. 


11 

Приклейте


с


внутренней


стороны


левой


боковой


панели

расположив


рядом


с


табличкой


с


данными

наклейку


(

поставлется


с


преобразовательным


комлектом

с


указанием


типа


газа


и


давлением

на


которое


был


настроен


котел

12  Replace the service panel, the left hand-

side panel and the front panel of the case. 


12 

Установите


на


место


сервисную


панель

левую


боковую


панель


и


переднюю


панель


корпуса


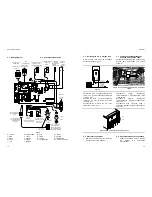
  1 


1. Appliance description 


1. 

Описание


устройства


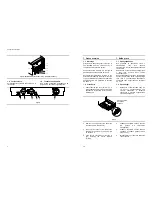
1.1. Overview 


1.1 

Внешний


вид


1

2

3


Fig. 1.1 

1 Case 

front 

panel 


Передняя


панель


2 Control 

panel 


Панель


управления


Control panel cover 


Крышка


панели


управления


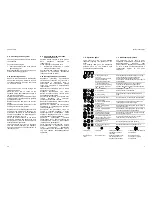
1.2. Control Panel 


1.2 

Панель


управления


C.h. circuit temperature and pressure 
gauge 


Термоманометр


с

-

мы


отопления


Lock-out signal lamp 


Индикатор


блокировки


котла


Boiler reset button 


Кнопка


разблокировки


котла


Function switch and c.h. temperature 
adjustment knob 


Переключатель


режимов


и


регулятор


температуры


с

-

мы


отопления


D.h.w. temperature adjustment knob 


Регулятор


температуры


горячей


воды


Appliance operation light 


Индикаторы


функций


1.3. Isolation valves 


1.3 

Запорные


краны


10 Gas 

label 


10 

Наклейка


с


параметрами


газа


11  C.h. return pipe, D.h.w. coil heat 

exchanger return pipe 


11 

Обратка


с

-

мы


отопления

обратка


спирального


теплообменника


12 

C.h. circuit filling valve 


12 

Кран


заполнения


с

-

мы


отопления


13 

Gas inlet cock 


13 

Кран


подачи


газа


14  D.h.w. coil heat exchanger flow 

connection 


14 

Подсоединение


подачи


на


спиральный


теплообменник


горячей


воды


15 C.h. 

flow 

pipe 


15 

Труба


подводки


отопления


Summary of Contents for PARVA CONTROL M90.24AV

Page 1: ...1796211072 17962 1107 2 4606 52A5 PARVA CONTROL MODEL M90 24AV USER MANUAL AND INSTALLATION INSTRUCTIONS...

Page 2: ...erous to obstruct even partially the air intakes used to aerate the room where the boiler is installed to use extractor fans fire places and the like in the same room at the same time as the boiler to...

Page 3: ...the gas cocks get the assistance of a qualified person Do not touch the appliance with parts of the body that are wet or damp and or bare feet In case of structural work or maintenance near the exhaus...

Page 4: ...ng the addition of an external control you can eliminate the boiler from your fault analysis Do not forget to range rate the boiler to suit the system requirements This procedure is covered in the com...

Page 5: ...e boiler to follow the timed settings Some products incorporate an anti cycling time delay It is normal when first switching the boiler on for the boiler to operate on heating for a few seconds then s...

Page 6: ...1 Warnings 39 7 2 Procedures 39 8 Maintenance 8 1 Warnings 41 8 2 Dismanting the external panels 41 8 3 Emptying the ch system 42 8 4 Cleaning the primary heat exchanger 42 8 5 Checking the pressurisa...

Page 7: ...e left hand side panel adjacent to the data badge the self adhesive label included with the conversion kit indicating the type of gas and the gas pressures to which the appliance has been set 11 12 Re...

Page 8: ...tructions relating to the procedures for adapting the boiler to the type of gas available and subsequent calibration described below are presented in sections 6 5 and 6 6 6 5 6 6 7 2 Procedures 7 2 1...

Page 9: ...ur Fill in the details required on the Boiler Guarantee Certificate and hand to the User advising them to return the correct section for boiler Guarantee registration Finally advise the User that for...

Page 10: ...s normally provided by the installer for this purpose 2 2 If you are in any doubt regarding this procedure you are advised to contact your Installer or an Approved Engineer This appliance is provided...

Page 11: ...ment potentiometer marked RISC Fig 6 8 Rotating the potentiometer anti clockwise reduces the maximum supply current to the gas modulator device and thus reduces the gas pressure to the burner RISC 6 8...

Page 12: ...e operation light 9 will flash every 2 seconds operating boiler 4 7 2 5 9 2 Commissioning 35 6 6 Adjusting the burner ignition 6 6 1 Turn off the boiler by means of the fused spur isolation switch pro...

Page 13: ...ment will be necessary A full explanation of the gas pressure adjustment procedure is given in the Gas Valve section of the service manual If maximum and or minimum gas pressures are adjusted then the...

Page 14: ...iance operation light 9 will flash every 4 seconds 7 2 9 9 4 Commissioning 33 5 Set the d h w and c h temperature control knobs to their maximum position 5 6 Switch on the boiler and if external contr...

Page 15: ...panel of the case see section 8 2 in this manual 1 8 2 2 Open the gas valve inlet pressure test point 36 in Fig 6 5 at the valve input connect a suitable pressure gauge check the gas pressure of the s...

Page 16: ...ll turn and leave open permanently 3 21 6 2 1 4 Open the C h circuit filling valve 12 in Fig 6 1 and fill the C h circuit see section 2 2 4 12 6 1 2 2 5 Open each radiator air release tap starting wit...

Page 17: ...be inspected and cleaned This service can be part of a maintenance contract In particular you are advised to have the following checks carried out primary heat exchanger domestic hot water storage tan...

Page 18: ...ter comes out of the pressure relief valve Check that the C h circuit filling valve is closed as described in the section 2 2 of this manual 2 2 Check on the temperature and pressure gauge 4 on sectio...

Page 19: ...ting it upwards 5 14 Connect the two temperature probe wires between D h w storage tank temp probe terminals Fig 5 15 5 15 Insert D h w storage tank temp probe in the longest probe sheath Fig 5 16 5 1...

Page 20: ...on switch Fig 5 11 T 1 2 L N 3 Room thermostat Power supply terminal block External controls terminal block Fig 5 12 5 Connect the electrical supply flexible cord coming from the fused spur isolation...

Page 21: ...to facilitate the operations on the internal parts 3 5 9 45 4 Loosen the screws J and remove the service panel Fig 5 10 4 J 5 10 For the electrical connection to the boiler use electric wires which co...

Page 22: ...C h temp probe NTC Primary circuit flow switch Three way diverter valve D h w storage tank temp probe NTC NTC Pump Gas valve Installation 25 5 7 Installing the D h w storage tank 5 7 D h w storage tan...

Page 23: ...l information 17 4 4 Technical Data mod M90 24AV 4 4 Nominal heat input kW 26 6 Minimum heat input kW 11 0 Maximum useful output kW 24 0 Minimum useful output kW 9 3 Central heating Temp regulation ra...

Page 24: ...ney working at the nominal heat input 1 Installation 23 5 3 Installing the bracket 5 3 Precautions Utilise the paper template supplied with the boiler to determine the fixing position for the bracket...

Page 25: ...by promoting formation of a protective skin on metal surfaces and neutralising gases present in the water Technical information 19 4 5 Hydraulic specifications 4 5 0 00 0 10 0 20 0 30 0 40 0 50 0 2 0...

Page 26: ...d only in an adequately ventilated room in conformity with the standards A minimum air flow rate of 2 m3 h per kW of max heat input must be ensured 2m3 For LPG the appliance must also conform with the...

Reviews: