4
2
Instructions for use
2.1
Warnings
Biasi UK Ltd support the Benchmark initiat-
ive. The Benchmark Log Book is located at
the back of this manual and should be com-
pleted by the Installing/Commissioning En-
gineer and handed over to the User for fu-
ture reference by other visiting Engineers.
Also included is the Service Interval Record
card that should be completed by the Ser-
vice Engineer following the annual service
maintenance of the boiler and system.
All CORGI Registered Installers carry a
CORGI ID card, and have a registration
number. Both should be recorded in your
Benchmark Log Book. You can check your
installer is registered by calling CORGI di-
rect on 01256 372300.
In order to guarantee safety and correct oper-
ation, it is essential that all the tests are carried
out by a competent and responsible service
engineer before lighting up the boiler.
The tests are described in the
installation in-
structions
in section 7
commissioning.
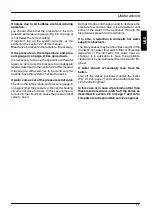
Ensure that the c.h. circuit is regularly filled with
water (even if the boiler is only used for d.h.w.
supply) checking that the pressure indicated
on the temperature and pressure gauge 4 is
not lower than that shown in Fig. 2.2.
If the pressure reading on the pressure gauge
is below that shown in Fig. 2.2, then the system
will require topping up. A filling loop is normally
provided by the installer for this purpose.
If you are in any doubt regarding this pro-
cedure you are advised to contact your In-
staller or an Approved Engineer.
This appliance is provided with a built in anti---
freeze system that operates the boiler when the
temperature is below 5
û
C
Therefore, when the boiler is not lit or used in
cold weather, with consequent risk of freezing
do not switch off the boiler at the fused spur
isolation switch or close the gas inlet cock
.
When you do not expect to use the boiler for a
long period and the boiler is not to be used for
frost protection then follow the instructions
given in section 2.6 on page 7.
2.2
Refilling procedure
1 Isolate the boiler from the electrical supply at
the fused spur. Reconnect the filling loop as
demonstrated in Fig. 2.1.
Temporary
connection
Control valve
Control valve
Double check valve
Supply pipe
(cold water inlet)
C.h. return pipe
Fig. 2.1
2 Open the valves of the filling loop and watch
the gauge until it reaches normal filling pres-
sure as shown in Fig. 2.2.
4
Normal filling
pressure
Fig. 2.2
3 Close the valves and remove the filling loop.
If you experience any difficulty with the oper-
ation of the boiler, switch off the boiler immedi-
ately at the fused spur isolation switch and
contact your Installer or an approved Service
Engineer
Air introduced into the boiler during this filling pro-
cess will vent through the automatic air purger
fitted to the boiler. You may also find it necessary
to vent air from your radiator circuit using your
radiator key, however be aware that excessive
venting will cause the pressure in the system to
drop.
Always ensure that the pressure gauge is set at the
required pressure.
2.3
Ignition
1 Check that the valves located in the lower part
of the boiler are open (Fig. 2.3).
USE

