Step 3: Attach Top Wall Caps
A:
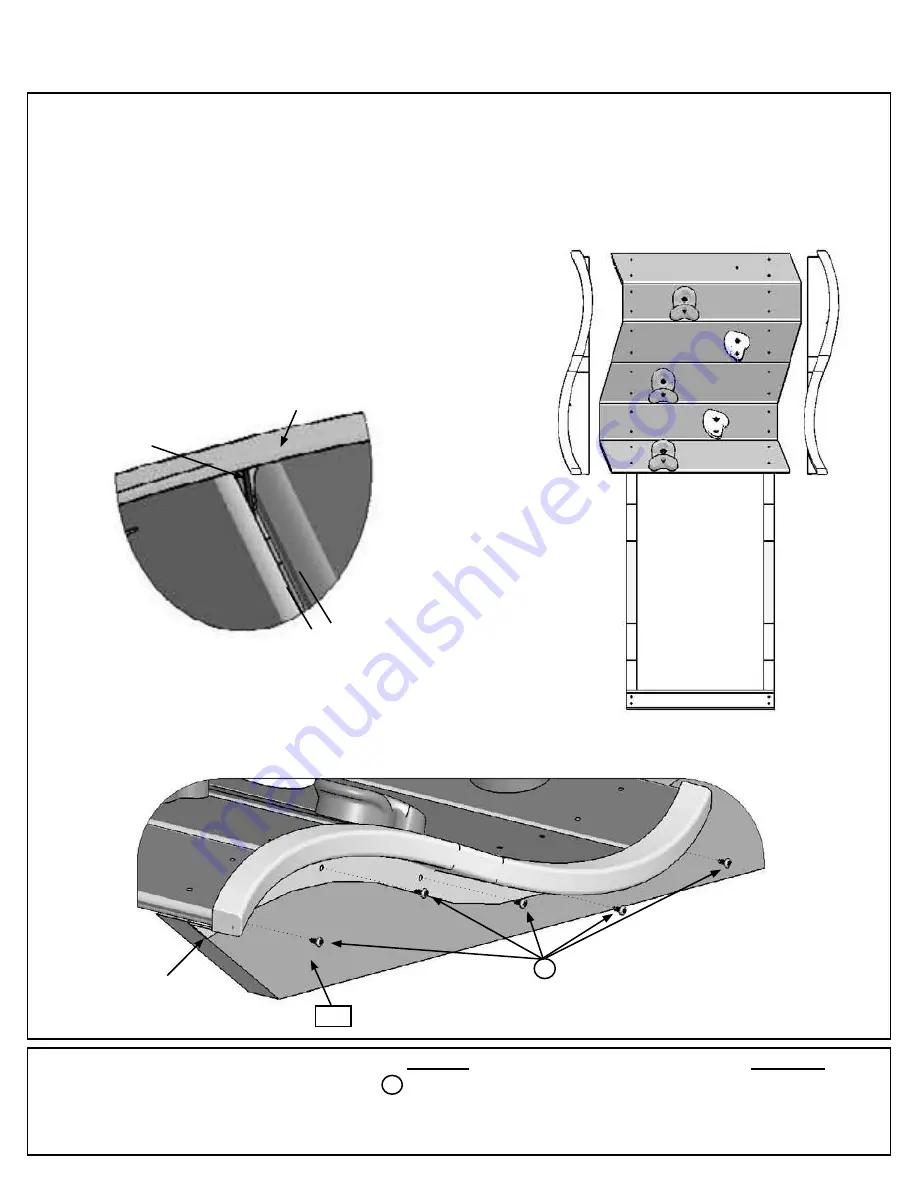
Attach 1 - Wiggle Wall Cap Left to the left side of the Wiggle Boards as shown in fig. 3.1.
B:
The tab inside the cap should fit between the Wiggle Boards so a slight gap will form. (fig. 3.2)
C:
Make sure the cap end is flush to the top of (B29) Wiggle Joist and then attach Wiggle Wall Cap Left to the
(B29) Wiggle Joist with 5 (S5) #8 x 1/2” Pan Screws. (fig. 3.3)
D:
Repeat Steps A - C for the Wiggle Wall Cap - Right.
Fig. 3.1
Fig. 3.2
Fig. 3.3
Cap
Tab inside Cap
Cap end flush
to board end
S5
Gap between boards
Hardware
10 x
#8 x 1/2” Pan Screw
S5
1 x Wiggle Wall Cap Left
1 x Wiggle Wall Cap Right
Other Parts
B29
16
Summary of Contents for F23100
Page 2: ......
Page 3: ......
Page 4: ......
Page 5: ......
Page 6: ...Square Assembly...
Page 71: ...NOTES 71...


