19
2.
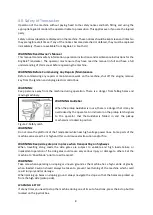
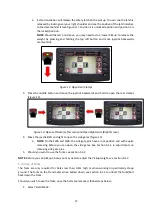
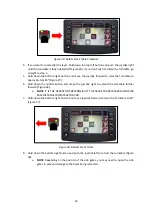
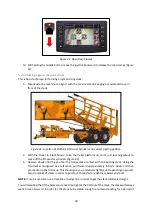
Once the bale is in the correct position, tight to the pickup and against the Guidebar. Push the
joystick forward and then release
(assumed you’re already in field mode). This will pick the
bale up and place on the Turntable for you (Figure 16).
o
Should you wish to stop the automated sequence at any point, just push the joystick
left or right and this will cancel the function and the machine will await operator input.
To know it
’
s cancelled, the brown highlighted auto-pickup symbol will change to the
background colour again.
o
NOTE
: If the
Guidebar is retracted, ‘Auto
-
Pickup’ won’t work.
3.
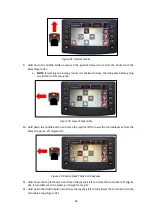
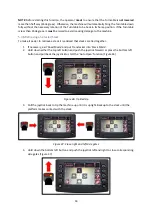
Should you want the pickup tines to penetrate the bale further, push the joystick forward and
hold it will continue inserting the tines until the joystick is released at which point it will
continue the auto-pickup sequence. This could therefore allow you to reduce the
‘Auto
Insert
Tines’
timer and if the tine penetration
isn’t
sufficient then hold the joystick it is. See setting
on how to adjust timer.
4.
Now repeat the process to fill the Turntable, (this will be 2 six string bales or 3 four string
bales)
The design of machine requires the bale being picked up to push the bale already on the turntable
across. To assist with pushing the bales across the turntable there are two additional functions built
into the
‘A
uto-Pickup
’
sequence which are explained below:
•
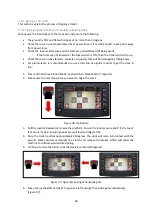
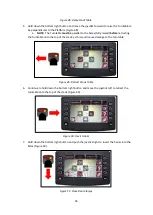
During the lowering of the pickup within the auto pickup sequence, should you wish to push
the bale further across the turntable, wait until the pickup is approximately half way through
lowering (Pickup is parallel to the turntable) and then push and hold the joystick forward. This
will raise the pickup again to push the bale further across the turntable.
o
If the setting ‘Extend Tines in Bump’ is ‘Active’, it will also reinsert the tines to
push
the bale even further. You will need to let the pickup lower enough to give enough
time for the tines to insert before they make contact with the bale. See Extra Setting
in section 6.3.3
to learn about ‘
Extend Ti
nes in Bump’
setting. If you are unsure of the
stage of the machine, reference the ‘function description’ displayed in the top right
corner of the screen (see section 5.2.5)
5.
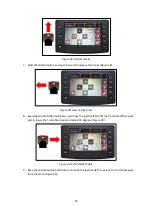
During the pickup lifting the bale during the auto pickup sequence, you can push the joystick
forward and this will lower the pickup. When you release it, it will continue to raise the pickup
again. It is recommended to test the functionality without a bale to become familiar with it.
This is very useful if the bale being lifted by the pickup is trying to sit on top of the bale already
on the turntable.
o
If bump (pickup lower) speed is found too aggressive, it is possible to slow down the
bump speed by reducing
the setting ‘Auto Lower Pickup Speed’
NOTE
: Reducing this setting will marginally slow down overall pickup cycle.
5.3.4
Picking up a bale manually
1.
Align the bale as described in the previous section.
Summary of Contents for Transtacker
Page 7: ...7 3 0 Machine Overview Figure 1 Transtacker Overview...
Page 43: ...43 Figure 59 Auto Settings Screen...
Page 57: ...57 8 1 Auto Pickup Sequence Figure 69 Auto Pickup Diagram...
Page 58: ...58 8 2 Auto Stack Sequence both with and without tie Figure 70 Auto Stack Diagram...
Page 59: ...59 8 3 Auto Lower Turntable Figure 71 Auto Lower Turntable Diagram...
Page 60: ...60 8 4 Auto Open Sequence Figure 72 Auto Open Diagram...
Page 61: ...61 8 5 Auto Tip Bed Down Sequence Figure 73 Auto Tip Bed Down Diagram...
Page 62: ...62 8 6 Road Mode Sequence Figure 74 Road Mode Diagram...


