background image

18

19

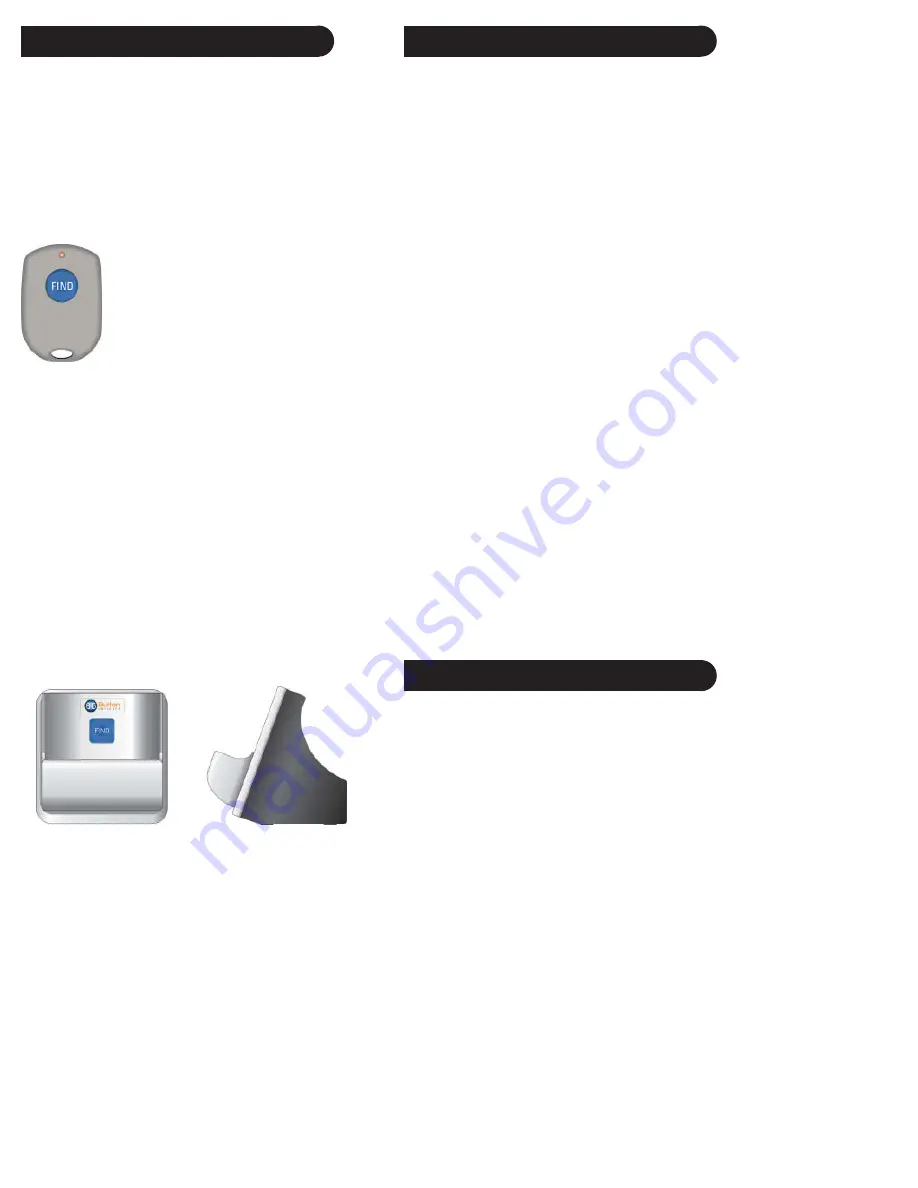
  Optional Accessories

Your new remote has a “Find Feature” build 
in. If you purchase either of the accessories 
below you can press a button to locate your 
remote if you misplace it. When your press the 
button the remote emits a loud tone to let you 
know where it is.

The optional keyfob can be kept 
on your key chain with your keys 
and lets you easily locate your 
lost remote with the push of a 
button. Two coin cell batteries are 
included. To replace them, pry 
the Keyfob open and replace with 
two CR2016 Lithium coin cells.

The optional stand is a handy place to store 
your remote, and if you misplace the remote 
the button on the stand lets you easily locate it.

The stand requires two AAA batteries, not 
included.

  Troubleshooting

Remote does not operate your product.

•   Press the mode button of the product you want 

to control.

•   Program the remote with a new code.
•   Install new batteries. (You might have to 

reprogram your remote after installing new 
batteries.)

•   Remote may not be compatible with your 

product.

Remote does not operate some features of your 
product.

•   Program remote with a new code.
•   Remote may not be able to operate all features 

of your product or button names might be 
different than your product.

Green Indicator blinks after you program a 
product code.

•   Remote did not accept the code.
•   Try to program the code again or try a different 

code.

For help with setup, please call: 201-661-9944.

The manufacturer warrants that this product shall 
be free from defects in material, workmanship 
and assembly, under normal use, in accordance 
with the speci

fi

 cations and warnings, for 120 days 

from the date of purchase. This warranty extends 
only to the original purchaser of the product, 
and is nontransferable. Defective products, 
together with the dated proof of purchase, must 
be returned to the place of purchase for repair or 
replacement. THERE ARE NO OTHER EXPRESS 
WARRANTIES. Incidental and consequential 
damages are disclaimed where permitted by law. 
This warranty gives you speci

fi

 c legal rights, and 

you may also have other rights which vary from 
state to state.

  Limited Warranty

Summary of Contents for BB40

Page 1: ...BB40 Owner s Manual ...

Page 2: ...on your equipment Some functions of your particular equipment e g menu functions may not be controlled by this remote In such cases use the original remote control for your equipment Please use this manual to become familiar with your Universal Remote After you are familiar with your remote the first thing you need to do is to install batteries and setup your remote for your particular product and...

Page 3: ...N Changes the volume level of the product normally the TV 7 UP DOWN LEFT RIGHT navigation buttons 8 MENU Brings up the DVD disc Menu screen use with the UP DOWN LEFT RIGHT navigation buttons 9 PAGE Moves one screen down at a time in guides and menus 10 NUMBERS Enter numbers for direct channel selection Some products require Enter to be pressed after channel selection 11 ENTER Used after direct cha...

Page 4: ... 3 Enter the 4 digit Cable code from the code tables on separate sheet Note after a valid code entry the green indicator turns off For an invalid code the green indicator flashes 4 With your device on press POWER If the device turns off no further programming is required Note If some buttons do not operate your equipment try one of the other codes for your brand Setup Battery Installation 1 On the...

Page 5: ...f some buttons do not operate your equipment try one of the other codes for your brand To set up your remote to control a VCR 1 Press and hold the SETUP button until the green indicator under a mode button stays on then release the SETUP button 2 Press and release the DVD VCR mode button The green indicator for DVD VCR mode blinks then stays lit 3 Enter the 4 digit VCR code from the code tables on...

Page 6: ...utton until the green indicator under a mode button stays on then release the SETUP button 2 Press and release the desired mode button TV SAT CBL etc The green indicator for that mode blinks then stays lit 3 Press and release the SETUP button The green indicator blinks off 4 To find the first digit for the code stored under the mode key pressed in step 2 press each numeric key from 0 9 in turn Whe...

Page 7: ... on then release the SETUP button Setup cont 2 Press and hold the MUTE button until the green indicator blinks off then release the button 3 Press and release the desired Mode button TV SAT CBL etc for Volume Mute control the green indicator for that mode blinks then stays on 4 Press and release the MUTE button and the green indicator turns off The green indicator will blink rapidly for three seco...

Page 8: ...t the height of either remote to achieve this Use the IR Transmitter Finder feature to assist you Code learning h Keep the distance between the two remotes to approximately 1 inch and do not move or change the distance between the two remotes until you have learned all the required buttons for that Mode i When Learning do not release the button being Learned until the green indicator has blinked o...

Page 9: ...ommands are learned Code Learning is now complete 1 6 Line up your remotes that you re learning from in front of the Learning remote on a hard surface approx 1 inch apart 2 3 Learning Commands 4 To Clear all Learned Commands under a mode 1 Press and hold the SETUP button until a green indicator turns on Release the SETUP button 2 Press and release the button for the mode you want to clear TV SAT C...

Page 10: ...lling new batteries Remote may not be compatible with your product Remote does not operate some features of your product Program remote with a new code Remote may not be able to operate all features of your product or button names might be different than your product Green Indicator blinks after you program a product code Remote did not accept the code Try to program the code again or try a differ...

Page 11: ...BB40 7 11 Made in China ...

Reviews: