LED Indicators
“G” or
Ground
On: PDU is grounded properly
Off: PDU is not grounded
“P” or
Power
Blue: Good / Protected and Clean power
Red: Bad, No Protection
“N” or
Network
Blinking Red: No Network Connection
Solid Blue: Good Network Connection
Rapid Blinking Red: PDU failure requires reboot or
reset
Outlet
Status
On: Outlet is On
Off: Outlet is Off
INSTALLATION
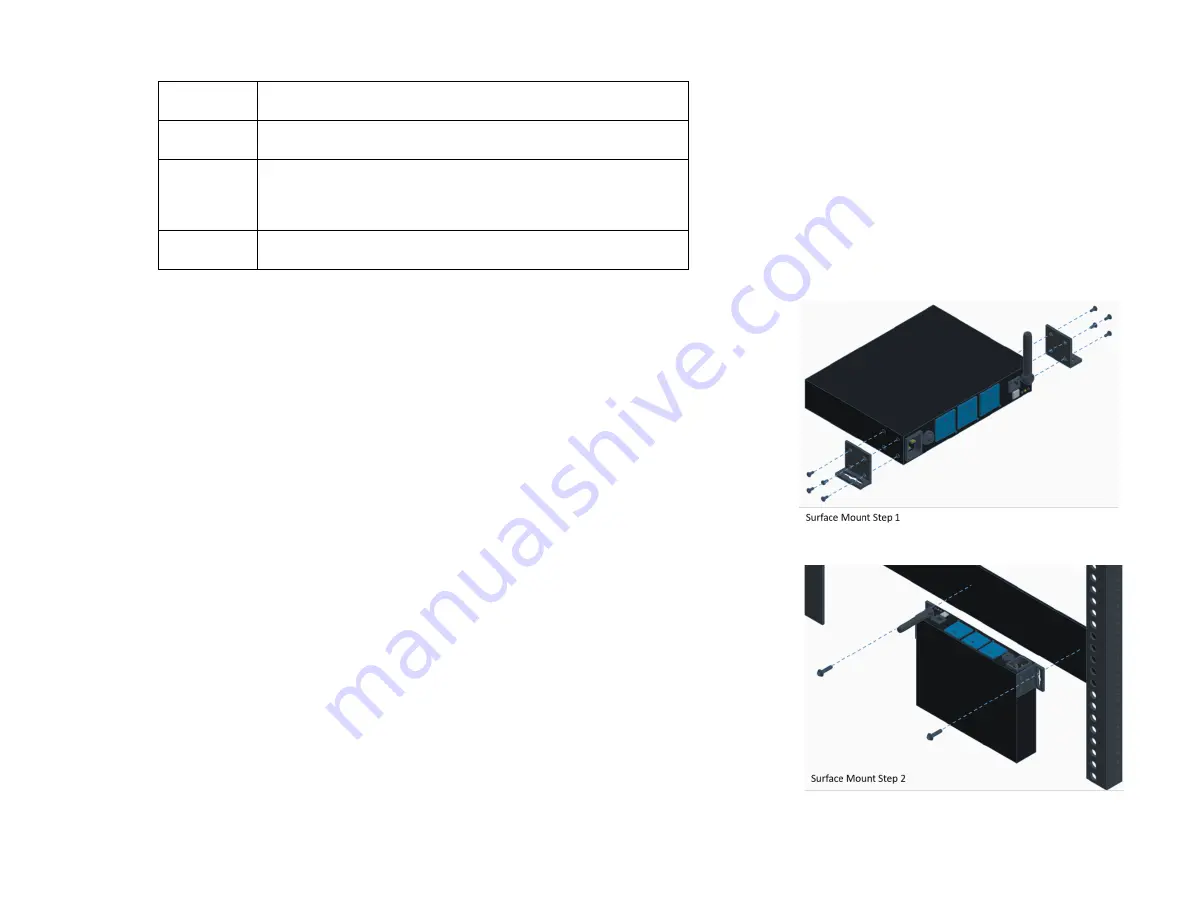
Surface Mount
Step 1)
Use the included screws to attach surface mount ears to PDU
a) Surface mount ears may be attached at 0°, 90°, 180°, and 270° to accommodate
desired mounting orientation
Step 2)
Install appropriate surface mount screws (not included) through the surface
mount ears into the desired surface.
CONNECTIONS and USE
Physical Connections
Step 1)
Plug in all to be used connections Including:
a) Ethernet LAN
i) Skip the Ethernet cable if you will be using Wi-Fi
b) Connected equipment power cables
Step 2)
Insert the female end of the included 6ft power cord into the PR-W3PI
Step 3)
Plug in the Male end of the included 6ft power cord into the mains outlet on
the wall.
Summary of Contents for MAVbase PR-W3PI
Page 1: ...PR W3PI...


