Install the BiSaddle and lightly tighten your seatpost bolts,
while still allowing for some movement and adjustments (do
NOT sit on the saddle or ride the bike yet).
6.
STEP
Installing the Fully Adjusted BiSaddle on Your Bike
www.BikeFit.com
Instructions for Use
BiSaddle ShapeShifter EXT -
BikeFit Edition
Part# 8050201-5
Form# 0050201
Toll Free 855-813-3233
Kirkland, WA 98034 • USA
You can adjust the shape of BiSaddle to custom fi t your body and riding style. And, if your riding style or body
shape change, you can simply re-adjust for ultimate comfort.
BiSaddle Shapeshifter is the world’s only adjustable shape saddle. (PATENTED)
All components are replaceable making it the last saddle you’ll ever need to buy.
The split-saddle design can change it’s width, angle and profi le (fl atness) to fi t your unique body shape, riding
position and riding style.
The perfect BiSaddle shape eliminates pain, numbness, discomfort and genital injury!
FEATURES:
• Adjustable Width 130 - 185mm
• Saddle weight varies from 275 g to 340 g based upon your frame selection
• UCI compliant race length (243mm long)
• Ultra sleek stealth black
• Takes pressure off your unmentionables
• Helps you ride faster, further
To set the fore-aft adjustment, replicate your old
measurement from the widest point of the saddle to the
center of the stem clamp:
To set the height, simply replicate the height you measured on your old saddle. You may also want to adjust the tilt
of the saddle top. We suggest starting with the top of the saddle fl at, or slightly tilted downwards.
DOUBLE CHECK THAT ALL BOLTS ARE TIGHTENED PROPERLY BEFORE RIDING YOUR BIKE!
Bring the necessary wrenches on your fi rst few rides, as some small tweaks may be necessary to get the position
100% dialed in. Often times a small adjustment in height, tilt, or fore-aft can make a big difference in comfort.
Also feel free to experiment with the saddle width, always making sure to carefully adjust it and properly tighten
the bolts before riding again.
Always let comfort be your guide!
Installing
Profi le Wedges
5.
STEP
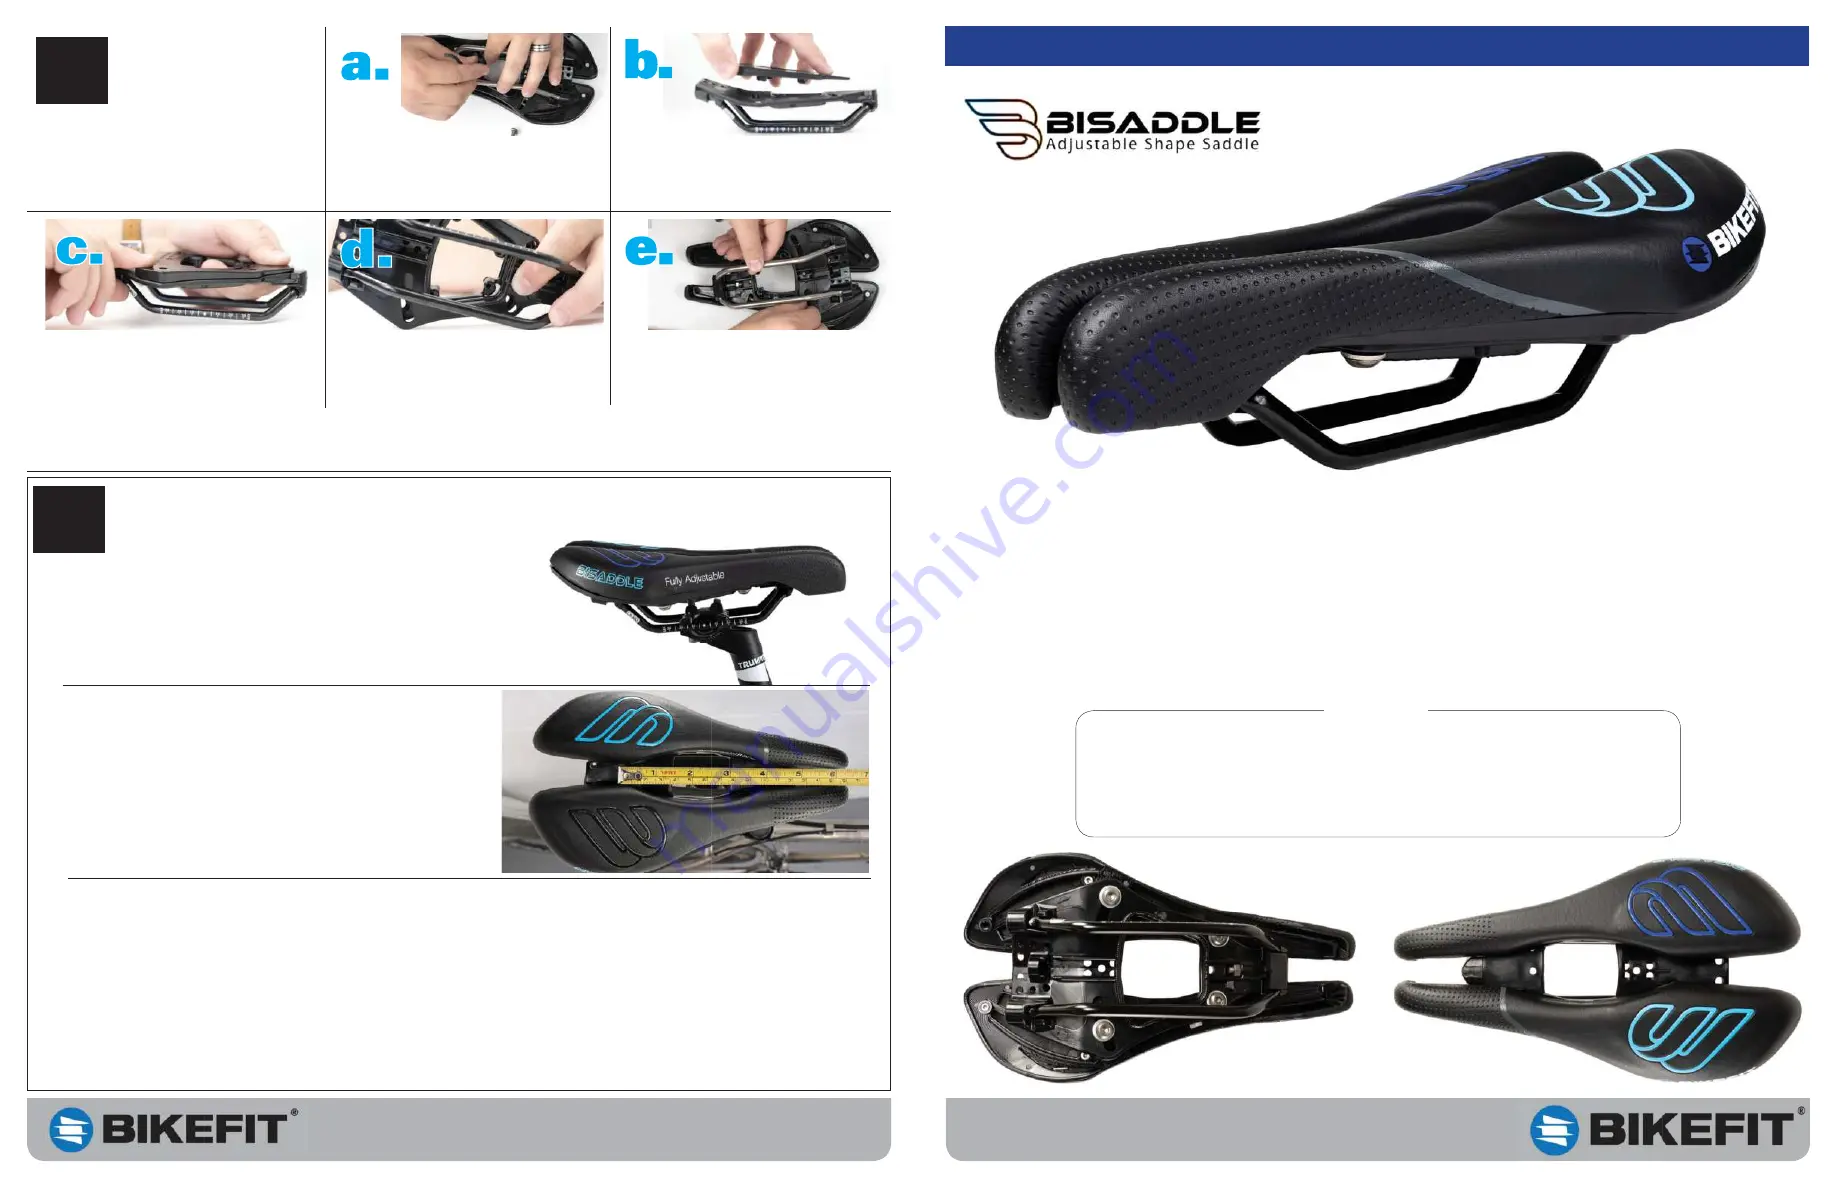
To install the wedges, remove the four
bolts from the bottom of the saddle.
NOTE: The REAR bolts are slightly longer
than the front bolts.
Place the wedge on the saddle frame,
ensuring that it is properly aligned.
Press down so alignment knobs can
engage frame.
Press down on rear of wedge to snap into
frame.
The tabs will align to the groove in the cut
out of the saddle frame.
Replace the bolts and washers. Use the
longest set in the back and the mid length set
on the front. Your shortest set will be left over
when using wedges. Adjust as needed.
MAX torque 25 in/lbs or 2.8 NM
Please consider your local
BikeFit Pro for help with fi nding
your saddle settings.
US Patent # 10,118,658, 6,209,954.
Additional patents pending
Made in the USA
There are no absolute rules that dictate who should use wedges. In general, people with good fl exibility and forward hip rotation
tend to prefer a fl atter saddle. People who aren’t as fl exible and/or to struggle with saddle sores tend to prefer a more rounded
saddle. We suggest you start with no wedges, and add them if you run in to a specifi c problem.
Register your saddle online at:
bisaddle.com/register
FIND INSTRUCTIONS ONLINE:
https://blog.bikefi t.com/instructions


