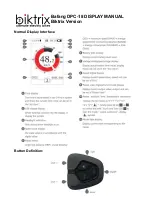


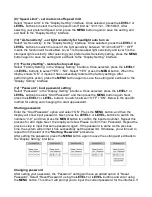
Display Backlight/Headlight Switch
Press and hold the
LIGHT
button to turn on the display backlight as well as the bike headlight.
Press and hold the
LIGHT
button again to turn off the display backlight and the headlight.
There are 5 levels of backlight brightness that can be selected by the user (can be set in
“Brightness”).
*If the display is turned on in a dark environment, the display backlight/ headlight will
be turned on automatically. The sensitivity of this can be changed. If the display
backlight/headlight are turned off manually, they also need to be turned on manually
afterwards.
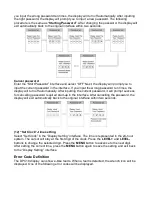
Walk assistance mode
Press and hold the
LEVEL-
button to enter walk assistance mode. The walking mode symbol
will be displayed in the PAS level area. To exit walk assistance mode, release the
LEVEL-
key.
Riding Mode Selection
Press and hold the
LEVEL+
button to switch the bike between ECO and SPORT mode.


