46
WAN Service
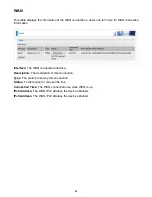
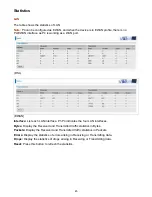
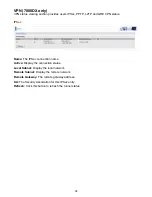
The table shows the statistics of WAN.
Interface:
Display the connection interface.
Description:
the description for the connection.
Bytes:
Display the WAN Received and Transmitted traffic statistics in Bytes.
Packets:
Display the WAN Received and Transmitted traffic statistics in Packests.
Errors:
Display the statistics of errors arising in Receiving or Transmitting data.
Drops:
Display the statistics of drops arising in Receiving or Transmitting data.
Reset:
Press this button to refresh the statistics.
xTM
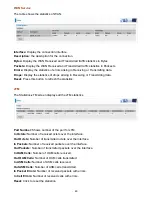
The Statistics-xTM screen displays all the xTM statistics
Port Number:
Shows number of the port for xTM.
In Octets:
Number of received octets over the interface.
Out Octets:
Number of transmitted octets over the interface.
In Packets:
Number of received packets over the interface.
Out Packets:
Number of transmitted packets over the interface.
In OAM Cells:
Number of OAM cells received.
Out OAM Cells:
Number of OAM cells transmitted.
In ASM Cells:
Number of ASM cells received.
Out ASM Cells:
Number of ASM cells transmitted.
In Packet Errors:
Number of received packets with errors.
In Cell Errors:
Number of received cells with errors.
Reset:
Click to reset the statistics.
Summary of Contents for 7800DX
Page 19: ...15 3G LTE Router mode ...
Page 37: ...33 Click link 192 168 1 254 it will lead you to the following page ...
Page 40: ...36 Click 192 168 1 254 it will lead you to the following page ...
Page 43: ...39 Click 192 168 1 254 it will lead you to the following page ...
Page 99: ...95 Configure AP as Enrollee Add Registrar with PIN Method 1 Set AP to Unconfigured Mode ...
Page 143: ...139 Accessing mechanism of Storage In your computer Click Start Run enter 192 168 1 254 ...
Page 145: ...141 Access the folder public ...
Page 148: ...144 Step 2 Click Add a Printer Step 3 Click Add a network wireless or Bluetooth printer ...
Page 159: ...155 Rule inactive ...
Page 186: ...182 ALG The ALG Controls enable or disable protocols over application layer ...
Page 194: ...190 ...
Page 197: ...193 ...
Page 204: ...200 5 Input the account user name and password and press Create ...
Page 205: ...201 6 Connect to the server ...
Page 206: ...202 7 Successfully connected ...
Page 208: ...204 ...
Page 219: ...215 4 Input Internet address and Destination name for this connection and press Next ...
Page 220: ...216 5 Input the account user name and password and press Create ...
Page 238: ...234 2 ipoe_eth0 with DDNS www hometest1 com using username password test test ...
Page 251: ...247 Click Apply to confirm your settings ...
Page 262: ...258 Example Ping www google com ...
Page 263: ...259 Example trace www google com ...

