169
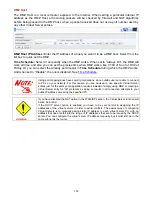
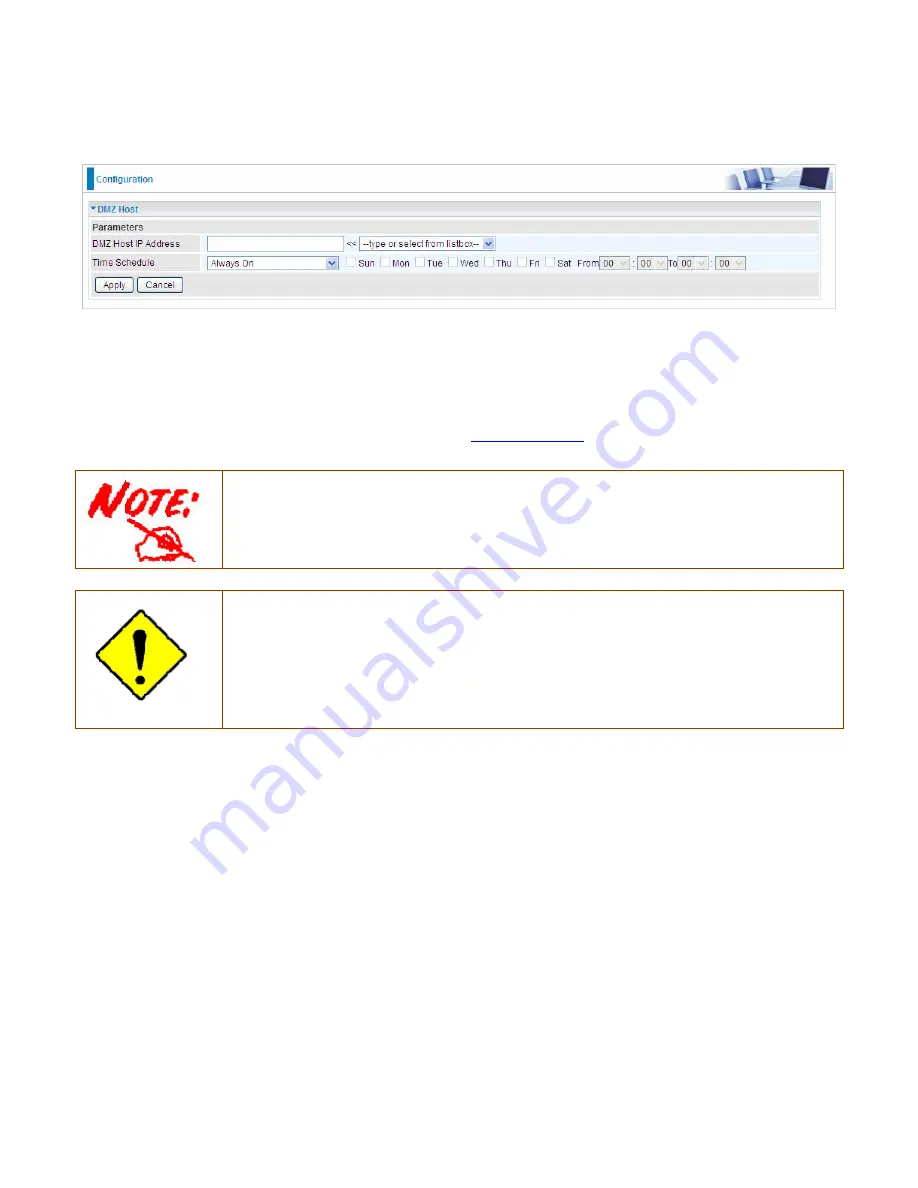
DMZ Host
The DMZ Host is a local computer exposed to the Internet. When setting a particular internal IP
address as the DMZ Host, all incoming packets will be checked by Firewall and NAT algorithms
before being passed to the DMZ host, when a packet received does not use a port number used by
any other Virtual Server entries.
DMZ Host IP Address:
Enter the IP Address of a host you want it to be a DMZ host. Select from the
list box to quick set the DMZ.
Time Schedule:
Select or set exactly when the DMZ works. When set to “Always On”, the DMZ will
work all time; and also you can set the precise time when DMZ works, like 01:00 of Sun to 19:00 of
Friday. Or you can select the already set timeslot in
Time Schedule
during which the DMZ works.
And when set to “Disable”, the rule is disabled. See
Time Schedule
.
Using port mapping does have security implications, since outside users are able to connect
to PCs on your network. For this reason you are advised to use specific Virtual Server
entries just for the ports your application requires instead of simply using DMZ or creating a
Virtual Server entry for “All” protocols, as doing so results in all connection attempts to your
public IP address accessing the specified PC.
Attention
If you have disabled the NAT option in the WAN-ISP section, the Virtual Server function will
hence be invalid.
If the DHCP server option is enabled, you have to be very careful in assigning the IP
addresses of the virtual servers in order to avoid conflicts. The easiest way of configuring
Virtual Servers is to manually assign static IP address to each virtual server PC, with an
address that does not fall into the range of IP addresses that are to be issued by the DHCP
server. You can configure the virtual server IP address manually, but it must still be in the
same subnet as the router.
Summary of Contents for BiPAC 7800DXL
Page 19: ...15 3G LTE Router mode ...
Page 39: ...35 Click 192 168 1 254 it will lead you to the following page ...
Page 42: ...38 Click 192 168 1 254 it will lead you to the following page ...
Page 68: ...64 7 Success ...
Page 136: ...132 Accessing mechanism of Storage In your computer Click Start Run enter 192 168 1 254 ...
Page 138: ...134 Access the folder public ...
Page 141: ...137 Step 2 Click Add a Printer Step 3 Click Add a network wireless or Bluetooth printer ...

