KBF + KMF (E6) 07/2017
page 117/155
(2)
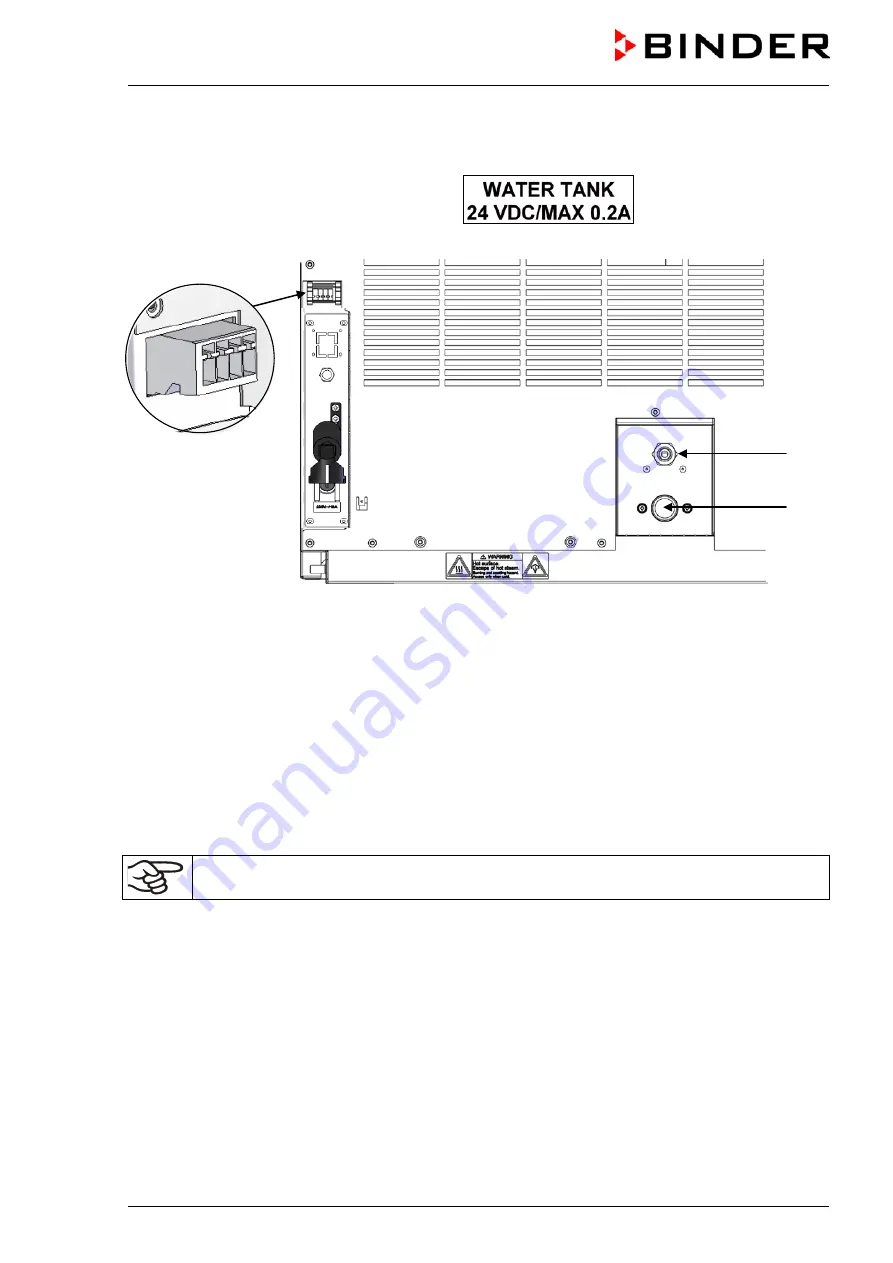
Cable connections
Connect the plug of the cable to the socket (10) at the rear of the chamber.
The socket (10) is marked with a sticker:
Socket (10)
(14)
(13)
Figure 25: Connections at the chamber rear
(3)
Hose connections
Plug the freshwater hose into the hose connection (16) above the freshwater can and secure it with
a hose clamp. You can use a part of the standard supplied water hose.
Screw the hose nozzle (brass) to the free edge of the hose and screw it directly onto the freshwa-
ter connection “IN” (13) at the rear of the chamber.
When the freshwater can is empty, the message “Freshwater supply” will be displayed on the controller
(chap. 11.1.3), the buzzer sounds, and the humidification module turns off. After acknowledging the
alarm, the humidification module tries to fill up and start operating.
To guarantee humidification during 24 hours even at high humidity set-points with manual
water supply, we recommend filling the freshwater can (option) at the end of each day.
Summary of Contents for KBF 115
Page 137: ...KBF KMF E6 07 2017 page 137 155 23 8 Dimensions size 115 ...
Page 138: ...KBF KMF E6 07 2017 page 138 155 23 9 Dimensions size 240 ...
Page 139: ...KBF KMF E6 07 2017 page 139 155 23 10 Dimensions size 720 ...
Page 140: ...KBF KMF E6 07 2017 page 140 155 23 11 Dimensions size 1020 ...
Page 142: ...KBF KMF E6 07 2017 page 142 155 ...
Page 143: ...KBF KMF E6 07 2017 page 143 155 ...
Page 144: ...KBF KMF E6 07 2017 page 144 155 24 2 EU Declaration of Conformity for KMF ...
Page 145: ...KBF KMF E6 07 2017 page 145 155 ...
Page 146: ...KBF KMF E6 07 2017 page 146 155 ...
Page 148: ...KBF KMF E6 07 2017 page 148 155 ...
Page 149: ...KBF KMF E6 07 2017 page 149 155 25 Product registration ...


