background image

5

SPRay GUn

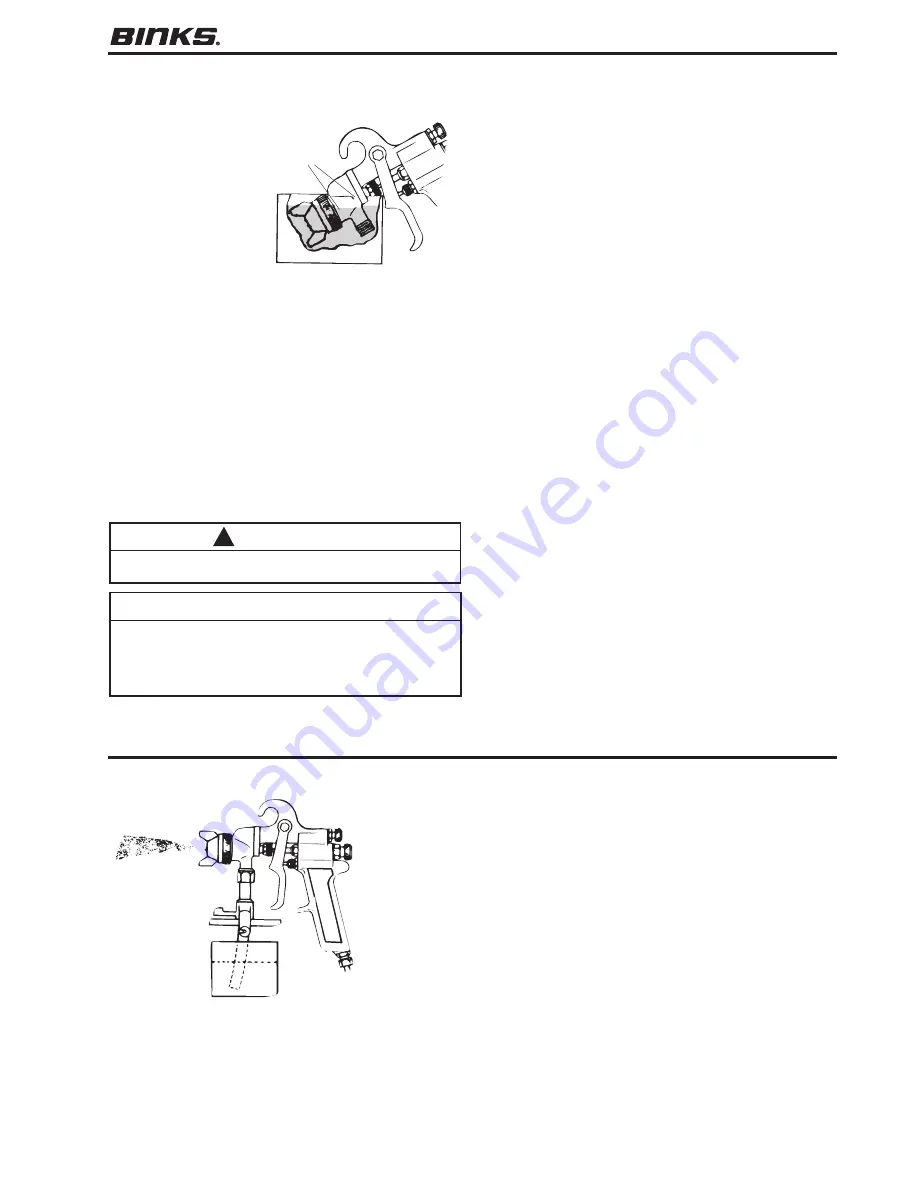
1.  Immerse only the 

front end of the gun 
until solvent just  
covers the fluid  
connection.

2.  Use a bristle brush 

and solvent to wash 
off accumulated paint.

3.  Do not submerge the 

entire spray gun in 
solvent because:

  a.   the lubricant in the leather packings will dissolve and the 

packings will dry out.

  b.   the lubricant at wear surfaces will dissolve causing harder 

operation and faster wear.

  c.   residue from dirty solvent may clog the narrow air  

passages in the gun.

4.  Wipe down the outside of the gun with solvent-dampened rag.
5.  Lubricate gun daily. Use a light machine oil on: 
  a.   fluid needle packing.
  b.   air valve packing.
  c.   side port control packing.
  d.   trigger pivot point.
  Coat the fluid control spring with vaseline.

aIR nozzle, flUID nozzle, neeDle

1.  All nozzles and needles are  precision made. They should be 

handled with care.

2.  Do not make any alterations in the gun. To do so could cause  

finishing   difficulties.

3.  To clean nozzles, soak them in solvent to dissolve any dried 

material, then blow them clean with air.

4.  Do not probe any of the holes in the nozzles with metal 

instruments. If probing is necessary, use only a tool that is 
softer than brass.

 Caution

never use lubricants containing silicone since these lubricants 

can cause finish defects.

!

Binks MoDel 7

 SPRay GUn GeneRal MaInTenanCe

notE

all parts on a spray gun should be screwed in hand tight at 

first; this will avoid the possibility of cross threading the 

parts. If the parts can not be turned by hand easily, make 

sure you have the correct parts, unscrew, realign, and try 

again. neveR use undue force in mating parts.

When Used With Siphon Cup

A compatible thinner or solvent should 
be siphoned through gun by inserting 
tube in open container of that liquid. 
Trigger gun repeatedly to flush  
passageway thoroughly and to clean  
tip of needle.
When local codes prohibit spraying of 
thinner or solvent, use a gun washer to 
clean spray guns.

When Used With Pressure Tank

Shut off air supply to tank and release 
pressure on tank. Open vent and loosen 
air nozzle. Hold a piece of cloth over 
the air nozzle and squeeze  trigger. Air 
will back up through fluid nozzle, and 
force fluid out of hose into tank. Next, 
put enough thinner into tank to wash 
hose and gun thoroughly. Spray thinner 
through the gun until it is clean. Attach 
fluid hose to air line and blow it out 
thoroughly to remove all traces of  
materials and to dry it.

PoInTeRS on CleanInG

Keep thinner 

level below  

packing

Thinner

Summary of Contents for 7

Page 1: ... Clean Air filter Figure 5 Air Fluid Fluid Regulator Fluid Figure 4 Air Supply Air Supply Pressure Tank Clean Air filter Air Inlet Figure 3 Air Pressure Tank Fluid PRESSURE FEED TANK HOOKUP For portable painting operations double regulator Air pressure for atomization and fluid sup ply is regulated by two individual air regu lators on tank see figure 4 PRESSURE FEED CIRCULATING HOOKUP For heavy pr...

Page 2: ...ment if you are uncertain about its condition Never Modify the Equipment Do not modify the equipment unless the manufacturer provides written approval Know Where and How to Shut Off the Equipment in Case of an Emergency Pressure Relief Procedure Always follow the pressure relief procedure in the equipment instruction manual Noise Hazard You may be injured by loud noise Hearing protection may be re...

Page 3: ...o obtain the same coverage on the increased area SIPHON SPRAYING Set atomization pressure at approximate ly 50 PSI for lacquer and 60 PSI for enamel Test spray If the spray is too fine reduce the air pressure or open fluid control screw If the spray is too coarse close the fluid control screw Adjust the pattern width and repeat adjustment of spray if necessary PRESSURE SPRAYING After selecting cor...

Page 4: ...ion air pressure 2 Attempting to get too wide a spray pat tern with thin material Reducing air pressure will correct cause 1 To correct cause 2 open material control to full position by turning to left At the same time turn spray width adjustment to right This will reduce width of spray but will correct split spray pattern 1 Dried out packing around material nee dle valve permits air to get into f...

Page 5: ...y a tool that is softer than brass Caution Never use lubricants containing silicone since these lubricants can cause finish defects Binks Model 7 Spray Gun General Maintenance NOTE All parts on a spray gun should be screwed in hand tight at first this will avoid the possibility of cross threading the parts If the parts can not be turned by hand easily make sure you have the correct parts unscrew r...

Page 6: ...6 Binks Model 7 Spray Gun 12 13 15 14 16 17 18 19 57 53 54 56 21 22 23 24 25 26 27 28 29 30 20 31 32 33 37 38 39 40 36 41 42 44 45 46 47 43 48 49 50 51 52 12 35 34 ...

Page 7: ... PE Pressure feed external mix SE Siphon feed external mix Not furnished with nozzle Please order separately Furnished with nozzle All needles are stainless steel Nozzle and Needle Selection Chart Type of Fluid Viscosity To Be Sprayed Thin Sealers Lacquers Primers Stains Zinc Chromates Lubricants Medium Lacquers Enamels Varnishes Shellacs Primers Epoxies Urethanes Lubricants Medium Heavy House Pai...

Page 8: ...nt Atomizing pressure must be set to allow for the drop in air pressure between the regulator and the spray gun A DeVilbiss Clean Air filter is important A Clean Air filter serves a double purpose It eliminates blistering and spotting by keeping air free from oil and water and its precision air regulator makes possible perfect air pressure control at the gun The best spray gun in the world will no...

Reviews: