6
cLEanInG
(Continued)
11. Using a rag dampened with solvent, wipe the exterior
surface of the gun. Additionally, some solvents are
prohibited from being used for cleaning. The operator
must take care to use only approved cleaning solvents
for equipment cleaning. These materials are clearly
labeled as approved for cleaning and wash off opera-
tions. If the operator has any question on selecting
appropriate cleaning solvents, the operator should
consult a supervisor or plant environmental staff.
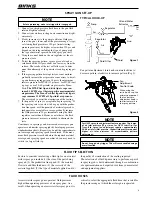
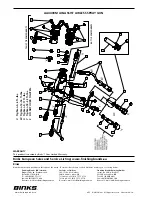
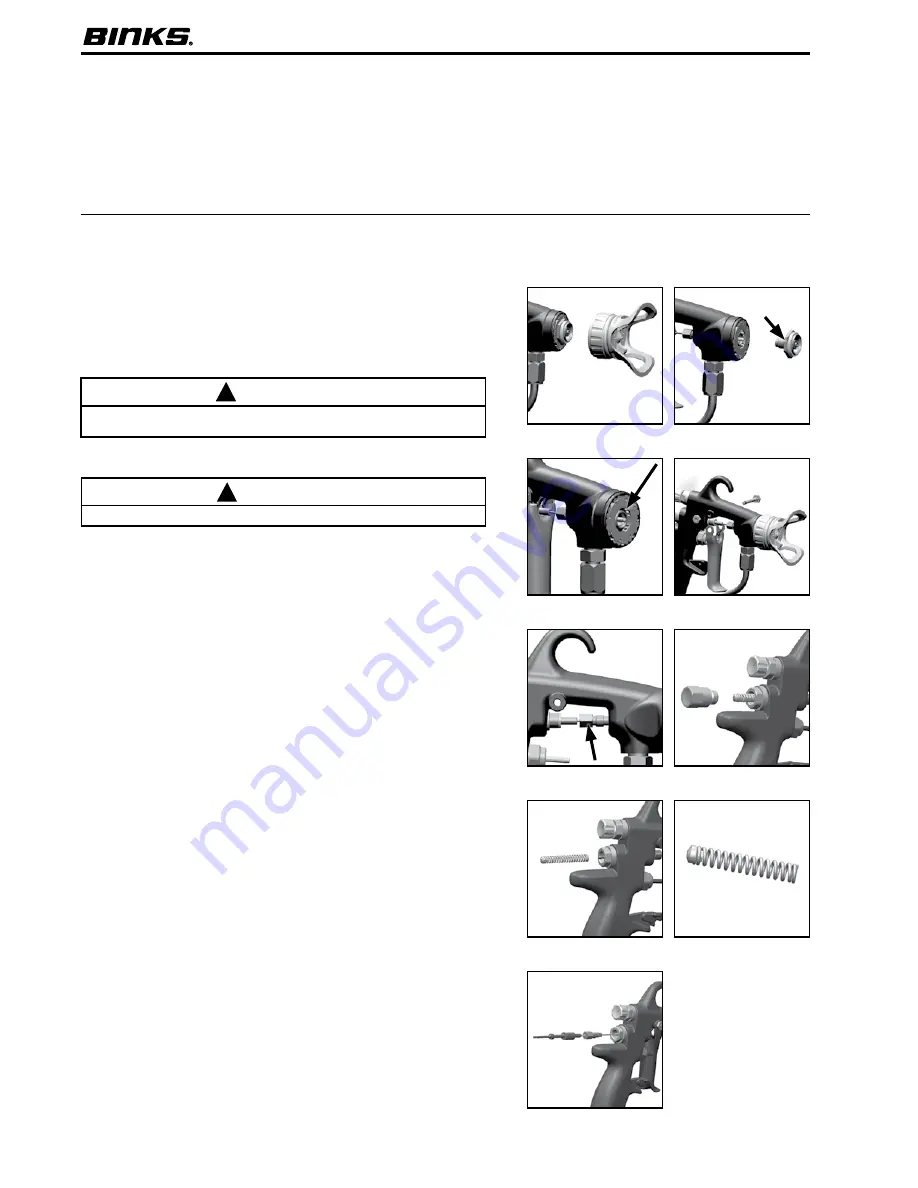
REPLacInG fLUID nozzLE anD/oR fLUID nEEDLE aSSEMBLY
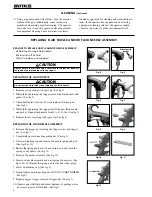
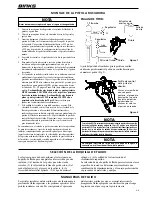
fig. 11
fig. 10
fig. 12
REaSonS to REPLacE nozzLE anD/oR nEEDLE aSSEMBLY:
A) Fluid leak through fluid nozzle.
B) Slow shut off of fluid.
C) No fluid when gun triggered.
REPLacInG tHE fLUID nozzLE
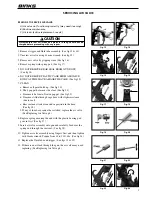
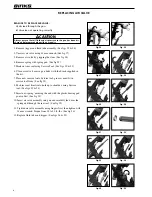
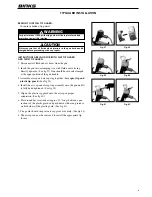
1. Remove air cap along with spray tip. (See fig 4)
2. While fully depressing the trigger remove the fluid nozzle and
gasket. (See fig 5)
3. Check baffle plate for wear. If worn replace with new part.
(See fig 6)
4. While fully depressing the trigger install the new fluid nozzle
and gasket. Torque fluid nozzle from 9 to 11 ft.-lbs. (See fig 5) .
5. Replace the air cap along with spray tip (See fig 4)
REPLacInG tHE fLUID nEEDLE aSSEMBLY
1. Remove the trigger by removing the trigger screw and trigger
nut. (See fig 7)
2. Completely unscrew needle packing nut. (See fig 8)
3. Unscrew blanking cap and remove the needle spring and pad.
(See figs 9 & 10)
4. Ensure the spring pad has not been worn down and clean the
spring of any debris. (See fig 11)
5. Remove the needle assembly. (See fig 12)
6. Insert new needle assembly and new spring if necessary. (See
figs 12 & 10) Ensure the spring pad is attached to the spring.
7. Screw on blanking cap. (See fig 9)
8. Gently tighten needle packing nut. DO nOT OVER TIGHTEn.
(See fig 8)
9. Replace trigger, trigger screw and trigger nut. (See fig 7)
10. Operate gun with fluid and adjust tightness of packing nut as
necessary to prevent fluid leak. (See fig 8)
CAutIon
always ensure that all fluid and air pressure to the gun has been dis-
charged before proceeding with any repairs.
!
CAutIon
Do not remove fluid tube when replacing the fluid nozzle.
!
fig. 4
fig. 7
fig. 9
fig. 6
fig. 8
fig. 5
nozzle with
gasket


