(5)
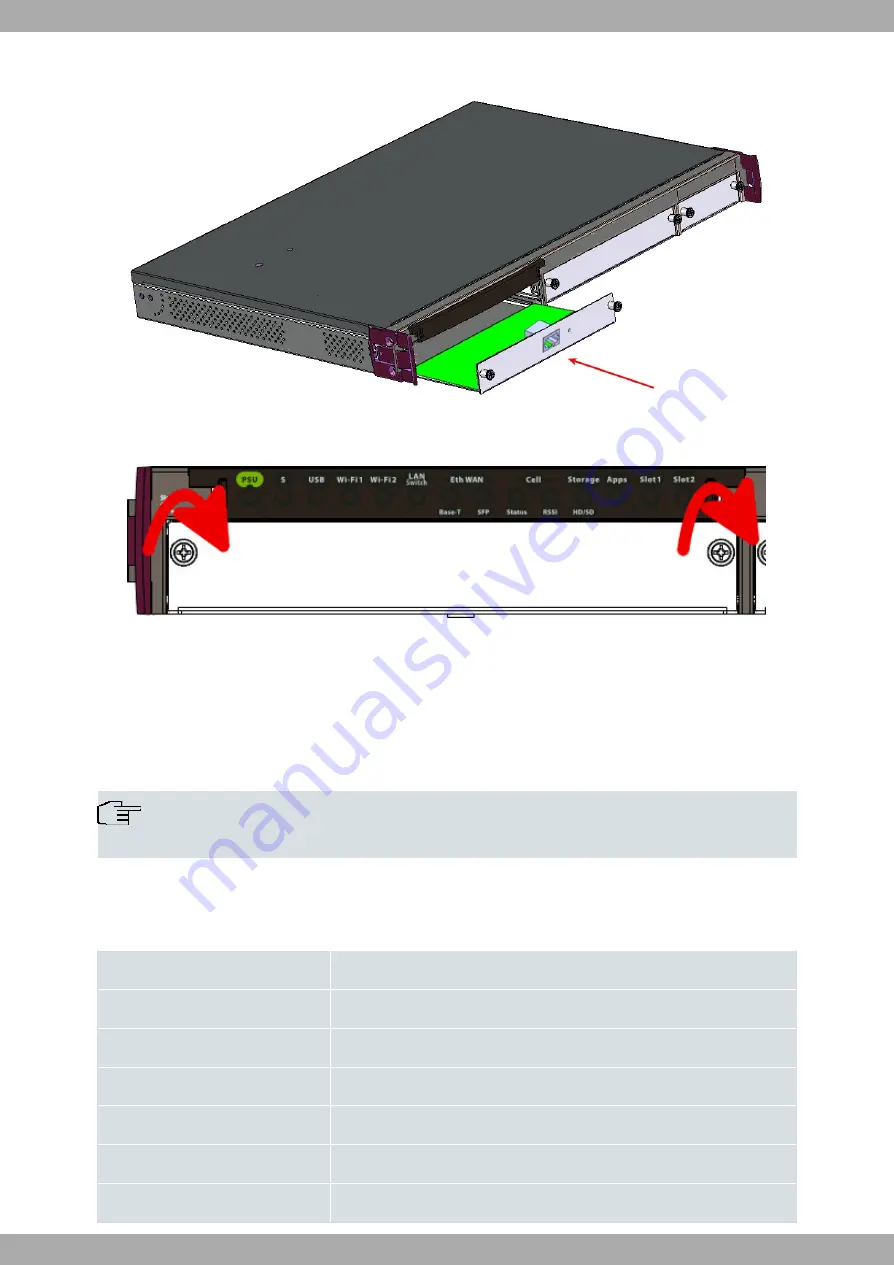
Finally, put the tray that holds the card back into the device.
Fig. 7:
Inserting the expansion card
(6)
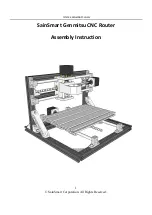
Screw the tray to the device.
Fig. 8:
Screw the tray to the front panel
(7)
Connect the equipment as indicated in section 3.5.1.1 "Connecting". Connect a terminal to the console and veri-
fy that the expansion card has been detected.
3.2.1 Compatible cards
RM7000 can be equipped with a wide variety of cards that expand the router features and interfaces.
Note
Please see the bintec website http://www.bintec-elmeg.com for a list of updated expansion cards.
Depending on the card type, it can be plugged in any expansion Slot, or only in the Slot#1
The following table lists the different models of cards that can be installed in Slot #1 or Slot #2 without restrictions:
RM7000 Slot#1 and Slot#2 compatible cards
Code
Description
RCTMATS1
One serial port card (synchronous/asynchronous).
RCTMATS2
Two serial ports card (synchronous/asynchronous).
RCTMATSFP
One port SFP card.
RCTMATE1T1
One port E1/T1 card. CABLE INCLUDED (RJ45/RJ45, 2m.)
RCTMATE1T1COAX
One port E1/T1 card. COAXIAL CABLE INCLUDED (RJ45/Coax5, 2m.)
RCTMATVADSL-VA
One port VADSL Annex-A (Vectoring)
bintec elmeg
3 Components and Power Supply
RM7000
9
Summary of Contents for RM7000
Page 5: ...I Related Documents bintec Dm748 I Software Updating bintec elmeg Related Documents RM7000 1 ...
Page 7: ...Fax 49 911 688 0725 Email support bintec elmeg com bintec elmeg 1 About this Guide RM7000 3 ...
Page 23: ...Fig 27 Inserting SD card bintec elmeg 3 Components and Power Supply RM7000 19 ...


