background image

(v)

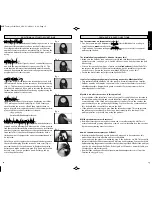
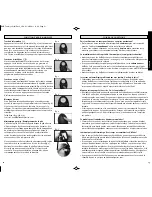
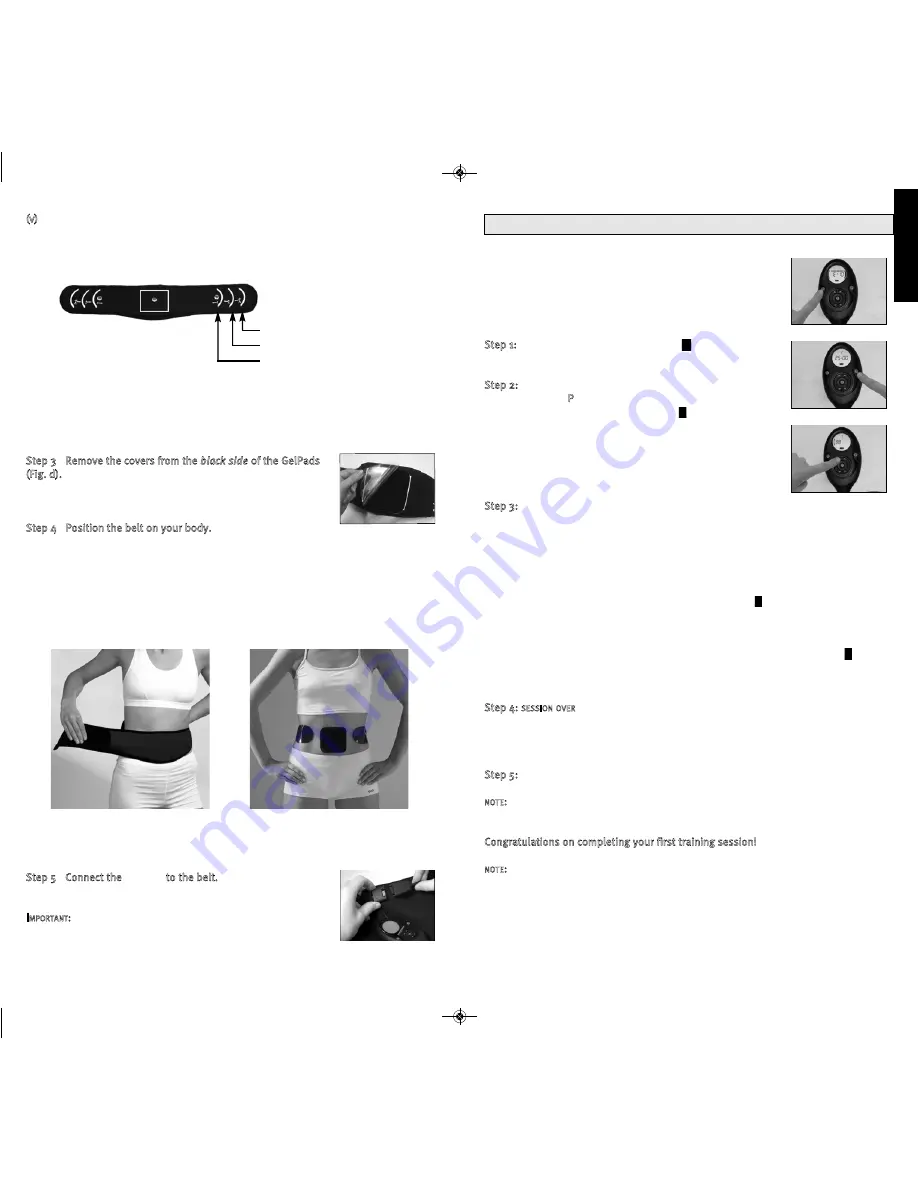
The location of the smaller GelPads depends on your waist size. In the picture below,

the positions for placing the GelPads for a small, medium and large waist size are
highlighted. Use the sizing guidelines below to help you choose your correct GelPad
location. 

IMPORTANT

:

Before you progress, make sure that all three silver studs are completely covered by
the GelPads. Press the edges of all three GelPads firmly onto the belt before use.

Step 3 

-

Remove the covers from the 

black side

of the GelPads

(Fig. d). 

Do not throw these covers away as you will need to put

them back onto the GelPads at the end of your session.

Step 4 

-

Position the belt on your body. 

Wrap the belt around your waist so that the GelPads are pressed firmly against your
skin, positioning the large square GelPad over your navel (belly button). Stretch the
ends of the belt around your waist (Fig. e) until the small GelPads are between your
hip bone and ribs on either side of your body (Fig. f). Fasten the belt tightly around
your waist, but not so tight as to cause discomfort. The GelPads are water-based, so
you may find they are cool when placed on your skin.

You are now ready to begin using 

BMR TUMMY LIFT

.

Step 5 

-

Connect the 

ACTIVATOR

to the belt.

The 

ACTIVATOR

and belt

must be connected for

BMR TUMMY LIFT

to work. ‘Click’ the 

ACTIVATOR

connector into the belt connector as shown in Fig. g. 

I

MPORTANT

:

Make sure the 

ACTIVATOR

and belt are connected correctly

or your 

BMR TUMMY LIFT

will not work - this is a safety feature.

Muscle toning can be an unusual sensation, but a pleasant
one. It may tickle to begin with. This progresses to a smooth
muscle contraction as the intensity increases. We recommend
that you use the product while seated until you become
accustomed to the sensation. To get started, follow these
simple steps:

Step 1:

Press and hold the on/off button (    ) for two seconds

to switch your 

ACTIVATOR

on (Fig. a).

Step 2:

Select the program you wish to use by pressing the

program button ( 

P

- Fig. b). Then to start the program, press

and hold the increase intensity buttons (    - Fig. c) until you
feel your muscles contracting. Always choose an intensity level
at which you feel a strong but comfortable contraction. This
will vary from person to person. You should try to reach an
intensity level of 15 or higher in your first session. The
increasing intensity level is displayed on the screen.

Step 3:

Continue increasing the intensity throughout the session if possible. You will

feel the muscle contractions getting stronger as the intensity increases. Remember the
harder you work your muscles the better the results you will see, but always reduce
the intensity if you feel any discomfort. Your 

BMR TUMMY LIFT

’s intensity range is 0-150. 

PAUSING A SESSION

If you wish to pause a session before it is finished, simply press the on/off button
briefly. The display will show that the session is paused (     ). To resume the session,
briefly press the on/off button again. The display will return to its normal mode.

INCREASING INTENSITY FASTER

If you wish to increase the intensity faster, press both intensity up buttons (    Fig. c )
and the information button ( 

i

) simultaneously. This will increase the intensity for

both sides at a faster rate.

Step 4:

SESSION OVER

At the end of the session your 

BMR TUMMY LIFT

will stop automatically. However, to switch

off your 

ACTIVATOR

at any time during a session, press and hold the on/off button for

two seconds. You should see the display turn off.

Step 5:

Remove the belt and lay it on a flat surface. Put the covers back on the 

black

side

of the GelPads. Store your 

BMR TUMMY LIFT

safely in the pouch until your next session.

NOTE

:

Do not disconnect the 

ACTIVATOR

from the belt without first switching it off, as this

may result in an error on your display. 

Congratulations on completing your first training session!

NOTE

:

We recommend that you do at least five training sessions per week to see the

best results. You should, however, only do one session per day on a single body area.

Fig. a

Fig. b

Fig. c

your first training session

8

9

Fig. d

Fig. g

Fig. e

Fig. f

English

L - For waist sizes 41”-47”/ 104-119cm

M - For waist sizes 32”-40”/ 81-102cm

S - For waist sizes 24”-31” / 61-79cm

BELT SIZES

BMR Tummy Lift IM Rev 2_USA  21/03/2011  11:02  Page 9

Summary of Contents for Tummy Lift

Page 1: ...cal Research Ltd All Rights Reserved Part No 2400 0331 Rev 2 Date of Issue 2 11 1 877 518 2323 ask bmrbeautyseries com SDI Inc A division of Bio Medical Research Ltd PO Box 5179 Hoboken NJ 07030 MODE...

Page 2: ...ion should be used in the following When there is a tendency to bleed internally following an injury or fracture Following recent surgical procedures when electronic stimulation may disrupt the healin...

Page 3: ...ed around your waist under your clothes during use It fits waist sizes 24 47 The belt has a pocket for holding the ACTIVATOR during use 2 Unit Connector This connects the belt to the ACTIVATOR sold se...

Page 4: ...rogram Button P Press this button to select the toning program you wish to use There are 10 programs in total which are explained later in this manual page 10 5 Information Button i Press this button...

Page 5: ...strong but comfortable contraction This will vary from person to person You should try to reach an intensity level of 15 or higher in your first session The increasing intensity level is displayed on...

Page 6: ...estyle Improve your diet and try to increase the amount of exercise you do 4 BMR TUMMY LIFT has 10 toning programs which are listed in the table below There are 8 core programs and 2 bonus programs Pr...

Page 7: ...past 3 months consult your doctor for approval before using the belt The stimulation is uncomfortable How can I improve this Make sure the GelPads are positioned correctly and that they are pressed fi...

Page 8: ...e display is on but there is no signal The battery symbol is flashing The symbol has appeared on the display Unpleasant feeling beneath the GelPads The contractions are very weak even when the trainin...

Page 9: ...82 Nylon 18 Elastane Hook Loop 100 Nylon Foam 100 Polyurethane Caring for your ACTIVATOR Your ACTIVATOR should not be allowed to get wet or be left in excessive sunlight It may be cleaned regularly u...

Page 10: ...uct failures not covered This Limited Warranty covers defects in manufacture that arise from correct use of the Product per the product manual and instructions It does not cover damage caused by abuse...

Page 11: ...ture la suite d une intervention chirurgicale lorsque l lectrostimulation pourrait interrompre le processus de gu rison sur les zones o la peau manque de sensation Votre produit n est pas destin des f...

Page 12: ...ille de 24 47 po Elle est galement munie d une poche dans laquelle vous pouvez ins rer l ACTIVEUR durant vos s ances d exercice 2 Raccord Ce raccord permet de brancher l ACTIVEUR la ceinture de tonifi...

Page 13: ...0 5 Touche d information i Appuyez sur cette touche pour conna tre les informations relatives votre s ance d entra nement telles que l intensit maximale de votre s ance en cours ou celle de votre s an...

Page 14: ...s muscles Choisissez toujours une intensit avec laquelle vous ressentez une forte contraction des muscles mais confortable Ce niveau d intensit varie toujours d une personne l autre Vous devriez attei...

Page 15: ...votre r gime alimentaire et augmentez la quantit d exercice que vous faites 4 Votre appareil BMR LIFT ABDOS compte 10 programmes de tonification d crits dans le tableau ci dessous Il y a 8 programmes...

Page 16: ...corriger cette situation Assurez vous que les GelPads sont positionn es correctement et qu elles sont press es fermement contre la peau voir pages 7 et 8 Si n cessaire teignez votre ACTIVEUR et repos...

Page 17: ...elPads ne recouvrent pas les rivets en m tal Message d erreur Solution Recharger la pile Recharger la pile Recharger la pile S assurer que la ceinture est correctement branch s l ACTIVEUR Appuyer ferm...

Page 18: ...aisser que votre ACTIVEUR se mouille ou qu il soit expos la lumi re du soleil de mani re excessive Il peut tre nettoy r guli rement l aide d un linge doux peine humide et savonneux Ne laissez pas que...

Page 19: ...correcte de ce Produit en suivant les directives indiqu es dans son mode d emploi Elle ne couvre pas les dommages caus s par l abus le mauvais usage les accidents les modifications ou les r parations...

Page 20: ...nes para los pacientes con posible epilepsia o con epilepsia diagnosticada contraindicaciones advertencias y precauciones Se deben tomar precauciones en los siguientes casos Cuando existe una tendenci...

Page 21: ...ajusta el tama o de 24 47 El cintur n tiene un bolsillo en el que puede guardar el ACTIVADOR durante el uso 2 Conector del ACTIVADOR Conecta el ACTIVADOR al cintur n de tonificaci n Aseg rese que el...

Page 22: ...ograma que desee utilizar Existen 10 programas en total que se explican m s adelante en este manual p gina 10 5 Bot n de informaci n i Pulse este bot n para ver la informaci n sobre la sesi n como la...

Page 23: ...tar la intensidad Fig c hasta que sienta los m sculos contraerse Elija siempre un nivel de intensidad en el que sienta una contracci n fuerte pero c moda Este nivel var a de una persona a otra Debe in...

Page 24: ...estimulaci n nunca debe ser inc moda 3 Utilice el producto como parte de un estilo de vida saludable Mejore su dieta e intente aumentar la cantidad de ejercicio que realiza 4 El producto tiene 10 pro...

Page 25: ...r de BMR m s pr ximo en bmrbeautyseries com o llamando al tel fono de atenci n al cliente de BMR Espa ol funciones adicionales de la unidad Bot n de informaci n i Pulse el bot n de informaci n en cual...

Page 26: ...la bater a Recargue la bater a Aseg rese de que el cintur n y el ACTIVADOR est n conectados correctamente Presione firmemente los GelPads contra la piel Retire las cubiertas de los GelPads Visite la p...

Page 27: ...en el ACTIVADOR Su interpretaci n es la siguiente El ACTIVADOR y el 0cintur n son productos fabricados por Bio Medical Research Ltd Parkmore Business Park West Galway Irlanda El ACTIVADOR necesita 1...

Page 28: ...arant a Limitada cubre los defectos de fabricaci n que surjan del uso correcto del Producto seg n el manual y las instrucciones del producto No cubre los da os ocasionados por el abuso uso indebido in...

Page 29: ...3 4 plan de 30 d as Semana D a 1 D a 2 D a 3 D a 4 D a 5 D a 6 D a 7 1 2 3 4 1 2 3 4 5 6 7 1 2 3 4 1 2 3 4 5 6 7 1 2 3 4 1 2 3 4 5 6 7 1 2 3 4 1 2 3 4 5 6 7 1 2 3 4 1 2 3 4 5 6 7 1 2 3 4 1 2 3 4 5 6...

Page 30: ...7 1 2 3 4 1 2 3 4 5 6 7 1 2 3 4 1 2 3 4 5 6 7 1 2 3 4 1 2 3 4 5 6 7 1 2 3 4 1 2 3 4 5 6 7 1 2 3 4 1 2 3 4 5 6 7 1 2 3 4 1 2 3 4 5 6 7 1 2 3 4 1 2 3 4 5 6 7 1 2 3 4 1 2 3 4 5 6 7 1 2 3 4 1 2 3 4 5 6 7...

Reviews: