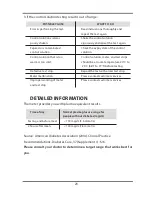
13
NOTE :
•
Choose a diff erent spot each time you test. Repeated punctures at the same spot may
cause soreness and calluses.
•
Please consult your health care professional before you begin AST.
•
It is recommended that you discard the fi rst drop of blood as it might contain tissue
fl uid, which may aff ect the test result.
⊙
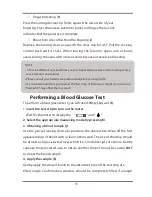
Fingertip testing (h)
Press the lancing device’s tip fi rmly against the lower side of your
fi ngertip. Press the release button to prick your fi nger, then a click
indicates that the puncture is complete.
⊙
Blood from sites other than the fi ngertip (i)
Replace the lancing device cap with the clear cap for AST. Pull the cocking
control back until it clicks. When lancing the forearm, upper arm or hand,
avoid lancing the areas with obvious veins because of excessive bleeding.
Performing a Blood Glucose Test
To perform a blood glucose test, you will need:
(b), (c), (e)
and
(f)
.
1. I
nsert the test strip to turn on the meter
Wait for the meter to display the “
” and “ ”.
2. Select the appropriate measuring mode by pressing M.
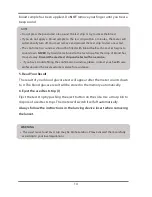
3. Obtaining a blood sample (j)
Use the pre-set lancing device to puncture the desired site. Wipe off the fi rst
appeared drop of blood with a clean cotton swab. The size of the drop should
be at least as big as
●
(actual size), which is 0.5 microliter (μL) of volume. Gently
squeeze the punctured area to obtain another drop of blood. Be careful
NOT
to smear the blood sample.
4. Apply the sample (k)
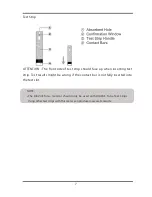
Gently apply the drop of blood to the absorbent hole of the test strip at a
tilted angle. Confirmation window should be completely filled if enough


