VaDia Startup Guide v1.1
20/25
www.biocontrol.no/vadia
8.3. Calibrate the vacuum sensors
The vacuum sensors of the VaDia are calibrated in the factory. Should it be
necessary to (re)calibrate the sensors then do the following.
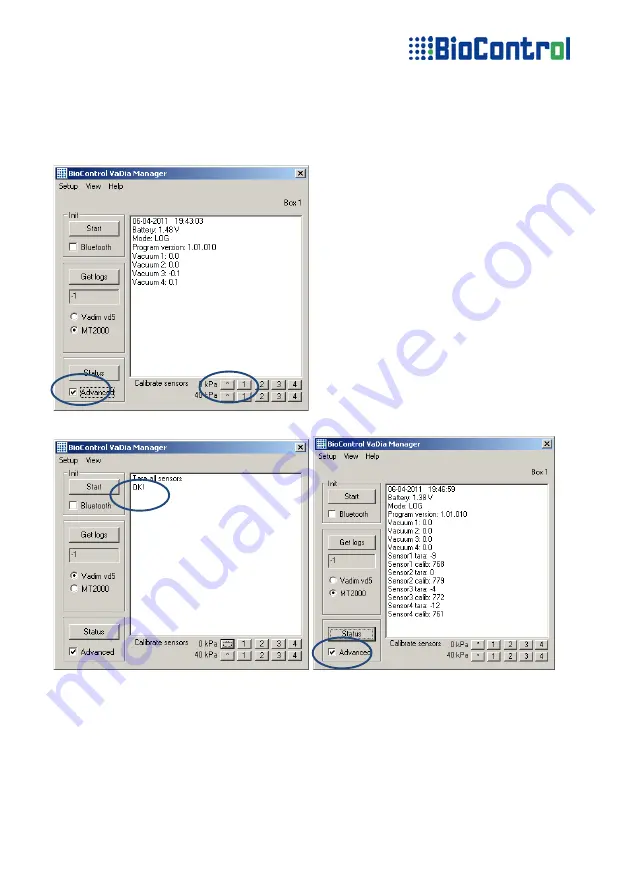
Connect the VaDia to a PC trough USB and start VaDia Manager.
After the calibration is done, OK! Will appear in the status area
Click ‘Status’ to see the vacuum of the sensors after the zero calibration.
The displayed counter values (sensor tara and calib) are for service purposes
and can be ignored.
Follow the same procedure to calibrate for 40 kPa.
The individual sensors can be calibrated by clicking the corresponding sensor
number and following the same calibration routine.
Tick the “Advanced” checkbox
The calibration buttons appear and
the two leftmost buttons show *
These two buttons are used when
calibrating all the sensors
simultaneously.
Make sure that the vacuum is stable
zero for all sensors.
Click * next to ‘0kPa’ and wait one
second while the VaDia calculates


