background image


Camera One


User Manual


Summary of Contents for Camera One

Page 1: ...Camera One User Manual...

Page 2: ...053 Registered office The Barn Hurstwood Grange Hurstwood Lane Haywards Heath West Sussex RH17 7QX United Kingdom P 44 0 1444 473999 F 44 0 1444 473888 sales bionics co uk This manual is intended for...

Page 3: ...is being recorded as it happens 34 For how long are the recordings kept on the system 34 Is there a maximum recording length 34 In which format are the videos recorded 35 How do I edit the recordings...

Page 4: ...Page 4 of 40 Glossary 39 Further sources of help and support 40...

Page 5: ...mes manuals can make things seem more complicated than they actually are so please also see our training videos at http bionic radio training Tip Recording law and regulations vary around the world Ma...

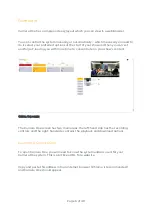
Page 6: ...u with more time to concentrate on your show s content CAMERA ONE SCREEN The Camera One screen has two main areas the left hand side has the recording controls and the right hand side contains the pla...

Page 7: ...ssword depending on how your system has been configured It s a good idea to add a shortcut to Camera One to your desktop to make it easier to find CAMERA ONE SHORTCUT CHROME Tip The address for Camera...

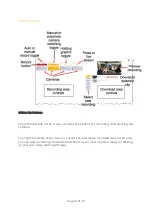
Page 8: ...screen contains the options for recording and selecting the cameras The right hand side of the screen contains the previously recorded clips In this area you can view recordings and download them to...

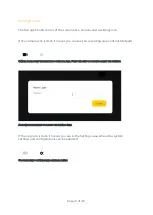
Page 9: ...the recording area controls default CAMERA ICON SHOWS THE RECORDING CONTROLS AREA PRESS THE GREY COG ICON TO ACCESS THE SETTINGS A PASSWORD IS REQUIRED TO ACCESS THE SETTINGS AREA If the cog icon is...

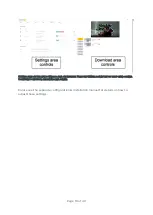
Page 10: ...HE LEFT DOWNLOAD AREA ON THE RIGHT PRESS THE CAMERA ICON IN THE TOP RIGHT HAND CORNER TO RETURN TO THE USUAL RECORDING AREA SCREEN Please see the separate configuration installation manual for details...

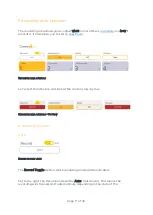
Page 11: ...RECORDING AREA CONTROLS Let s start from the top and look at the controls row by row RECORDING AREA CONTROLS TOP ROW Recording Controls Auto RECORD TOGGLE AUTO The Record Toggle defines which recordin...

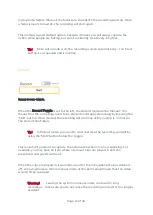
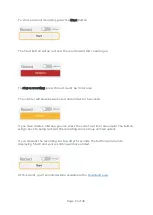
Page 12: ...topped manually by pressing the Start button Once started the recording will continue until you stop it no matter the state of the faders Tip In Manual mode you need to start and stop the recording yo...

Page 13: ...will pulse between red and amber for 5 seconds If you have made a mistake you can press the count up timer area again The button will go back to being red and the recording will continue uninterrupted...

Page 14: ...to give some shot variety for a solo presenter AutoSwitch is the easiest option and is recommended a true set and forget approach To operate the cameras yourself turn AutoSwitch off When AutoSwitch is...

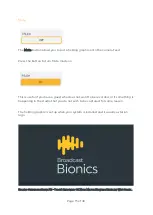
Page 15: ...eful if you have a guest who does not want to be recorded or if something is happening in the studio that you do not wish to be captured for some reason The holding graphic is set up when your system...

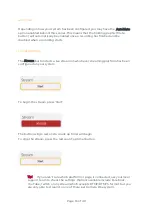
Page 16: ...on starts a live stream on whichever streaming platform has been configured on your system To begin the stream press Start The button will go red and a count up timer will begin To stop the stream pre...

Page 17: ...c microphone The Camera Controls work in two ways If the system is in AutoSwitch mode the amber highlighted camera shows which shot the system is currently automatically selecting If the system is in...

Page 18: ...nked to a specific microphone MICROPHONE ICON On some systems depending on your mixing desk you may see a microphone which is struck through MICROPHONE STRIKETHROUGH ICON This shows that the microphon...

Page 19: ...rea lets you preview your recordings and choose which ones to download so that you can edit them and share on social media DOWNLOADS AREA The vertical day of the week buttons allow you to select a day...

Page 20: ...Page 20 of 40 To view recordings from a previous day press that day s button The related recordings will then appear to the right MONDAY S RECORDINGS DISPLAYED...

Page 21: ...detailed information about when the clip was recorded and how long it is next to the thumbnail RECORDING SUMMARY DISPLAYED NEXT TO THE THUMBNAIL Press on any recording to view The player at the top w...

Page 22: ...Page 22 of 40 PRESS THE CLIP THAT YOU WANT IT WILL THEN DISPLAY IN THE PLAYER AT THE TOP To preview the clip you can press play on the player...

Page 23: ...Page 23 of 40 PRESS PLAY TO PREVIEW You can drag the play cursor to skip forward and backwards through the recording PLAY CURSOR...

Page 24: ...akes the player display full screen press Esc Escape to exit The three vertical dots allow you to select the Picture in picture option This means you can watch the clip whilst using a different progra...

Page 25: ...ILL THEN APPEAR IN THE CORNER OF YOUR SCREEN SO YOU CAN LOOK AT OTHER PROGRAMS AND PREVIEW THE CLIP AT THE SAME TIME To download a clip select the recording you wish to use and then press the Download...

Page 26: ...diting software to trim it add subtitles and any extra graphics or effects you wish to include before sharing it on social media Newsworthy clips can also be shared with your news teams If your system...

Page 27: ...Page 27 of 40 CORNER LOGO AUTOMATICALLY ADDED TO RECORDING...

Page 28: ...you can see a preview of the different camera outputs on a multiview screen We d recommend having this on a separate screen in your cubicle or studio control area if space allows Here s an example of...

Page 29: ...monitor and running the ATEM Software Controller software which comes with your ATEM unit The top Multiview rows allow you to see which camera feed is connected to which shot and which camera is curre...

Page 30: ...Media Player box will display either your Mute graphic or your DOG on screen logo depending on what state the switcher is running and if you have configured these options in your Camera One settings M...

Page 31: ...cted AUDIO LEVELS METER Tip The multiview screen is only available with the ATEM Mini Pro ATEM Mini Pro ISO ATEM Mini Extreme or ATEM Mini Extreme ISO The ATEM Mini unit only allows the Program Main o...

Page 32: ...the cameras yourself AutoSwitch on or AutoSwitch off 4 For automatic camera switching ensure the AutoSwitch button is on and that Mute mode is off if your system is set to AutoMute you can ignore thi...

Page 33: ...k like this SUGGESTED DEFAULTS RECORDING HAS BE STARTED RECORDING MODE IS AUTO AUTOSWITCH IS ON AND MUTE IS OFF This means the cameras will record automatically whenever a microphone is on and that th...

Page 34: ...to preview you can always do a quick test recording on your system before your show begins to check that your guests are in shot and framed correctly For how long are the recordings kept on the syste...

Page 35: ...s are made by a different company and Broadcast Bionics is not responsible for the content of external websites How do I add or remove the corner logo DOG This is controlled in the system Settings Ple...

Page 36: ...reconnect your physical ATEM switcher and refresh the Camera One window The other Disconnected error happens when either Camera One is not running or a technical problem is preventing the browser on...

Page 37: ...hat the user machines and the main brains machine are kept separate for this reason but check with your local support team if you are not sure The recordings themselves are kept for a set period of ti...

Page 38: ...l You can ask your audience to share or signpost them to your main show so they can hear the whole thing e g share an amazing question from your celebrity interview and then link to the whole item on...

Page 39: ...human needing to trigger the shot change Bug also known as network bug see DOG DOG Digital On screen Graphic the logo or icon you put in the corner of your screen to brand your station s video content...

Page 40: ...more detailed installation and configuration guide is also available https bionics co uk manuals If you need help on using the system at your station please contact your local support engineering dep...

Reviews: