


Handheld Pulse Oximeter
15 Description of Equipment Symbols
Palmcare plus Basic Operation 16
PalmCare plus
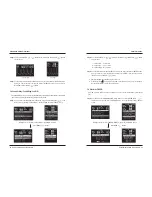
③
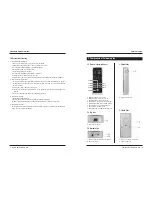
Big Wave
(3) Pleth Bar Mode
①
The domain showing various kinds of icons which describe the current state(Information
Alarm) of PalmCare plus.
②
Measured SpO
2
and pulse rate value
③
Pleth Bar
※
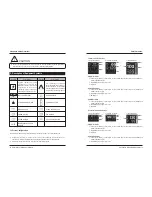
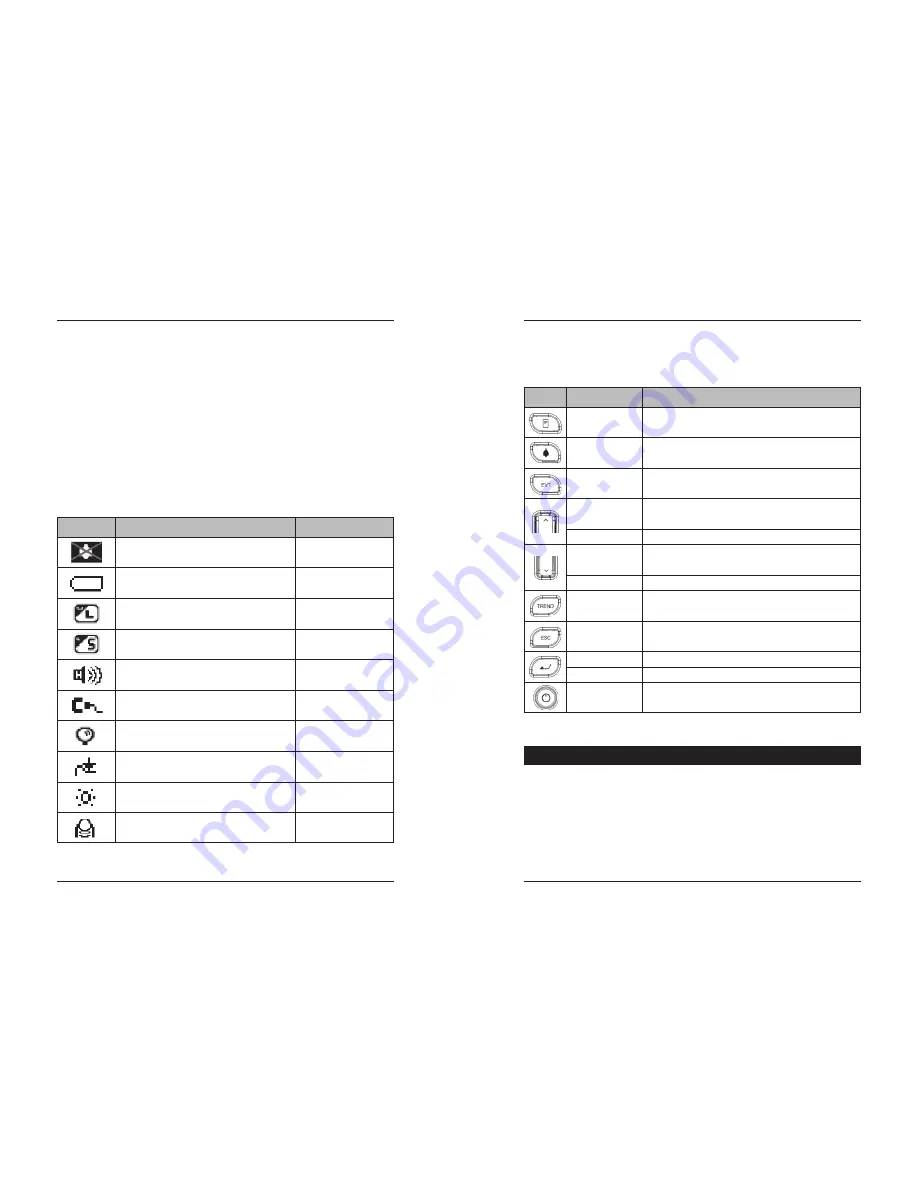
Each shape and meaning of the icons describing the current state(information alarm) of Palmcare
plus is as below.
(Table 1). Description of Screen Icon
Icon Measurement and operation condition
How to display
Alarm Off
Running out battery power
Screen select Icon
Language select Icon
Sound Off
Falling out the probe connection (Sensor Off)
Low volume of the blood flow(Low Perfusion)
High intensity of radiation in light (High Ambient)
Falling finger off the probe(No Finger)
Searching pulse
(In case the probe insert finger at first)
fixed
Blink every 1seconds
fixed
fixed
fixed
Blink every 1seconds
Blink every 1 seconds
Blink every 1 seconds
Blink every 1 seconds
Blink every 1 seconds
■
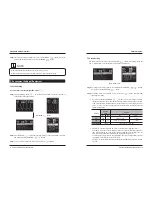
Function of the buttons
◆
Each buttons on the PalmCare plus services more than two use according to the screen. The use
meaning for each screen is as below chart.
Button
Display mode
Meaning and Operation
Initial Screen
Initial Screen
Initial Screen
Move to SETUP(Environment Set up) Screen
Alarm On/Off
Save the current measured value (Spo
2
& HR) in Trend Log
Initial Screen
Initial Screen
Initial Screen
Initial Screen
Initial Screen
ENTER (Input or select)
Commonness for all
kind of the screens.
Alarm Screen
Change the setting value on Alarm screen.
TREND Screen
TREND Screen
Up / Increase the value on setting up the Alarm range
Down / Decrease the value on setting up the Alarm range
Show Time-based TREND data(Spo
2
& HR) and move screen.
ESC(Moving to initial screen)
Power On/Off
Page Up(previous page)
Page Down(Next page)
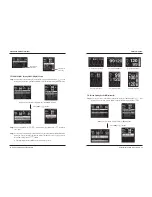
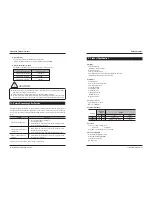
4.1 OPERATION
Step1) Please press the power button in front- lower of the equipment. The power is to be impressed
and Palmcare plus automatically starts the self-test. (You can see the BIONICS logo on the
screen during self-test)
Step2) Screen will be displayed the value and waves of patient after attaching the finger probe.
4. Palmcare plus Basic Operation


