background image

Electromyography (EMG) 

User Manual  


 11 of 19 


3.2.


Configuring the Sensor in OpenSignals  


3.2.1.


OpenSignals (r)evolution (Windows, macOS, Linux) 

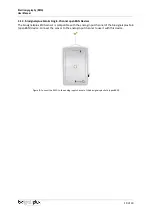
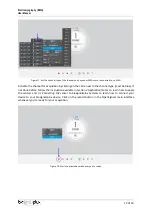
Open the OpenSignals (r)evolution device manager to access and configure your biosignalsplux device. 


Figure 9: Access the OpenSignals (r)evolution device manager. 

 
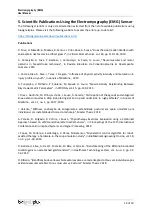
Select the device you intend to use for acquisition by clicking on 

ENABLE button on 

the device panel in 

the OpenSignals device manager. The device is activated for acquisition if the 

ENABLE 

button is blue.  


Figure 10: Enabling the device for acquisition. 


Click  on  the  biosignalsplux  logo  to  access  the  available  settings.  Select  the  channel  your  sensor  is 
connected to and select the 

EMG 

from the dropdown menu highlighted in the next screenshot. 


Summary of Contents for Electromyography

Page 1: ...biosignal acquisition tool kit for advanced research applications Electromyography EMG Sensor User Manual...

Page 2: ...sed of the possibility of such damages ATTENTION Please read this datasheet before using your biosignalsplux sensor The information contained in this document has been carefully checked and were made...

Page 3: ...g the sensor to biosignalsplux Systems 9 3 1 1 biosignalsplux 4 Channel Hubs 9 3 1 2 biosignalsplux 8 Channel Hubs 9 3 1 3 biosignalsplux Solo Single Channel openBAN Devices 10 3 2 Configuring the Sen...

Page 4: ...software one can easily extract statistical temporal and spectral parameters for further analysis of the acquired sensor data Figure 1 biosignalsplux Electromyography EMG sensor standard version 1 2...

Page 5: ...gnals acquired with biosignalsplux devices are converted into digital values ranged between 0 and 2n 1 n sampling resolution usually 8 bit or 16 bit and streamed in the raw digital format In most appl...

Page 6: ...s cables for EMG acquisitions 1 8 Physical Characteristics W1 x L1 x H1 1 6x2 2x0 5cm W2 x L2 x H2 1 5x1 75x0 55cm W3 A1 0 9cm 105 0 0 5cm L3 A2 0 5cm 5 0 0 5cm A3 2 5 0 5cm D 0 4cm Available sleeve c...

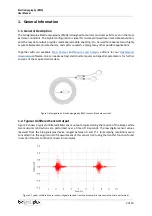
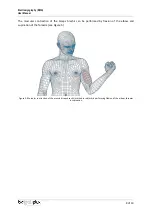
Page 7: ...r the clavicle An example is the measurement of the muscular activity of the muscle biceps brachii see muscle highlighted in red in Figure 4 The electrode positioning for this muscle is shown in Figur...

Page 8: ...r contraction of the biceps brachii can be performed by flexion of the elbow and supination of the forearm see Figure 5 Figure 5 Muscular contraction of the muscle biceps brachii marked in red while p...

Page 9: ...incompatible with the reference ground port Connect the sensor to an analog input to use it with this device Figure 6 EMG compatible biosignalsplux channels green checkmarks 3 1 2 biosignalsplux 8 Cha...

Page 10: ...AN Devices The biosignalsplux EMG sensor is compatible with the analog input channel of the biosignalsplux Solo openBAN device Connect the sensor to the analog input channel to use it with this device...

Page 11: ...evolution device manager Select the device you intend to use for acquisition by clicking on ENABLE button on the device panel in the OpenSignals device manager The device is activated for acquisition...

Page 12: ...type must be blue If not done before follow the instruction available in section 2 Application Notes to learn how to apply the sensors and 3 1 Connecting the sensor to biosignalsplux Systems to learn...

Page 13: ...technical in depth information about the different applications in which the EMG sensor can be applied Find below a list of the available technical notes and the links to the respective documents EMG...

Page 14: ...130 2019 I Dias L Godinho M Pinho G de S J Sousa Pereira Participation of the agonsit and antagonist knee extenso muscles in drop kick placing kick and up and under kick in rugby athletes in Annals o...

Page 15: ...es or other approved accessories purchased from PLUX or by a PLUX agent The user should inspect the sensors on a regular basis to ensure that they remain in good working order The user should stop usi...

Page 16: ...10 C to 30 C Atmospheric pressure between 500hPa and 1060hPa Whenever the equipment needs to be transported it should be placed in the original box since this was designed and tested to ensure the equ...

Page 17: ...accordance with the handling instructions indicated in the manual or use with accessories other than those manufactured by PLUX will invalidate the warranty of your devices Be careful when connecting...

Page 18: ...gnosis cure mitigation treatment or prevention of disease we expressly disclaim any liability whatsoever for any direct indirect consequential incidental or special damages including without limitatio...

Page 19: ...ail plux plux info web http www plux info Headquarters Zona Industrial das Corredouras Lt 14 1 2630 369 Arruda dos Vinhos Portugal tel 351 263 978 572 fax 351 263 978 902 Lisbon Office Av 5 de Outubro...

Reviews: