background image

Motherboard Manual


24 

5.3 I

NSTALLATION


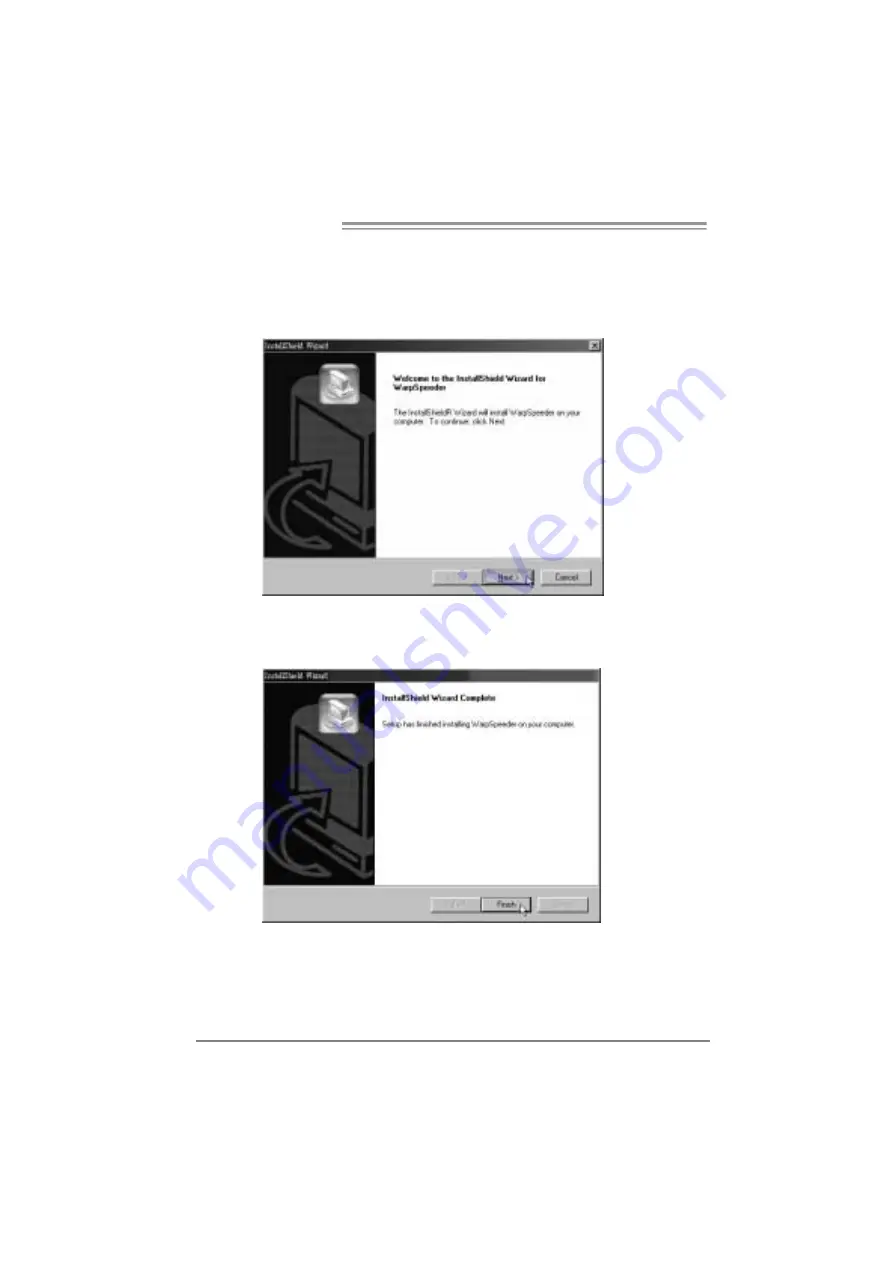
1.  Execute the setup execution file, and then the following dialog will pop 

up. Please click “Next” button and follow the default procedure to 
install. 


2.  When you see the following dialog in setup procedure, it means setup 

is completed. Click “Finish” button. 


Usage : 

The following figures are only for reference, the screen printed in this 

user manual will change according to your motherboard on hand.   

Summary of Contents for 945GC MICRO 775

Page 1: ...interference will not occur in a particular installation The vendor makes no representations or warranties with respect to the contents here and specially disclaims any implied warranties of merchantability or fitness for any purpose Further the vendor reserves the right to revise this publication and to make changes to the contents here without obligation to notify any party beforehand Duplicatio...

Page 2: ...stalling System Memory 9 2 4 Connectors and Slots 11 Chapter 3 Headers Jumpers Setup 13 3 1 How to Setup Jumpers 13 3 2 Detail Settings 13 Chapter 4 Useful Help 20 4 1 Driver Installation Note 20 4 2 Award BIOS Beep Code 21 4 3 Extra Information 21 4 4 Troubleshooting 22 Chapter 5 WarpSpeeder III 23 5 1 Introduction 23 5 2 System Requirement 23 5 3 Installation 24 5 4 WarpSpeeder III 25 Appendenci...

Page 3: ...tic charge Avoid touching the components on motherboard or the rear side of the board unless necessary Hold the board on the edge do not try to bend or flex the board Do not leave any unfastened small parts inside the case after installation Loose parts will cause short circuits which may damage the equipment Keep the computer from dangerous area such as heat source humid air and water 1 2 PACKAGE...

Page 4: ...t Guardian function ITE IT8712F H W Mon itor Fan Speed Controller ITE s Smart Guardian function Main Memory DIMM Slots x 2 Each DIMM supports 256 512MB 1G B DDR2 Max Memory Capacity 2G B Dual Channel Mode DDR2memorymodu le Supports DDR2 400 533 667 Registered DIMM and E CC DIMM is not supported DIMM Slots x 2 Each DIMM supports 256 512MB 1G B DDR2 Max Memory Capacity 2G B Dual Channel Mode DDR2mem...

Page 5: ...ctor x1 CD inConnector x1 CD inConnector x1 S PDIF ou t connector x1 S PDIF ou t connector x1 CPUFan header x1 CPUFan header x1 System Fan header x1 System Fan header x1 Clear CMOS header x1 Clear CMOS header x1 USB conn ector x2 USB conn ector x2 Power Conn ector 24pin x1 Power Conn ector 24pin x1 On Board Connector Power Conn ector 4pin x1 Power Conn ector 4pin x1 Back Panel I O PS 2Keyboard x1 ...

Page 6: ...S 2 Keyboard CO M1 USBX2 USBX2 LAN L ine In L ine Out Mic In Cen ter Rear S ide Since the audio chip supports High Definiti on Audio Specification the function of each audi o jackcan be defined bysoftware The input output function of each audio jack listed above represents the default setti ng However when connecti ng exter nal microphone to the audio port please use the Line In Blue and Mic In Pi...

Page 7: ...PWR1 JCFAN1 SATA1 SATA3 SATA2 SAT A4 Cod ec JCDIN1 JSFAN1 LAN BAT1 BIOS Intel ICH7 LGA775 CPU1 Intel 945GC JAUDIOF 1 Super I O JKBMS1 JUSB2 JRJ45 USB1 COM1 JCOM1 JVGA1 JAUDIO2 for Ver 5 x JSPDIF_OUT IDE1 JCMOS1 JPRNT1 JATXPWR2 JKBV1 optional JUSBV1 optional JUSBV3_1 optional AUD IO1 for Ver 6 x Note represents the 1 st pin ...

Page 8: ...cial Notice Remove Pin Cap before installation and make good preservation for future use When the CPU is removed cover the Pin Cap on the empty socket to ensure pin legs won t be damaged Pin Cap Step 1 Pull the socket locking lever out from the socket and then raise the lever up to a 90 degree angle ...

Page 9: ...dge The CPU will fit only in the correct orientation Step 2 1 Step 2 2 Step 3 Hold the CPU down firmly and then lower the lever to locked position to complete the installation Step 4 Put the CPU Fan and heatsink assembly on the CPU and buckle it on the retention frame Connect the CPU FAN power cable into the JCFAN1 This completes the installation ...

Page 10: ... pin 1 JCFAN1 CPU Fan Header Pin Assignment 1 Ground 2 12V 3 FAN RPM rate sense 1 4 JCFAN1 4 Smart Fan Control JSFAN1 System Fan Header Pin Assignment 1 Ground 2 12V 1 3 JSFAN1 3 FAN RPM rate sense Note The JCFAN1 and JSFAN1 support 4 pin and 3 pin head connector When connecting with wires onto connectors please note that the red wire is the positi ve and shoul d be connected to pi n 2 and the bl ...

Page 11: ...lign a DIMM on the slot such that the notch on the DIMM matches the break on the Slot 2 Insert the DIMM vertically and firmly into the slot until the retaining chip snap back in place and the DIMM is properly seated B Memory Capacity DIMM Socket Location DDR2 Module Total Memory Size DDR2_A1 256MB 512MB 1GB 1 DDR2_B1 256MB 512MB 1GB 1 Max memory 2GB ...

Page 12: ...ory module must meet the following requirements Install memory module of the same density in pairs shown in thef ollowing table Dual Channel Status DDR2_A1 DDR2_B1 Disabled O X Disabled X O Enabled O O O means memory installed X means memory not installed The DRAM bus width of the memory module must be the same x8 or x16 ...

Page 13: ...and 2 88M floppy disk ty pes This connector supports the prov idedf loppy drive ribbon cables 1 2 34 33 IDE1 Hard Disk Connectors The motherboard has a 32 bit Enhanced PCI IDE Controller that prov ides PIO Mode 0 4 Bus Master and Ultra DMA 33 66 100 functionality The IDE connector can connect a master and a slave drive soy ou can connect up to two hard disk driv es 40 2 1 39 ...

Page 14: ...ta transf er bandwidth up to 250MB s per direction 500MB s in total PCI Express supports a raw bit rate of 2 5Gb s on the data pins 2X bandwidth ov er the traditional PCI architecture PEX1_1 PEX16_1 PCI1 PCI2 Peripheral Component Interconnect Slots The motherboard is equipped with 2 standard PCI slots PCI stands for Peripheral Component Interconnect and it is a bus standard for expansion cards Thi...

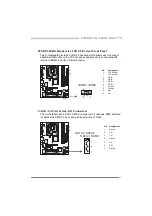
Page 15: ... 16 pin connector includes Power on Reset HDD LED Power LED Sleep button and speaker connections It allows user to connect the PC case s f ront panel switch functions 1 SLP PW R_LED ON OFF RST HLED SPK 9 8 16 Pin Assignment Function Pin Assignment Function 1 5V 9 Sleep control 2 N A 10 Ground Sleep button 3 N A 11 N A N A 4 Speaker Speaker Connector 12 Power LED 5 HDD LED 13 Power LED 6 HDD LED Ha...

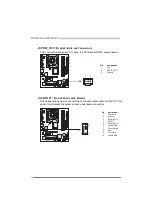
Page 16: ...3 3V 3 Ground 4 5V 5 Ground 6 5V 7 Ground 8 PW_OK 9 Standby Voltage 5V 10 12V 11 12V 12 2 x 12 Detect 13 3 3V 14 12V 15 Ground 16 PS_ON 17 Ground 18 Ground 19 Ground 20 5V 21 5V 22 5V 23 5V 1 12 13 24 24 Ground JATXPWR2 ATX Power Source Connector By connecting this connector it will provide 12V to CPU power circuit Pin Assignment 1 12V 2 12V 3 Ground 1 2 3 4 4 Ground ...

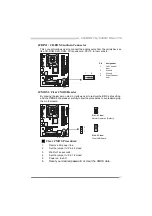
Page 17: ... with internal USB dev ices like USB card reader Pin Assignment 1 5V fused 2 5V fused 3 USB 4 USB 5 USB 6 USB 7 Ground 8 Ground 9 Key 1 9 2 10 JUSB4 JUSB3 10 NC SATA1 SATA4 Serial ATA Connectors The motherboard has a PCI to SATA Controller with 4 channels SATA interf ace it satisfies the SATA 2 0 spec and with transfer rate of 3Gb s Pin Assignment 1 Ground 2 TX 3 TX 4 Ground 5 RX 6 RX 1 4 7 SATA4 ...

Page 18: ...V 2 SPDIF_OUT1 1 3 3 Ground JAUDIOF1 Front Panel Audio Header This header allows user to connect the front audio output cable with the PC f ront panel It will disable the output on back panel audio connectors Pin Assignment 1 Mic Left in 2 Ground 3 Mic Right in 4 GPIO 5 Right line in 6 Jack Sense 7 Front Sense 8 Key 9 Left line in 10 Jack Sense 1 9 2 10 ...

Page 19: ...MOS1 ClearCMOS Header By placing the jumper on pin2 3 it allows user to restore the BIOS saf e setting and the CMOS data please carefully f ollow the procedures to avoid damaging the motherboard 1 3 Pin 1 2 Close Normal Operation Default 1 3 1 3 Pin 2 3 Close Clear CMOS data Clear CMOS Procedures 1 Remov e AC power line 2 Set the jumper to Pin 2 3 close 3 Wait f orf ive seconds 4 Set the jumper to...

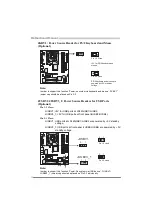
Page 20: ... JUSBV1 JUSBV3_1 Power Source Headers for USB Ports Optional Pin 1 2 Close JUSBV1 5V for USB ports at JRJ45USB1 JUSB2 JUSBV3_1 5V for USB ports at f ront panel JUSB3 JUSB4 Pin 2 3 Close JUSBV1 USB ports at JRJ45USB1 JUSB2 are powered by 5V standby v oltage JUSBV3_1 USB ports at front panel JUSB3 JUSB4 are powered by 5V standby v oltage 1 3 Pin 1 2 close 1 3 1 3 JUSBV1 JUSBV3_1 1 3 Pin 2 3 close No...

Page 21: ...ector printer on the PC 1 25 2 Pin Assignment Pin Assignment 1 Strobe 14 Ground 2 ALF 15 Data 6 3 Data 0 16 Ground 4 Error 17 Data 7 5 Data 1 18 Ground 6 Init 19 ACK 7 Data 2 20 Ground 8 Scltin 21 Busy 9 Data 3 22 Ground 10 Ground 23 PE 11 Data 4 24 Ground 12 Ground 25 SCLT 13 Data 5 26 Key ...

Page 22: ...tion To install the driver please click on the Driver icon The setup guide will list the compatible driver for your motherboard and operating system Click on each device driver to launch the installation program B Software Installation To install the software please click on the Software icon The setup guide will list the software available for your system click on each software title to launch th...

Page 23: ... CPU protection function has been activated When the CPU is over heated the motherboard will shutdown automatically to avoid a damage of the CPU and the system may not power on again In this case please double check 1 The CPU cooler surface is placed evenly with the CPU surface 2 CPU fan is rotated normally 3 CPU fan speed is fulfilling with the CPU speed After confirmed please follow steps below ...

Page 24: ...o disk controller board Make sure both ends are securely plugged in check the driv e type in the standard CMOS setup 2 Backing up the hard drive is extremely important All hard disks are capable of breaking down at any time System only boots f rom optical driv e Hard disk can be read and applications can be used but booting from hard disk is impossible 1 Back up data and applications f iles 2 Ref ...

Page 25: ...information Also in the About panel you can get detail descriptions about BIOS model and chipsets In addition the frequency status of CPU memory VGA and PCI along with the CPU speed are synchronically shown on our main panel Moreover to protect users computer systems if the setting is not appropriate when testing and results in system fail or hang WarpSpeeder III technology assures the system stab...

Page 26: ...up Please click Next button and follow the default procedure to install 2 When you see the following dialog in setup procedure it means setup is completed Click Finish button Usage The following figures are only for reference the screen printed in this user manual will change according to your motherboard on hand ...

Page 27: ...g the desktop icon 2 Main Panel If you double click the desktop icon WarpSpeeder III will be launched Please refer to the following figure the utility s first window you will see is Main Panel Main Panel contains features as follows a Display the CPU Speed CPU external clock Memory clock VGA clock and PCI clock information b ContainsAbout Voltage Overclock and Hardware Monitor Buttons for invoking...

Page 28: ...k the Overclock Overvoltage button in theMain Panel the button will be highlighted and the Overclock Overvoltage Panel will show up as the following figure As you can see the Overclock Panel is on the right side and the Overvoltage Panel is on the left side ...

Page 29: ...equency then you can click this button and WarpSpeeder III will proceed a testing for current frequency If the testing is ok then the current frequency will be saved into system registry If the testing fails system will do a fail safe rebooting After reboot the WarpSpeeder III utility will restore to the hardware default setting Warning Manually overclock is potentially dangerous especially when t...

Page 30: ...is function allows user to adjust Memory voltage Click on to increase or to decrease the Memory voltage 4 Hardware Monitor Panel Click the Hardware Monitor button in Main Panel the button will be highlighted and the Hardware Monitor panel will show up as the following figure In this panel you can get the real time status information of your system The information will be refreshed every 1 second ...

Page 31: ...that are related to overclocking You can also get the the version number of WarpSpeeder III utility Note Because the overclock overvoltage and hardware monitor features are controlled by several separate chipset WarpSpeeder III divide these features to separate panels If one chipset is not on board the correlative button in Main panel will be disabled but will not interfere other panels functions ...

Page 32: ...Funktion vonITE ITE 8712F Hardware Überwachung Lüfterdreh zah l Controller Smart Guardian Funktion vonITE Arbeitsspeich er DDR2 DIMM Steckplätze x 2 Jeder DIMM unterstü tzt 256 512MB 1G B DDR2 Max 2GB Arbeitsspeicher Dual Kanal DDR2 Speichermodu l Unterstü tzt DDR2 400 533 667 registrierte DIMMs ECC DIMMs werden nicht unterstützt DDR2 DIMM Steckplätze x 2 Jeder DIMM unterstü tzt 256 512MB 1G B DDR...

Page 33: ... sgangsan sch luss x1 S PDIF Au sgangsan sch luss x1 CPU Lüfter Sockel x1 CPU Lüfter Sockel x1 System Lüfter Sockel x1 System Lüfter Sockel x1 CMOS löschen Sockel x1 CMOS löschen Sockel x1 USB An schlu ss x2 USB An schlu ss x2 Stromansch luss 24 polig x1 Stromansch luss 24 polig x1 Onboard Ans chlu ss Stromansch luss 4 polig x1 Stromansch luss 4 polig x1 Rückseiten E A PS 2 Tastatur x1 PS 2 Mau s ...

Page 34: ...e vitesse de ven tilateur Fonction Gardienintelligen t de l ITE Mémoire prin cipale Fentes DDR2DIMM x 2 Chaque DIMM prend encharge des DDR2 de 256 512 Mo et 1Go Capacitémémoire maximale de 2 Go Module de mémoireDDR2 àmodeà double voie Prend encharge la DDR2 400 533 667 Les DIMM à registres et DIMM avec code correcteurs d erreurs ne sont pas prises en charge Fentes DDR2DIMM x 2 Chaque DIMM prend en...

Page 35: ...ntréeCD x1 Connecteu r d entréeCD x1 Connecteu r desortie S PDIF x1 Connecteu r desortie S PDIF x1 Embase de ven tilateurUC x1 Embase de ven tilateurUC x1 Embase de ven tilateursystème x1 Embase de ven tilateursystème x1 Embase d effacemen t CMOS x1 Embase d effacemen t CMOS x1 Connecteu r USB x2 Connecteu r USB x2 Connecteu r d alimen tation 24 broches x1 Connecteu r d alimen tation 24 broches x1...

Page 36: ...ller velocità ventolina Funzione Smart Guardi an di I TE Memoria principale Alloggi DIMM DDR 2 x 2 CiascunDIMM supporta DDR2 256 512MB e 1GB Capacità massima della memori a 2GB Modulo di memoria DDR2 a canale doppio Supporto di DDR2 400 533 667 DIMM registrati e DIMM ECC non sono supportati Alloggi DIMM DDR 2 x 2 CiascunDIMM supporta DDR2 256 512MB e 1GB Capacità massima della memori a 2GB Modulo ...

Page 37: ... ventolina CPU x1 Collettore ventolina CPU x1 Collettore ventolina sistema x1 Collettore ventolina sistema x1 Collettore cancellazione CMOS x1 Collettore cancellazione CMOS x1 Connettore USB x2 Connettore USB x2 Connettore alimentazione 24 pin x1 Connettore alimentazione 24 pin x1 Connettori su scheda Connettore alimentazione 4 pi n x1 Connettore alimentazione 4 pi n x1 I O pannello posteriore Tas...

Page 38: ...nte de ITE ITE 8712F Monitor hardware Controlador develocidad de ventilador Función Guardia in teligente de ITE Memoria prin cipal Ranuras DIMM DDR2 x 2 Cada DIMM admite DDR2 de 256 512MB y 1G B Capacidadmáxima de memoria de 2GB Módulo dememoria DDR2 de canal Doble Admite DDR2 de 400 533 667 No admite DIMM registrados o DIMM compatibles con E CC Ranuras DIMM DDR2 x 2 Cada DIMM admite DDR2 de 256 5...

Page 39: ... X1 Conector desalidaS PDIF X1 Cabecera de ven tilador de CPU X1 Cabecera de ven tilador de CPU X1 Cabecera de ven tilador desistema X1 Cabecera de ven tilador desistema X1 Cabecera de borrado de CMOS X1 Cabecera de borrado de CMOS X1 Conector USB X2 Conector USB X2 Conector de alimen tación X1 24 patillas Conector de alimen tación X1 24 patillas Conectores en placa Conector de alimen tación X1 4 ...

Page 40: ...davelocidade daventoinha Função Smart Guardian da ITE Memória prin cipal Ranhuras DIMM DDR2 x2 Cada módulo DIMM suporta umamemória DDR2 de 256 512 MB 1 GB Capacidade máxima dememória 2 GB Módulo dememória DDR2 de canal duplo Suportamódulos DDR2 400 533 667 Os módu los DIMM registados e os DIMM E CC não sãosuportados Ranhuras DIMM DDR2 x2 Cada módulo DIMM suporta umamemória DDR2 de 256 512 MB 1 GB ...

Page 41: ...saída S PDIF x1 Conector desaída S PDIF x1 Conector da ven toinha da CPU x1 Conector da ven toinha da CPU x1 Conector da ven toinha dosistema x1 Conector da ven toinha dosistema x1 Conector para limpeza do CMOS x1 Conector para limpeza do CMOS x1 Conector USB x2 Conector USB x2 Conector de alimen tação 24 pinos x1 Conector de alimen tação 24 pinos x1 Conectores na placa Conector de alimen tação 4 ...

Page 42: ...ięci DDR2z trybem podwójnego kanału Obsługa DDR2 400 533 667 Brak obsługi Registered DIMM oraz ECC DIMM Gniazda DDR2 DIMM x 2 Każde gniazdo DIMM obsługujemodu ły 256 512MB oraz 1GB DDR2 Maks wielkość pamięci 2G B Moduł pamięci DDR2z trybem podwójnego kanału Obsługa DDR2 400 533 667 Brak obsługi Registered DIMM oraz ECC DIMM SuperI O ITE 8712F Monitor H W Kon troler prędkości wen tylatora Funkcj a ...

Page 43: ...1 Złącze główkowe wen tylatora procesora x1 Złącze główkowe wen tylatora procesora x1 Złącze główkowe wen tylatora systemowego x1 Złącze główkowe wen tylatora systemowego x1 Złącze główkowe kasowaniaCMOS x1 Złącze główkowe kasowaniaCMOS x1 Złącze USB x2 Złącze USB x2 Złączezasilania 24 pinowe x1 Złączezasilania 24 pinowe x1 Złącza wbudowane Złączezasilania 4 pinowe x1 Złączezasilania 4 pinowe x1 B...

Page 44: ...ерживаетзареги стрированн ые модули DIMM an d ECC DIMM Слоты DDR2 DIMM x 2 Каждыймодуль DIMM поддержи вает 256 512МБ 1 ГБ DDR2 Максимальная ёмкость памяти 2 ГБ Модуль памятис двухканальн ым режимом DDR2 Поддержка DDR2 400 533 667 Не поддерживаетзареги стрированн ые модули DIMM an d ECC DIMM SuperI O ITE 8712F Аппаратн ый монитор Регуляторскорости ФункцияITE Smart Guardian Интеллектуальнаязащита IT...

Page 45: ...ие вентиляторацентральн ого процессора x1 Контактирующее при способление вентилятора си стемы x1 Контактирующее при способление вентилятора си стемы x1 Открытое контактирующее приспособление CMOS x1 Открытое контактирующее приспособление CMOS x1 USB разъём x2 USB разъём x2 Разъем питания 24 вывод x1 Разъем питания 24 вывод x1 Встроенны й разъём Разъем питания 4 вывод x1 Разъем питания 4 вывод x1 З...

Page 46: ...آ ﺳﻌﺔ 2 ﺑﺎﻳﺖ ﺝﻴﺠﺎ اآﺮة ذ وﺣﺪة DDR2 أﺣﺎدﻳﺔ اﻟﻘﻨﺎة ﻡﺰدوﺝﺔ ا ﺬ اﻟ ﺕﺪﻋﻢ ﻥﻮع ﻡﻦ آﺮة DDR2 ﺳﻌﺎت 400 533 667 ﺑﺎﻳﺖ ﻡﻴﺠﺎ اآﺮة ﺬ اﻟ رﻗﺎﺋﻖ ﺕﺪﻋﻢ ﻻ DIMM ﻡﻊ اﻓﻖ ﻮ ﺕﺘ ﻻ اﻟﺘﻲ وﺕﻠﻚ ECC ﻓﺘﺤﺔ DDR2 DIMM ﻋﺪد 2 ﻓﺘﺤﺔ آﻞ ﺕﺪﻋﻢ DIMM ﻥﻮع ﻡﻦ اآﺮة ذ ﺕﺪﻋﻢ DDR2 ﺳﻌﺔ 256 512 ﻡﻴﺠﺎ و ﺑﺎﻳﺖ 1 ﺝﻴﺠﺎ ﺑﺎﻳﺖ ﻗﺼﻮى ﺮة ذاآ ﺳﻌﺔ 2 ﺑﺎﻳﺖ ﺝﻴﺠﺎ اآﺮة ذ وﺣﺪة DDR2 أﺣﺎدﻳﺔ اﻟ ﻡﺰدوﺝﺔ ﻘﻨﺎة ﻥﻮع ﻡﻦ اآﺮة ﺬ اﻟ ﺕﺪﻋﻢ DDR2 ﺳﻌﺎت 400 533 667 ﺑﺎﻳﺖ ﻡﻴﺠﺎ اآﺮة ﺬ اﻟ رﻗﺎ...

Page 47: ...اﻟﻤﺮآﺰﻳﺔ اﻟﻤﻌﺎﻟﺠﺔ وﺣﺪة ﻡﺮوﺣﺔ وﺹﻠﺔ ﻋﺪد 1 اﻟﻤﺮآﺰﻳﺔ اﻟﻤﻌﺎﻟﺠﺔ وﺣﺪة ﻡﺮوﺣﺔ وﺹﻠﺔ ﻋﺪد 1 اﻟﻨﻈﺎم ﻡﺮوﺣﺔ وﺹﻠﺔ ﻋﺪد 1 اﻟﻨﻈﺎم ﻡﺮوﺣﺔ وﺹﻠﺔ ﻋﺪد 1 ﻡﺴﺢ وﺹﻠﺔ CMOS ﻋﺪد 1 ﻡﺴﺢ وﺹﻠﺔ CMOS ﻋﺪد 1 ﻡﻨﻔﺬ USB ﻋﺪد 2 ﻡﻨﻔﺬ USB ﻋﺪد 2 اﻟﻄﺎﻗﺔ ﺕﻮﺹﻴﻞ ﻡﻨﻔﺬ 24 دﺑﻮس ﻋﺪد 1 اﻟﻄﺎﻗﺔ ﺕﻮﺹﻴﻞ ﻡﻨﻔﺬ 24 دﺑﻮس ﻋﺪد 1 ﺳﻄﺢ ﻋﻠﻰ اﻟﻤﻨﺎﻓﺬ اﻟﻠﻮﺣﺔ اﻟﻄﺎﻗﺔ ﺕﻮﺹﻴﻞ ﻡﻨﻔﺬ 4 دﺑﺎﺑﻴﺲ ﻋﺪد 1 اﻟﻄﺎﻗﺔ ﺕﻮﺹﻴﻞ ﻡﻨﻔﺬ 4 دﺑﺎﺑ ﻴﺲ ﻋﺪد 1 دﺧﻞ ﻡﻨﺎﻓﺬ ﺧﺮج ﻟﺨﻠﻔﻴﺔ ا اﻟﻠﻮﺣﺔ ﻡﻔﺎﺕﻴﺢ ﻟﻮﺣﺔ PS 2 ﻋ...

Page 48: ...CH7 グラフィック ス Intel GMA 950 最大の共有ビデオメモリは224MBです Intel GMA 950 最大の共有ビデオメモリは224MBです メインメモリ DDR2 DIMMスロット x 2 各DIMMは256 512MB 1G B DDR2 をサポート 最大メモリ容量2GB デュアル チャンネルモードDDR2 メモリモジュール DDR2 400 533 667 をサポート 登録済みDIMMとE CC DIMMはサポートされません DDR2 DIMMスロット x 2 各DIMMは256 512MB 1G B DDR2 をサポート 最大メモリ容量2GB デュアル チャンネルモードDDR2 メモリモジュール DDR2 400 533 667 をサポート 登録済みDIMMとE CC DIMMはサポートされません SuperI O ITE 8712F H Wモニター ファン速度...

Page 49: ... フロントパネルコネクタ x1 フロントオーディオコネクタ x1 フロントオーディオコネクタ x1 CDインコネクタ x1 CDインコネクタ x1 S PDIFアウトコネクタ x1 S PDIFアウトコネクタ x1 CPUファンヘッダ x1 CPUファンヘッダ x1 システムファンヘッダ x1 システムファンヘッダ x1 CMOSクリアヘッダ x1 CMOSクリアヘッダ x1 USBコネクタ x2 USBコネクタ x2 電源コネクタ 24 ピン x1 電源コネクタ 24 ピン x1 オンボードコ ネクタ 電源コネクタ 4 ピン x1 電源コネクタ 4 ピン x1 背面パネル I O PS 2 キーボード x1 PS 2 マウス x1 シリアルポート x1 VGAポート x1 LANポート x1 USBポート x4 オーディオジャック Ver 6 x x3 オーディオジャック Ver 5 x...

Reviews: