Bird-X Mega Blaster PRO User
’
s Manual (#655-0065-00
–
May 2016)
5
Assembly
Note: You will find it easier to pre-assemble the following
components prior to installation in the field.
Control Unit
1. Lay the Control Unit face down
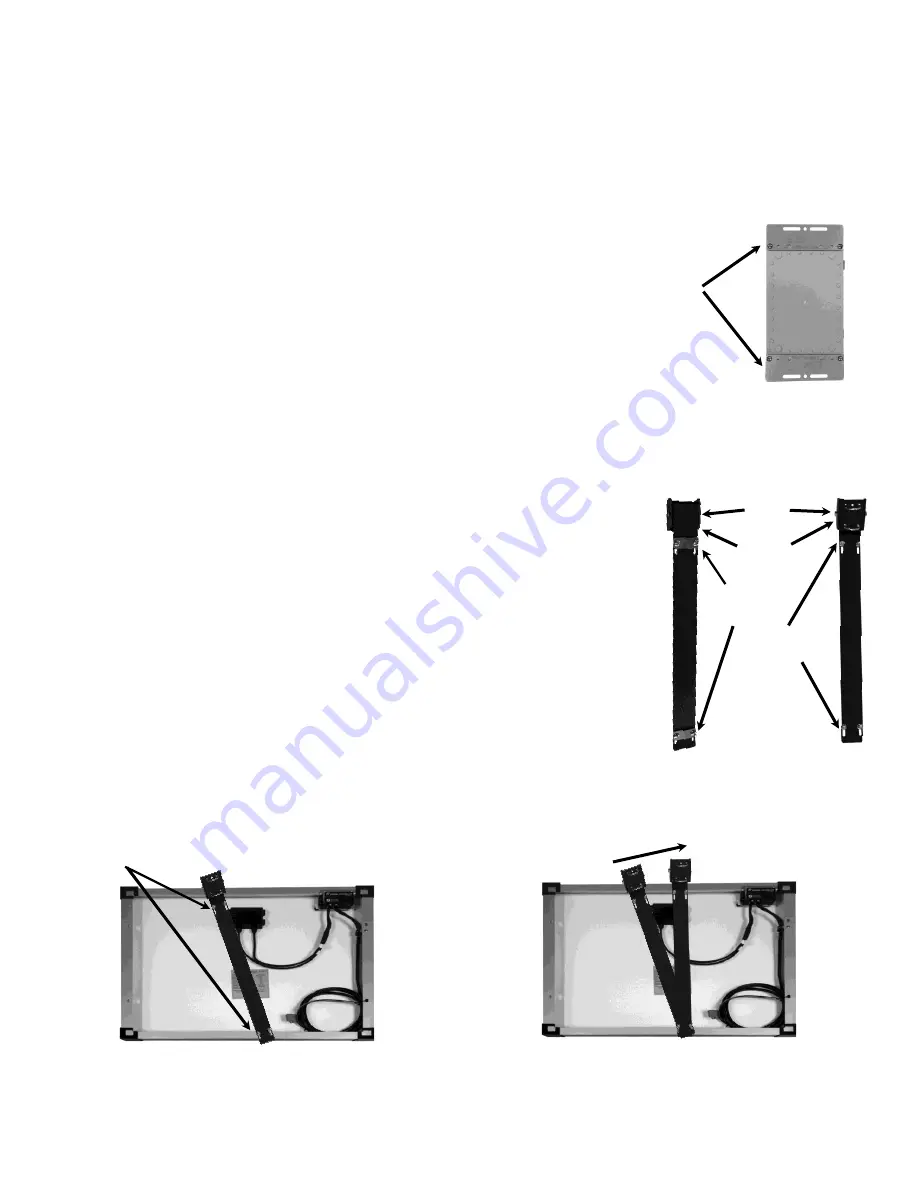
2. Attach the two Control Box Mounting Brackets to the back with the included screws (Figure 1)
Solar Panel
3. Install the two Solar Panel Mounting U-Bolts in the Head of the Solar Panel Mounting
Bracket (Figure 2)
4. Loosen, but do not remove the Carriage Bolts securing the movable Clamp Plates on the
Solar Panel Mount Bracket
5. Lay the solar panel on a flat surface with the glass side down
6. Lay the Mounting Arm across the Solar Panel with the Clamp Plates down. Position the
Mounting Arm at an angle so the Clamp Plates slide under the lip of the Solar Panel
(Figure 3A)
7. Rotate the Mounting Arm and secure it to the Solar Panel by tightening the Carriage
Bolts (Figure 3B)
Top View
Bottom View
Carriage
Bolts
Figure 2
Solar Panel Mounting Bracket
Head
U-Bolts
Clamp
Plates
Clamp Plates slide under
the lip of the Solar Panel
Rotate Mounting Arm and
tighten Carriage Bolts
Figure 1
Control Box
Mounting Brackets
Figure 3B
Figure 3A


