background image

Page 7 of 10

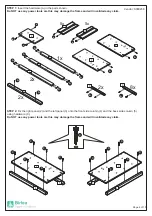
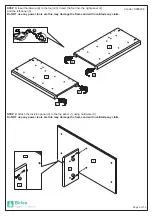
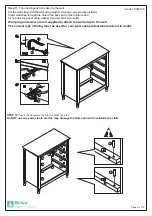
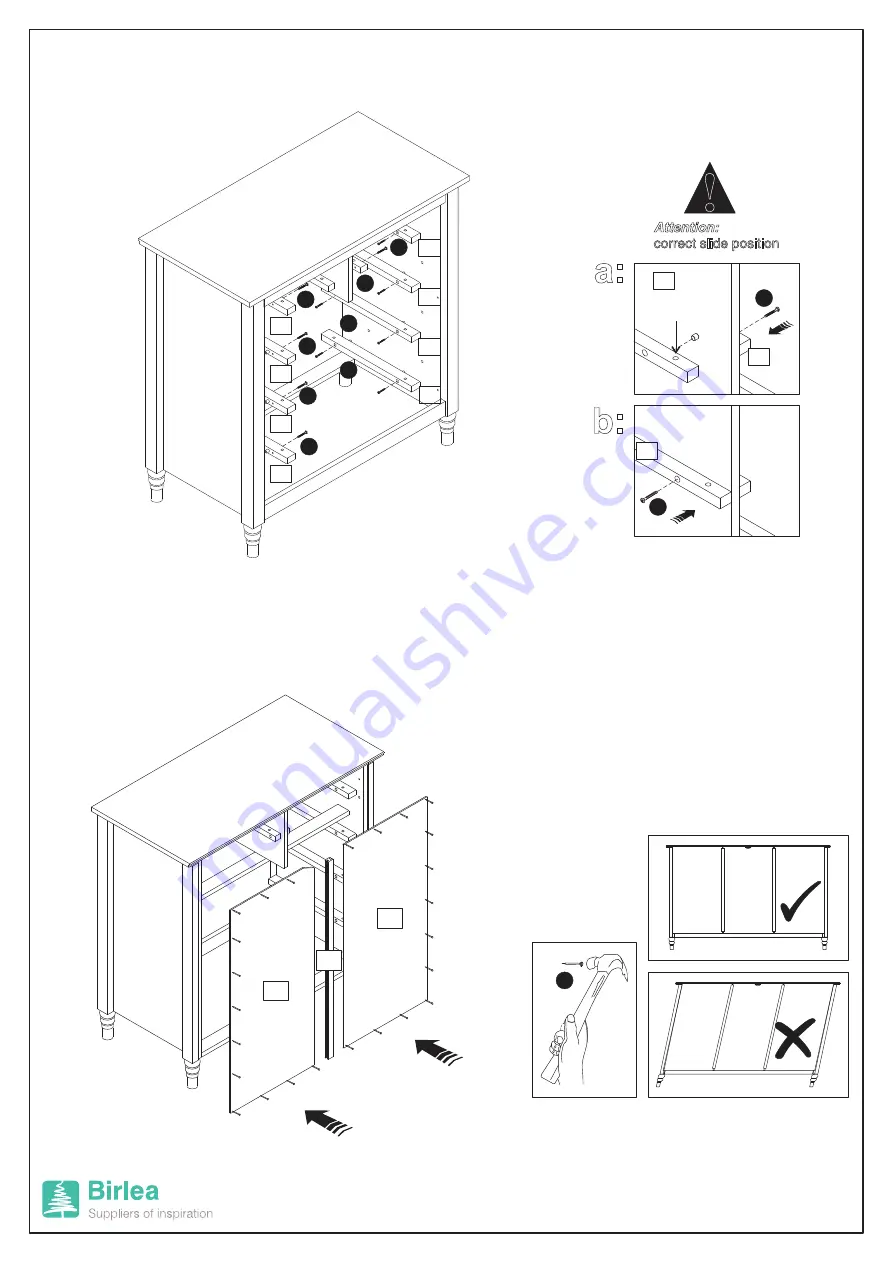
STEP 7:

Attach the side slide (8) and central slide (9) into the side of furniture using hardware (C).

Do NOT use any power tools are this may damage the frame and will invalidade any claim.

Vendor: S000238

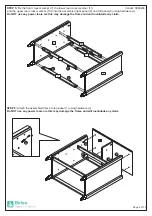
STEP 8:

Fix the left rear panel (12) and right rear panel (13) with the H profile (14) using hardware (J).

Do NOT use any power tools are this may damage the frame and will invalidade any claim.

J

a:

b:

9

9

6

C

C

C

C

C

C

8

8

8

8

8

8

8

8

C

13

12

14

C

C

C

C

Attention:

correct slide position

!

Summary of Contents for PEMBROKE S000238

Page 1: ...tailer you purchased the item from We will work with the retailer to resolve your issue as quickly as possible For a chance to win a voucher Love 2 Shop simply post a picture of your new product on your preferred social channels tagging Birlea Furniture and using the hashtag ShareYourStyle Birlea and One winner will be selected at random each month To view our full terms and conditions please visi...

Page 2: ... period of time DO NOT place the item next to a radiator or direct sunlight this item is susceptible to temperature change It is recommended an even room temperature be maintained with no sudden fluctuations DO NOT place hot or cold items directly onto the surface of the item as marking will occur For general cleaning use a duster or damp cloth almost dry not wet do not use soap and water detergen...

Page 3: ...Page 2 of 10 Vendor S000238 3x 2x 1 2 15 16 3 4 4 5 5 6 7 7 8 8 8 8 8 8 8 8 9 9 10 12 13 14 17 18 19 20 21 16 17 22 23 23 23 23 11 ...

Page 4: ... 2 5 1 6 2 7 8 8 2 9 1 10 1 11 1 12 1 13 Top Panel Right Panel Left Panel Front Side Column Back Side Column Division Panel Front Cross Member Side Slide Central Slide Upper Rear Cross Member Lower Rear Cross Member Left Rear Panel Right Rear Panel 1 14 H Profile 3 15 Drawer Front You will need a small mallet and a screwdriver 5 16 Right Side Drawer 5 17 Left Side Drawer 3 18 Larger Drawer Back 3 ...

Page 5: ...STEP 2 Fix the right panel 2 and the left panel 3 onto the front side column 4 and the back side column 5 C using hardware Do NOT use any power tools are this may damage the frame and will invalidade any claim Vendor S000238 C C C C C C C 2 C C 4 C C 4 5 A A 8x 2x A A 16 16 5x 5x A A 2x C C 5 3 C C 2x 8 9 1x A A A 2 3 6 11 10 7 5 2 A A A A A A A A ...

Page 6: ...his may damage the frame and will invalidade any claim Page 5 of 10 Vendor S000238 23 STEP 3 E 23 Insert hardware to the foot Insert the foot into the right panel 2 and the left panel 3 Do NOT use any power tools are this may damage the frame and will invalidade any claim E 3 2 1 6 C C C 23 23 23 23 6 1 ...

Page 7: ...d left panel 3 using hardware c Do NOT use any power tools are this may damage the frame and will invalidade any claim STEP 6 Attach the assembled frame to top panel 1 using hardware c Do NOT use any power tools are this may damage the frame and will invalidade any claim Page 6 of 10 Vendor S000238 7 2 3 1 C C C C C C C C 7 11 10 C C C C ...

Page 8: ...s may damage the frame and will invalidade any claim Vendor S000238 STEP 8 Fix the left rear panel 12 and right rear panel 13 with the H profile 14 using hardware J Do NOT use any power tools are this may damage the frame and will invalidade any claim J a b 9 9 6 C C C C C C 8 8 8 8 8 8 8 8 C 13 12 14 C C C C Attention correct slide position ...

Page 9: ...damage the frame and will invalidade any claim Page 8 of 10 STEP 10 C Fix the left and right side drawers 17 and 16 onto the smaller drawer front 20 using hardware Insert the lower drawer back 22 between the left and right side drawers 17 and 16 Fix the smaller drawer back 21 to the left and right side drawers 17 and 16 using hardware C Fix hardware F to the smaller drawer front 20 using hardware ...

Page 10: ...p panel using washer H and 14mm Screw B Wall plug and screw are not supplied to attach the wall strap to the wall The correct type of fixing must be used for your wall seek professional advice if in doubt a b c wall 1 1 H I I H I I I I I H B A 8 A 9 STEP 12 Insert the hardware A into the slides 8 e 9 Do NOT use any power tools are this may damage the frame and will invalidade any claim A A A A A A...

Page 11: ...nformation For complete product information images and dimension diagrams please visit the website www birlea com If you have any issues with your item please contact the retailer directly you purchased it from who will be able to resolve any issues with Birlea Why don t you send us photos of your assembled furniture to info birlea com to be shared in our birleahome feature on Instagram A ...

Reviews: